Step 1
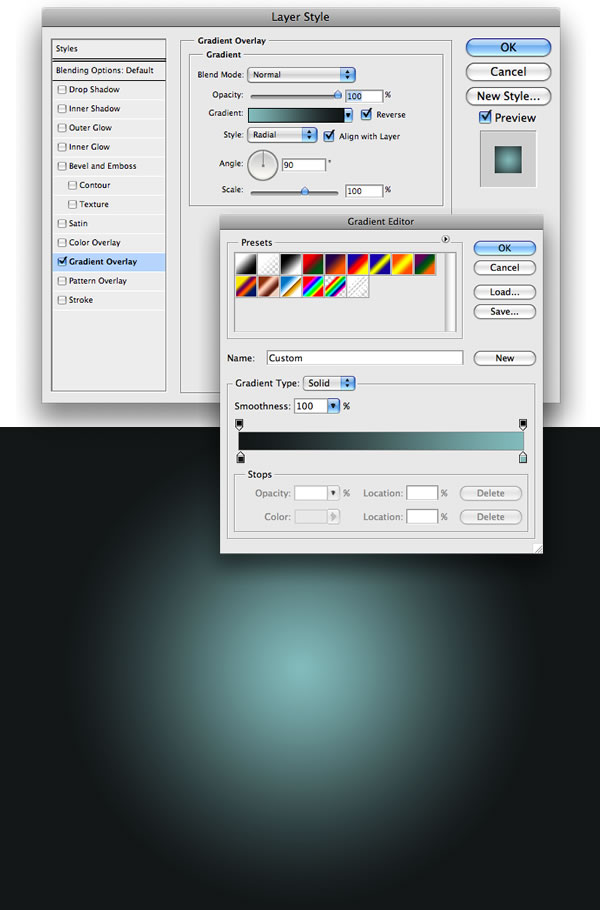
Create a new document. On the Background layer, double-click to open the Layer Style dialog box and apply the Gradient Overlay with black and green (#9dc5c7).
Step 2
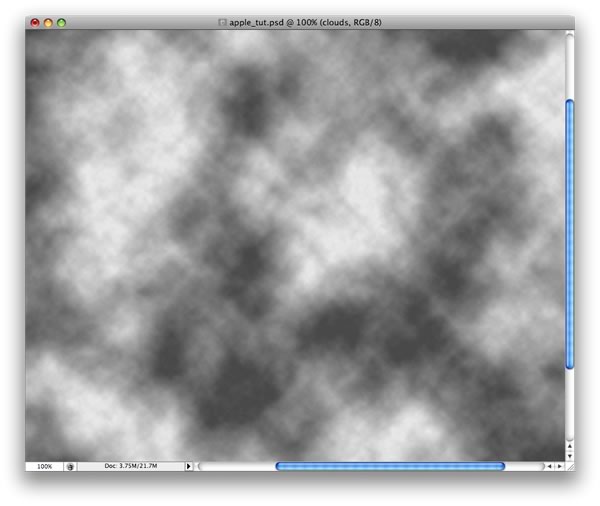
Create a new layer. Set white for the foreground and black for the background color. After that, go to Filter>Render>Clouds. Rename the layer to "Clouds."
Step 3
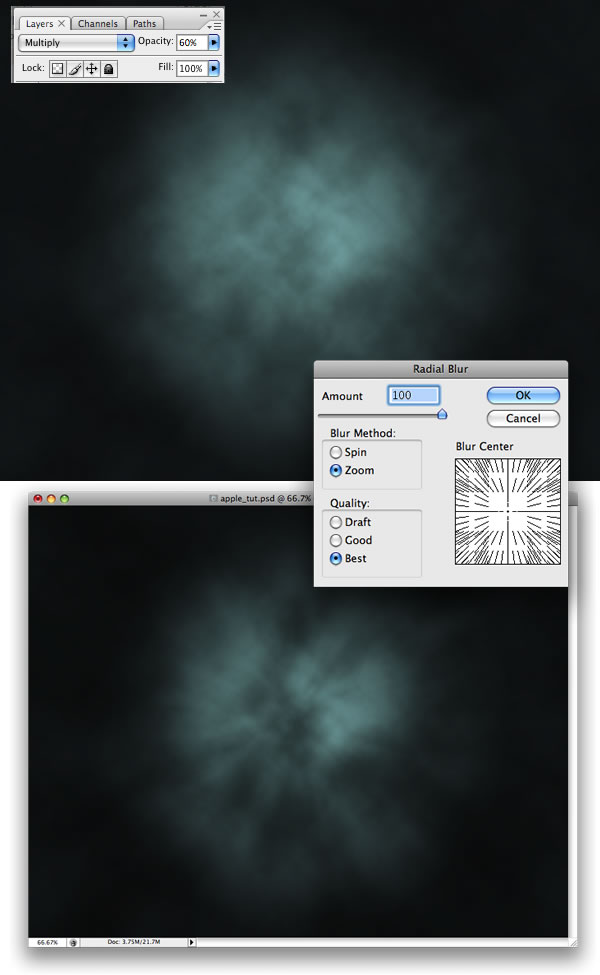
Change the Blend Mode of the clouds layer to Multiply 60%. Duplicate the layer and rename it to "radial blur." After that, go to Filter>Blur>Radial Blur.
Step 4
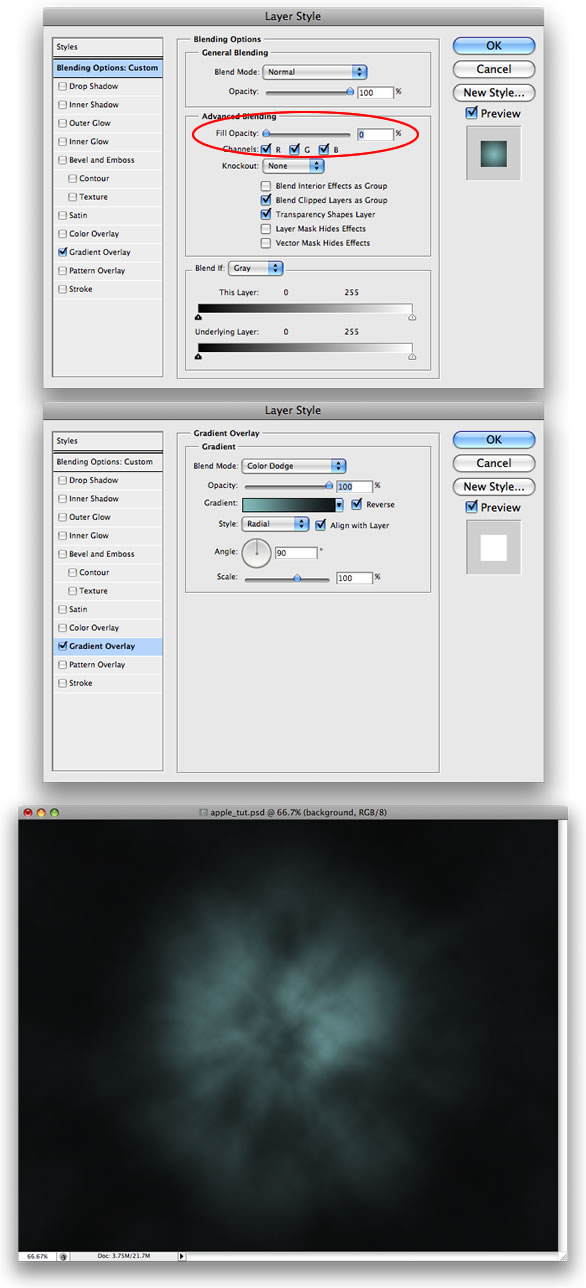
Duplicate the background layer and move it up in front of the other layers. Rename it to "Gradient Light" and go to the Layer Styles dialog box. Change the Fill Opacity to 0% under the Advanced Blending settings. After that in the Gradient Overlay settings, change the Blend Mode to Color Dodge and the scale to 70%.
Step 5
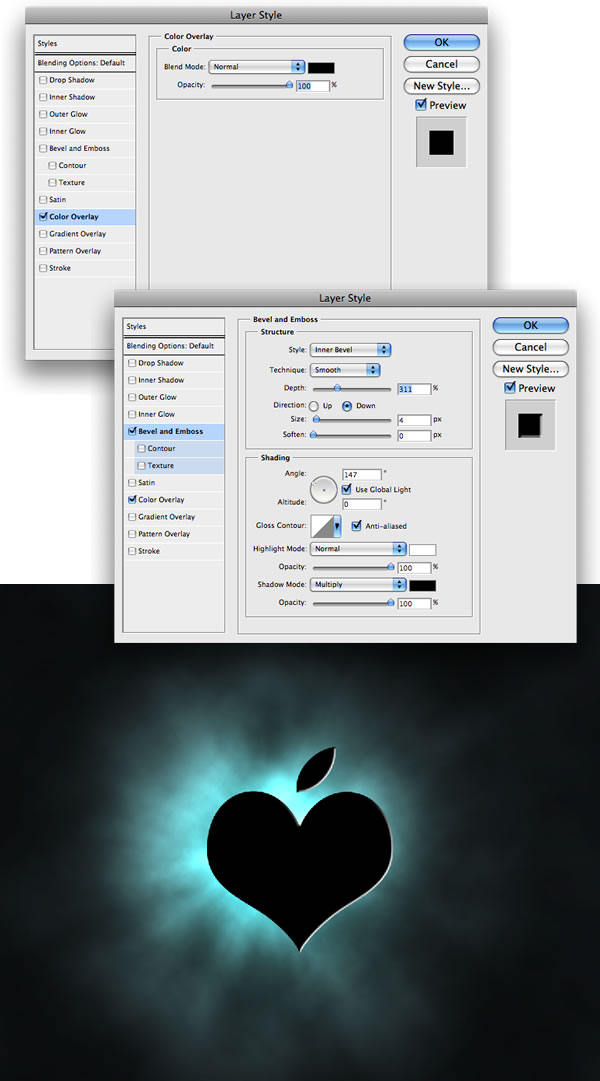
Place your logo in the center of the image and change the Layer Styles. First change the Color Overlay to black and then add a Bevel and Emboss as shown in the image below.
Step 6
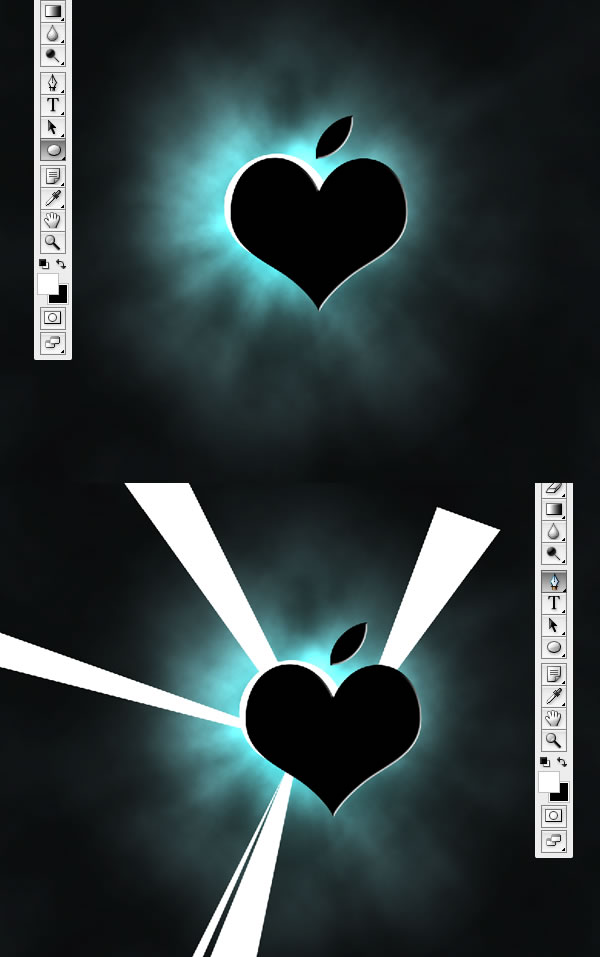
Create a new Folder and call it "lights" and move it behind the logo layer. Inside that folder, select the Ellipse Tool (U) and create a circle that will be almost entirely behind the logo. Using the Pen Tool (P), create some shapes that will be the lights. Use the image below for reference. Make sure that all of these objects are inside the "lights" folder.
Step 7
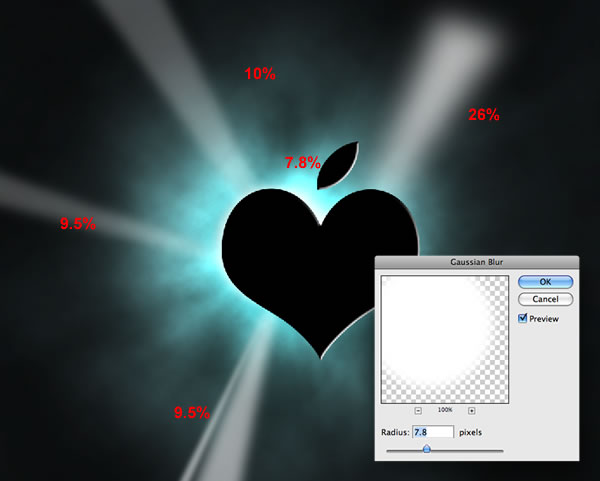
If you are using the CS3 version of Photoshop, you can convert the layers to Smart Objects in order to use the non-destructive filters feature.
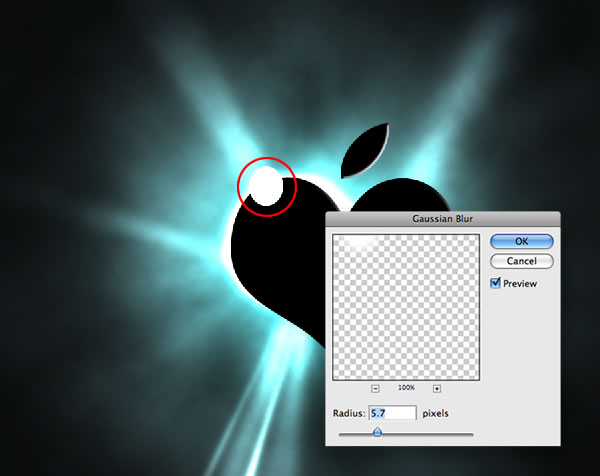
Apply a Gaussian Blur to the layers. Each one will have a different value because of their sizes.
Step 8
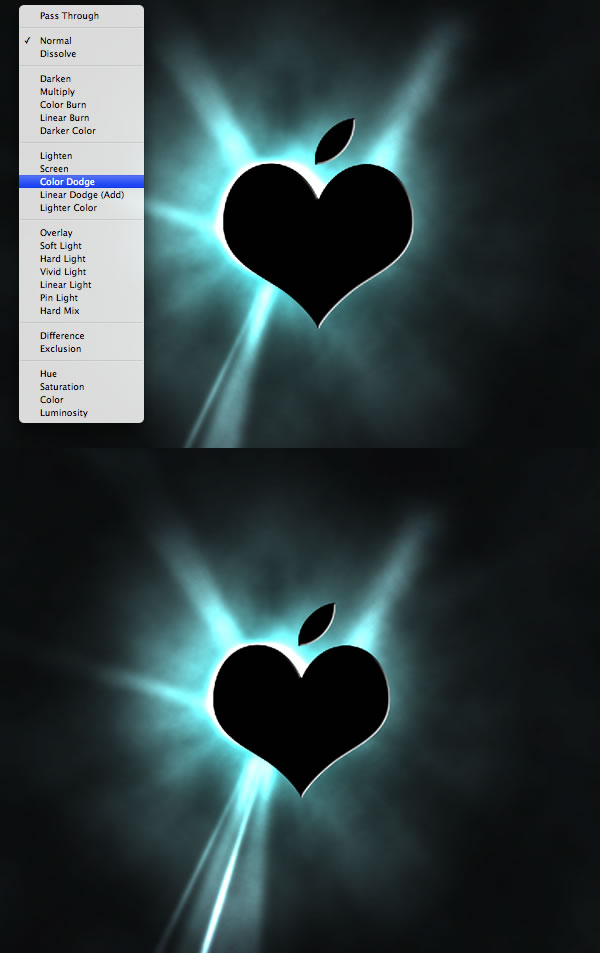
Select the lights folder and change the Blend Mode to Color Dodge. Duplicate the two bottom lights and move them to the center.
Step 9
Using the Ellipse Tool (U), again create a small circle but this time in front of the logo. This circle will be a reflection on the logo.
Conclusion
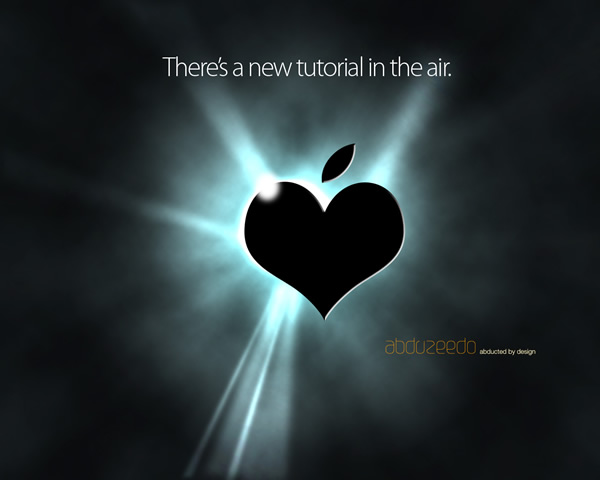
Now you can add some text—I've used Myriad Pro Light. Although this effect looks very cool and sort of complicated to achieve, it's really easy and can be done pretty quickly. Using Render Clouds, blurs, and blend modes, we can create really amazing lighting effects.
NOTE : ALL CREDITS FOR THE ORIGINAL TUTORIAL MAKER :)
=================================
=== For more tutorials keep visiting ;) ===
= http://photoshop-manic.blogspot.com =
=================================
No comments:
Post a Comment