Burning text is a great looking special effect and it can be achieved with relative ease in Photoshop. Even a glossy looking surface reflection is easy to pull off. This tutorial shows how to make flaming text, but the technique will work with any kind of object. Here's what the finished product looks like from this tutorial:

Keywords: | text on fire, flaming text, burning text, glossy surface reflection, special effects |
Features Used: | text tool, wind filter, gaussian blur, liquify tool, hue/saturation adjustment, layers, Overlay blending mode, gradient tool, lock transparency, layer styles, drop shadow, inner shadow |
1
Let's get started by creating a new document and filling it with black. I made mine 800 by 800 pixels, but you can pick any size depending on how much text you need to fit in.
2
Time to put down the text we want to see burning. I just used the word "FIRE" for this example. I used the Arial Black font at 250 points since I thought the block letters would look more intense. Put the text in white. After you've typed in what you want, choose Layer->Rasterize->Type to turn the text into pixels. Then use the Move tool ![]() to reposition the text so that it's centered horizontally and is just a little below the center line vertically. Here's what it should look like at this point:
to reposition the text so that it's centered horizontally and is just a little below the center line vertically. Here's what it should look like at this point:

3
Duplicate the layer with the text on it. We're going to use the duplicate to create the foreground text effect and the original text layer to create the rising flames illusion. Your layers should look like those to the right. We're going to work on the middle layer next, so make sure it's selected and highlighted as shown here. | 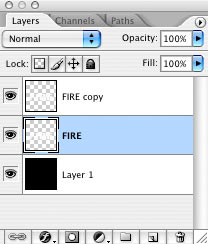 |
4
To get the flames rising, we're going to use the Wind filter. This filter only works going to the left or right, so we have to rotate our canvas first. Choose Image->Rotate Canvas->90 CW. Make sure the middle layer is still selected and choose Filter->Stylize->Wind. Select "Wind" and "From the Left" in the options and click OK. We need more wind than one application of the filter provides, so hit Cmd-F four times (or cntl-F if you're on Windows) to apply the filter four more times. You can use more or less applications depending on how high you want the flames to go. Finally, rotate the canvas back to normal with Image->Rotate Canvas-> 90 CCW. This is what it should look like now:

5
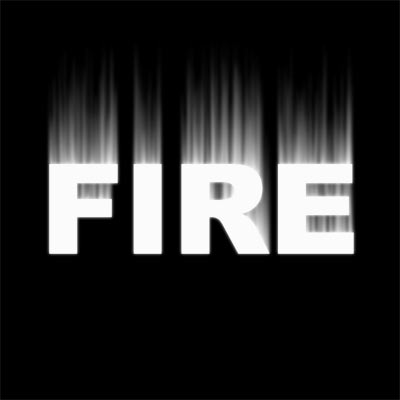
Now we need to make the wind streaks look more like flames by blurring them together. Select Filter->Blur->Gaussian Blur and set the radius to 3 (make sure you still have the middle layer selected). You can use more or less blur depending on how you want the flames to look. Here's what I got so far:
6
The next step is to give our flame layer a black background which will be needed for the next step. To do this, duplicate Layer 1 (our original background layer) and merge this duplicate layer with the blurred text layer we just made. This won't change the look of the image just yet, but your layers should now look like those to the right. | 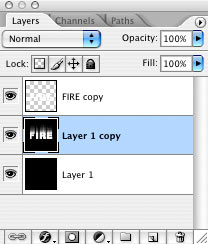 |
7
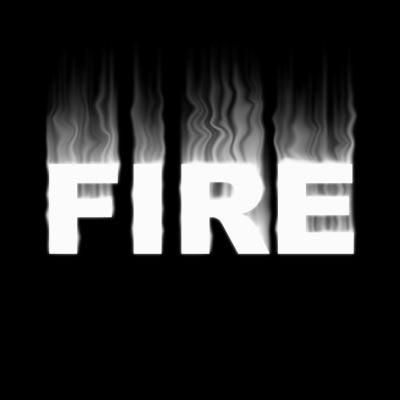
With the middle layer still selected, go to Filter->Liquify. We'll use this to give the flames a wavy look. I set the brush size to 80, density to 11 and pressure to 92. Now take the Warp tool and push the streaks around to get a sort of rising "S" pattern over the letters. Also push a bit around the sides of the letters to show some flames coming from the sides, and don't forget to work around the inside of the "F", "R" and the "E". This step takes a little practice, but it's not too hard. When you're happy with what you see, hit OK. Here's mine:
8
Time for some color. Select Image->Adjustments->Hue/Saturation and select Colorize so we can fiddle with the color. Bring Saturation up to 100 and set Hue to about 40.
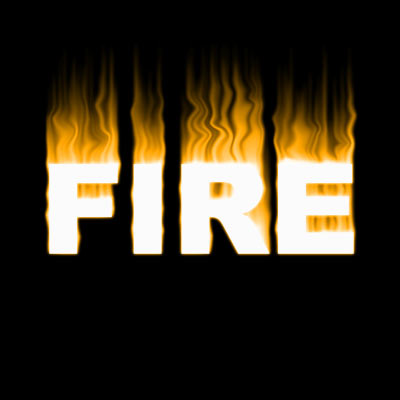
9
Duplicate this colorized layer and select this duplicate in the layers palette. Select Image->Adjustments->Hue/Saturation again, this time with Colorize off. Set the Hue to -20 to make the flames red. Set the Blending Mode of this duplicate layer to Overlay. Now we've got some nice looking flames:
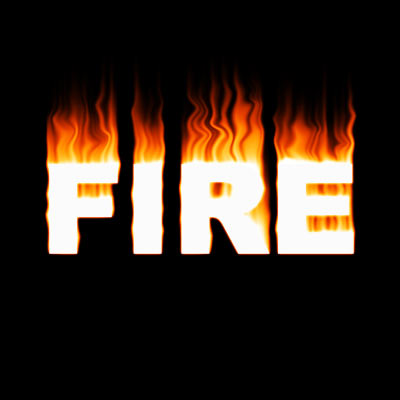
10
Next we want to add some color to the top text layer that just has white letters at the moment. So click on the top layer to make it active and click on the Lock Transparency icon ![]() above the layer. This protects all the transparent pixels in the layer from changes so we can change the color of the text alone. We'll make the text a gradient from yellow to brown, so set the foreground color to #f9e400 and the background color to #a36a06 (you may vary these). Select the Gradient Tool
above the layer. This protects all the transparent pixels in the layer from changes so we can change the color of the text alone. We'll make the text a gradient from yellow to brown, so set the foreground color to #f9e400 and the background color to #a36a06 (you may vary these). Select the Gradient Tool ![]() and swipe a gradient from top to bottom across the letters. Because of the locked transparency, only the text is affected by the gradient tool.
and swipe a gradient from top to bottom across the letters. Because of the locked transparency, only the text is affected by the gradient tool.
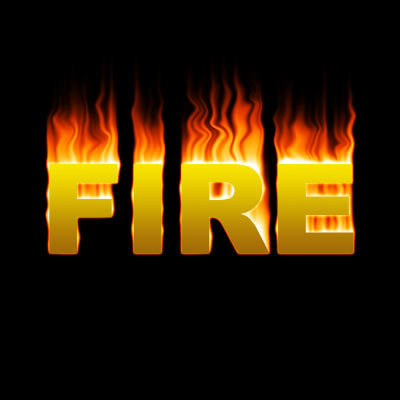
11
A Layer Style will be used next to add more depth to the letters. We'll add a Drop Shadow first using the settings shown below. The color I used in the Blend Mode is a shade of orange #ee6a00.
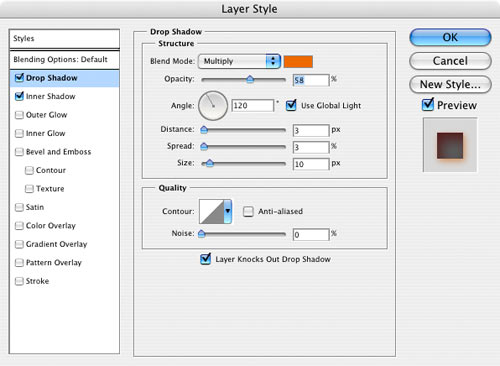
Don't click OK just yet since we have one more thing to set.
12
Now we'll add a red Inner Shadow. I used color #ec0606 for the Blend color.
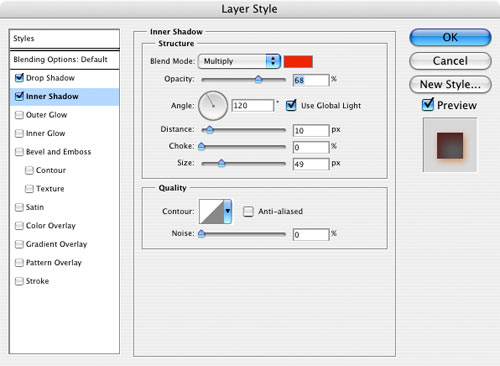
Click OK. Our burning text effect is looking pretty good at this point:

Choose Layer->Merge Visible to collapse all the layers together. You can stop here if the text effect is all you need. But we can also take it further by adding a reflection in the foreground. This is a great way to add more depth and it's quite easy.
Below steps are for reflection effect :D
Create a Glossy Surface Reflection
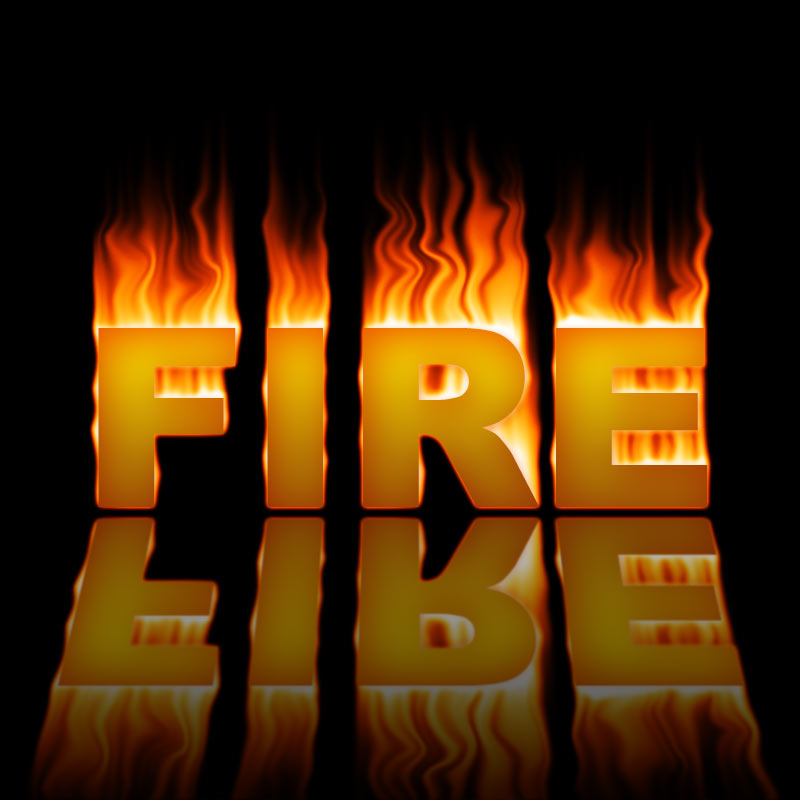
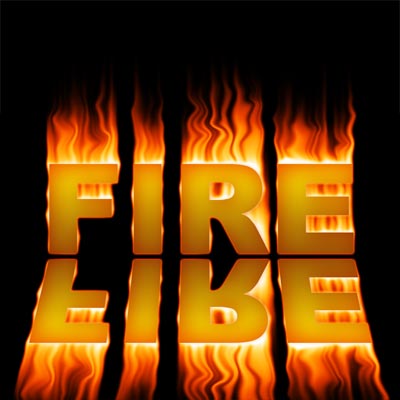
Reflections are a great way to add three dimensional depth to any type of object. Fortunately, it's an easy special effect to create in Photoshop. Here's an example of the finished product using the text on fire effect we created in that tutorial:
1
For this tutorial we'll start off with the burning text effect we created in one of the other tutorials on this blog . if you haven't tried it yet. Below is our starting point for this tutorial. You can use any object you want of course and the background doesn't have to be black. The flaming text looks good on a black background, but this technique works for any color.

2
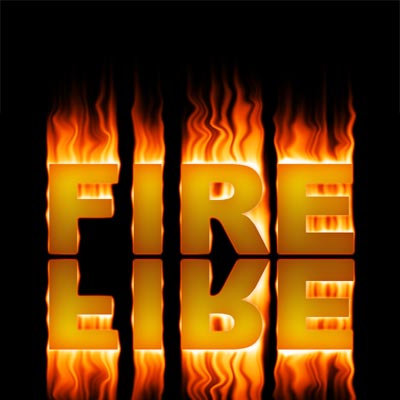
To create the reflection, we'll make a duplicate of the layer we want to see in the reflection. So duplicate the layer. The reflection needs to be a mirror image, of course, so we'll flip it over. Make sure the top most layer is selected and choose Edit->Transform->Flip Vertical. Now set the blending mode for this layer to Screen. Among other things, screen mode makes the color black essentially disappear. This will allow the image on the bottom layer to show through where there's black on the top layer. Lastly, select the Move tool ![]() and move the upside down version of the image downward so that it's underneath the original. It should look like this now:
and move the upside down version of the image downward so that it's underneath the original. It should look like this now:
3
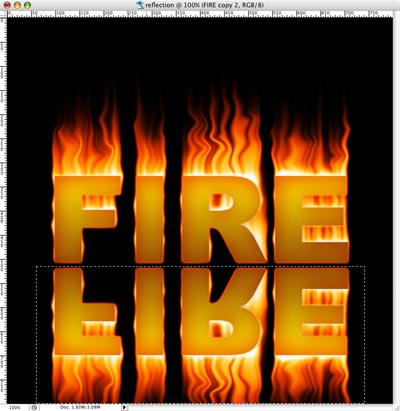
So far so good. Reflections on a surface tend to spread out the farther away they get from the object being reflected. This creates the illusion of a surface. We can easily achieve this by distorting the reflection a little bit. To begin this, select the Rectangular Marquee Tool ![]() and select an area that just surrounds the upside down text like this:
and select an area that just surrounds the upside down text like this:
4
At this point, it helps to reduce the magnification to 50% or less to give us a little elbow room to use the next tool. Select Edit->Transform->Distort, making sure the layer with the upside down text is still selected. Now grab the handle in the lower right hand corner and drag it a little ways further to the right. Next grab the handle in the lower left corner and move it horizontally to the left by the same amount that you moved the other one to the right. This will keep things even looking. Feel free to move the handles a little beyond the edge of the canvas to achieve the effect you want. This creates a nice illusion that there's a surface there. Hit return when you're happy with what you have to commit the change. Deselect the selection with cmd-D (or cntl-D for Windows). Here's the result:
5
Reflections tend to fade out the farther they are from the object, so we need to create that effect next. We'll do this with a Layer Mask. Make sure the layer with the reflected text is selected and click the layer mask button | 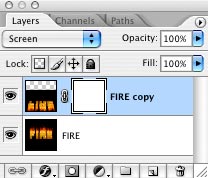 |
6
We will next apply a black and white gradient to cause the contents of the reflected text layer to fade out as it gets farther away from the original text. Click inside the white box of of the layer mask in the layers palette. When you do so, you'll notice that the foreground and background colors change to white and black. Layer masks are always grayscale images, so we work with these colors. Now select the Gradient Tool ![]() and select the white to black gradient in the toolbar along with the other options as shown here:
and select the white to black gradient in the toolbar along with the other options as shown here:
![]()
7
To fade the reflection, swipe out a gradient by moving in a downward direction on top of the image. Since the layer mask is currently selected, the gradient will be drawn in the mask as opposed to on top of the image itself. I started by clicking around the middle of the "R" and dragging down until I was a little ways beyond the edge of the canvas. If you don't like what you see the first time you try it, just do it again. Each time you swipe the gradient it will replace the previous one since we selected the Normal blending mode in the tool bar.
What's happening here is that anywhere there's white in the layer mask, it allows the pixels in that layer to show through. Anywhere there's black in the layer mask, those pixels in the layer will become transparent. And anything in between black and white in the layer mask cause the corresponding pixels to become semi-transparent according to the gray level (the darker the gray, the more transparent they become). So our gradient from white on the top to black on the bottom causes a nice fade-out effect for the reflection. Here's the result:

8
This last step is optional, but I find it helps. When an image is reflected on a surface, the surface usually scatters the light a little and makes the reflection a little blurry. So a slight blurring can add an extra element of realism. To add this effect, click inside the thumbnail in the layers palette for the reflected image. This will let us alter the pixels in the image itself as opposed to the contents of the layer mask. Once this is selected, choose Filter->Blur->Gaussian Blur. Set the radius to something that gives the look you want. I wanted the surface to be pretty glossy looking, so I used a small radius of just 0.7. You can use more or less depending on what you want. The blur effect is a bit subtle and difficult to see in these reduced size screen shots, but when you try this yourself you'll be able to see the effect more clearly. Here's our finished product:

NOTE : ALL CREDITS FOR THE ORIGINAL TUTORIAL MAKER :)
=================================
=== For more tutorials keep visiting ;) ===
= http://photoshop-manic.blogspot.com =
=================================
2 comments:
I give birth to read a insufficient of the articles on your website in the present circumstances, and I extremely like your style of blogging. I added it to my favorites entanglement period roster and resolve be checking promote soon. Will repress out my orientation as highly and let me know what you think. Thanks.
Wow! you wonderfully done it... thanks for this tutorial. Get more new reflection Photoshop text effect tutorials 2016 step by step on http://www.photoshophelps.com/2015/10/29/cool-reflection-text-effects-photoshop-tutorials-2016/
Post a Comment