In this Photoshop tutorial I’ll show you how to make some cool edge effects using the power of Smart Objects and Smart Filters in Photoshop CS3.
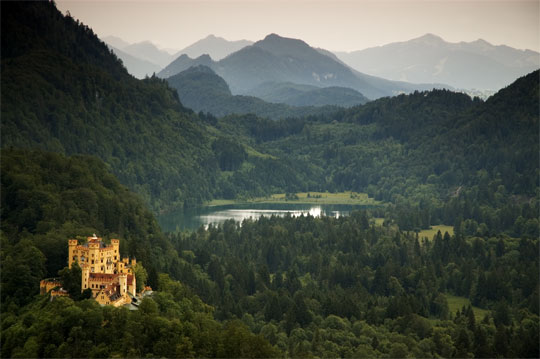
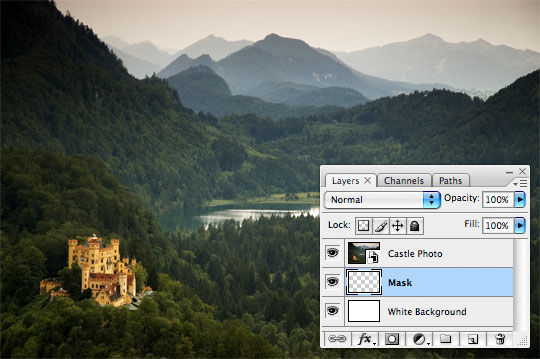
First things first, lets go ahead and open a photo, I took this one while on a photography trip through Europe of the Hohenschwangau castle in Germany. It had been raining all day and as the sun set, the showers subsided for about half an hour… just enough time to get a few great photos.
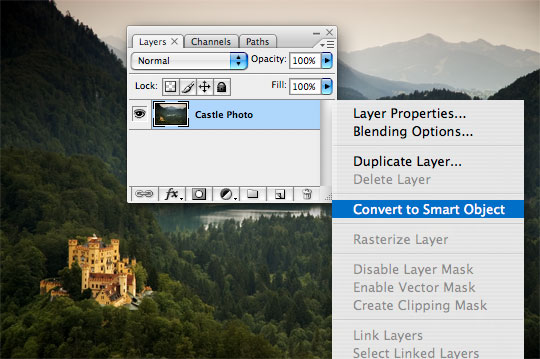
Now lets start by converting the photo to a smart object by Right-Clicking (Mac: Control-Click) on the layer in the layers palette and choose Convert To Smart Object.
(*note: You can also convert to smart object from the main menu by choosing Layer>Smart Objects>Convert To Smart Object )
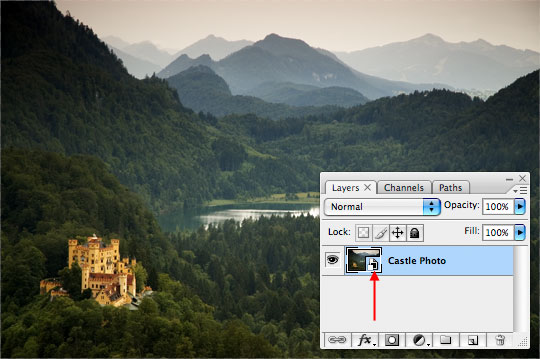
You can see by the Smart Object icon now showing in the thumbnail area of the Layers palette that this layer is indeed a Smart Object and by double-clicking on the smart object icon you can edit the object from within the file.
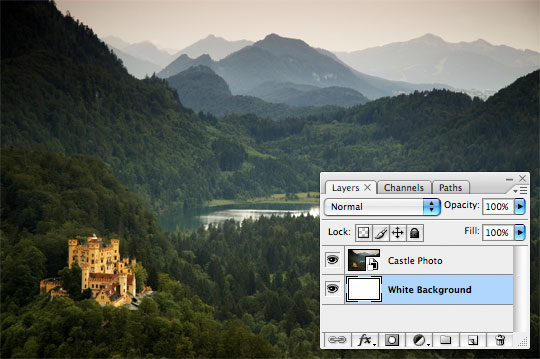
Now lets place a layer below the current layer by holding down the Command (PC: Ctrl) key while clicking the new layer button at the bottom of the Layers palette.
Press D to reset the foreground/background colors to black/white, then fill the layer with white by pressing Command-Delete (PC: Ctrl-Backspace). You won’t see any change in the image because the layer is behind the photo layer, but notice that the thumbnail in the layers palette has now been filled with white.
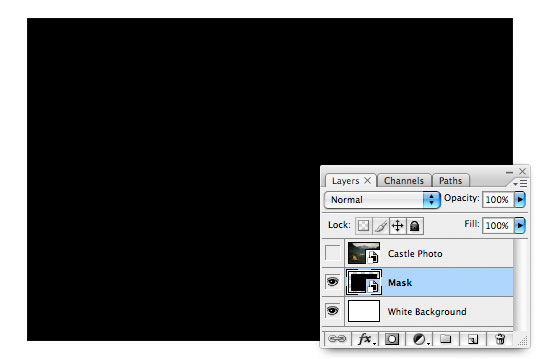
Create a new layer between the White Background and the Photo layers by clicking the new layer button at the bottom of the Layers palette. Double click the layer name in the layers palette and rename it Mask.
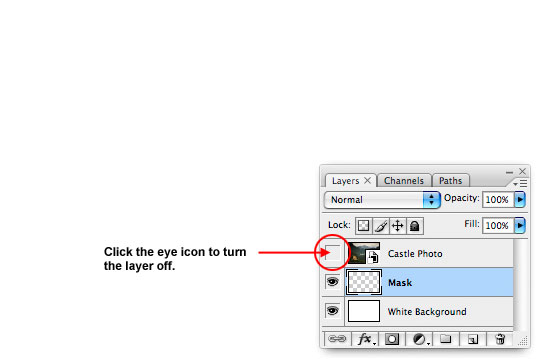
Lets click the little Eye icon next to our photo layer in the layers palette to turn off the layer so we can see what we’re doing on the Mask layer.
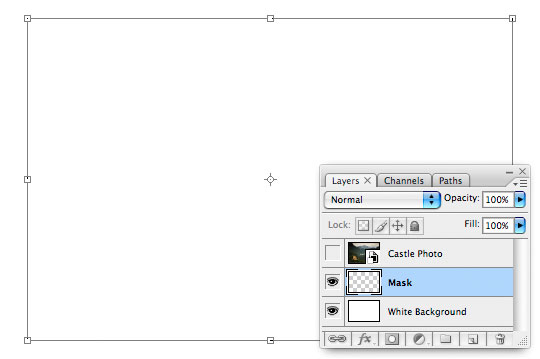
Now that we can see what we’re doing, lets press Command-A (PC: Ctrl-A) to Select All, then choose Select>Transform Selection from the main menu. This will give the standard transform handles placed at the corners and sides of the selection. Drag the corners in until your desired crop is achieved.
(*note: by holding down Option-Shift (PC: Alt-Shift) while dragging one corner, all the other corners will follow.)
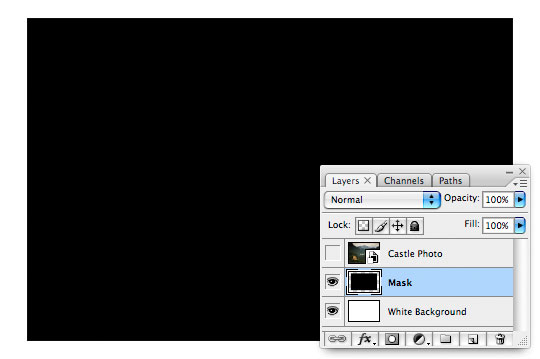
When your selection is sized, press Return (PC: Enter) to commit the transformation and return the selection to it’s dancing dotted line form. Now simply press Option-Delete (PC: Alt-Backspace) to fill the selection with Black, and Command-D (PC: Ctrl-D) to deselect.
Now, just like we did in Step 2, convert the layer to a smart object by Control-Clicking (PC: Right-Click) and choose Convert To Smart Object. The layer thumbnail in the layers palette will now also have the smart object icon.
Now that the layer is a Smart Object, we can go ahead and apply a Smart Filter to it. The advantage of using Smart Filters over just applying all these steps to the image without creating Smart Objects is the ability we have to return and edit the object at a later time with ease.
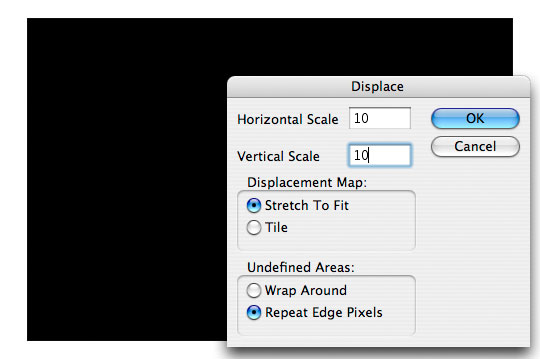
From the main menu, choose Filter>Distort>Displace to bring up the Displace filter menu. For this example lets leave the settings at the default values shown below and click OK to move to the next step.
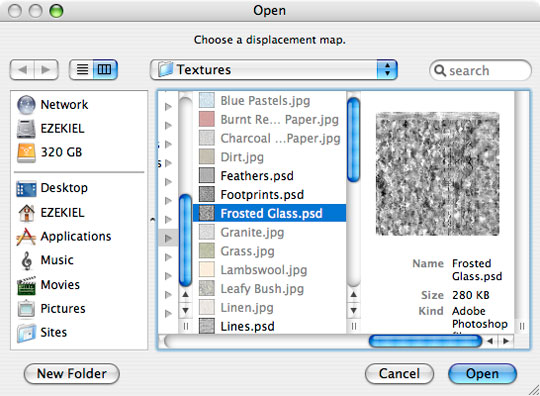
Now we need to navigate to a file which we will use as the Displacement Map. Luckily, Photoshop has a nice selection to choose from built right in. Navigate to your Photoshop CS3 application folder, then to Presets>Textures and find the file called Frosted Glass.psd. Choose this file and click Open.
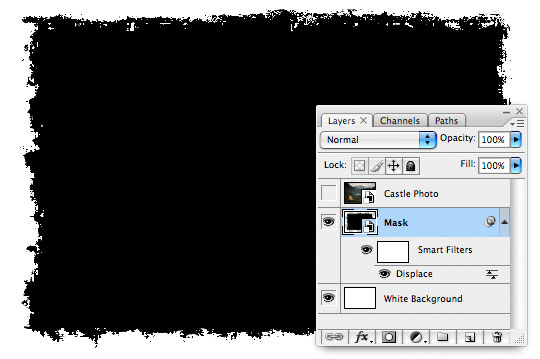
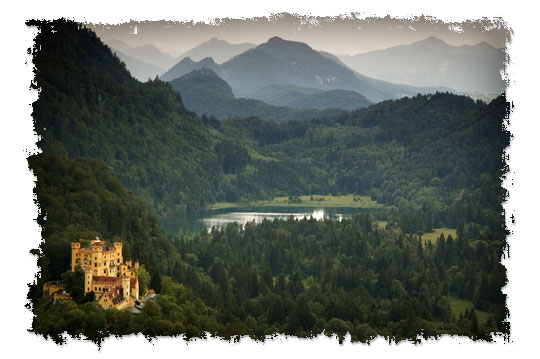
Your file should now look like this.
Lets go ahead and turn our photo layer back on by clicking in the empty box next to it’s thumbnail in the Layers palette (remember we turned it off the same way back in step 6).
Now right click on the Photo layer and choose Create Clipping Mask. This will link the Photo layer and the Mask layer together, showing only the parts of the Photo layer which overlap the Mask layer.
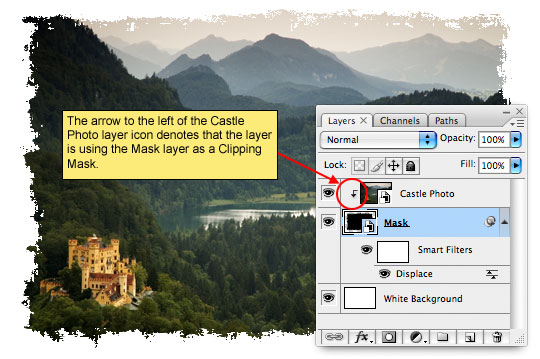
We’ve created a great little effect here, but the neatest part is that by clicking on any of the features (ie. the Displace Smart Filter or the Photograph) we can change both on the fly and apply them to the file easily OR we can swap out the photo altogether.
Try Double-Clicking on the Displace smart filter and choosing a different Displacement Map, or Control-Click (PC: Right-Click) on the Photo layer and choose Replace Content, which will allow you to browse for another photo to replace the current photo with.
=================================
=== For more tutorials keep visiting ;) ===
= http://photoshop-manic.blogspot.com =
=================================
No comments:
Post a Comment