Step 1
Let's first take a look at the image we're creating. Click the screenshot below to view the full-size image. As always, the full Photoshop file is available via our PSDTUTS Plus membership.
Step 2
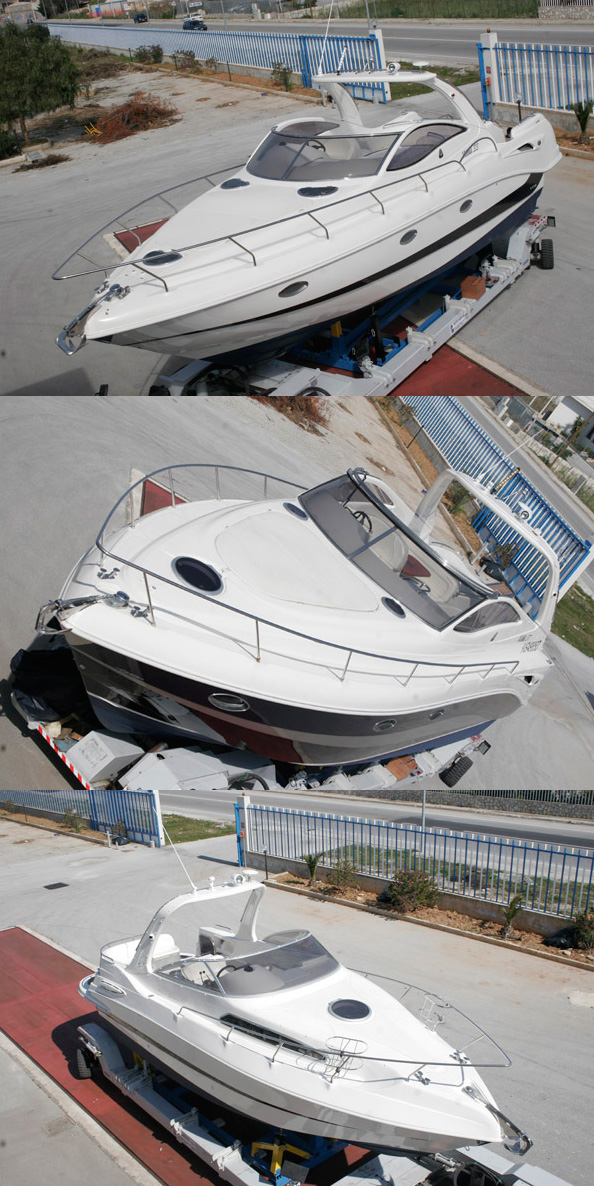
We need three boat photos taken from a high view. For this tutorial, you can substitute boats with cars, shoes, or anything else.
Step 3
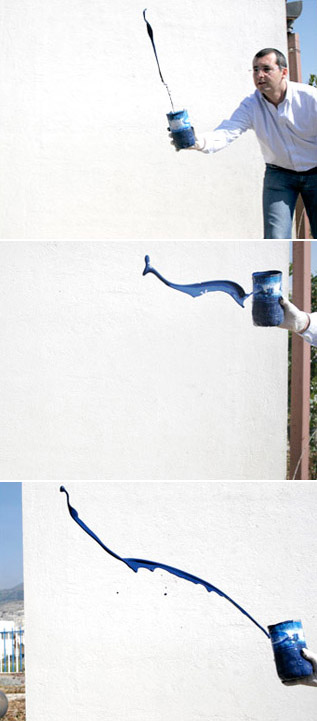
Start to throw the paint from a cut plastic bottle. You can do it in front of a white wall or a green screen (if you have it) to obtain a good contrast on the edges of the splashes. The results will show better if you mix water and paint together. Be forewarned, stay away from the paint. In this attempt, we lost a cashmere pullover and a watch—irremediably stained.
Step 4
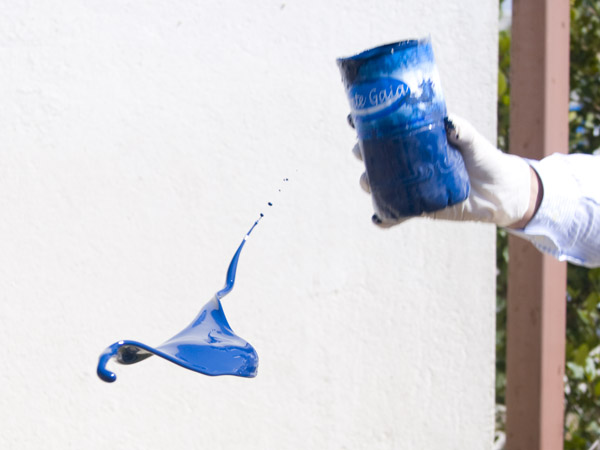
Select the best splashes you photographed. If some parts of the paint are out of focus, don't worry. It's a fine effect and it will contribute to a sense of depth in the final result.
Step 5
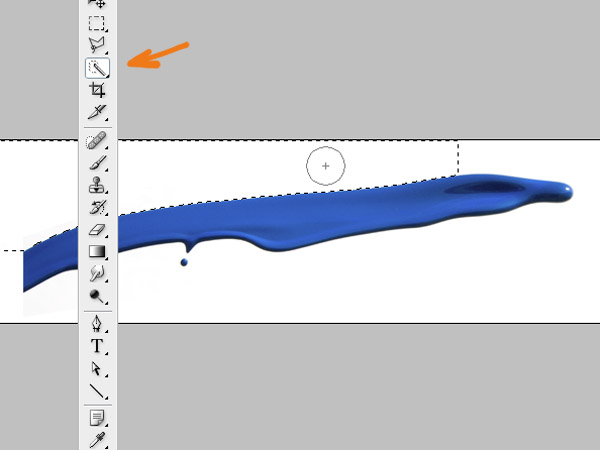
Use the Rapid Selection Tool or Magic Wand Tool to select the white background around the splashes. After you complete the selection process, go to Select>Refine>Edge and make some adjustments. Add Feather, Radius, and Expand or Reduce the selection until you find a nice result. Use a black background to remove excess white pixels on the edges. After that, go to Layer>Layer Mask>Reveal Selection to hide the white background.
Step 6
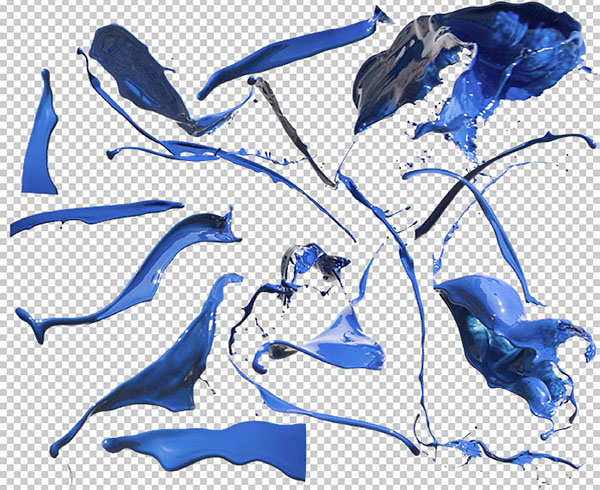
For each splash you need to repeat Step 5 and duplicate the layer every time. At the end, you may have a multilayer file like the image below.
Step 7
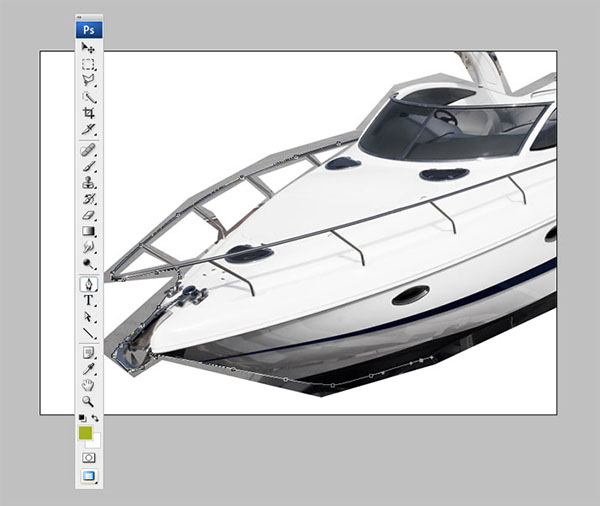
Now switch off every Paint layer so we can concentrate our attention on the boats. Select the Pen Tool (P) and start creating a path in the shape of the first yacht. This is the only way to make it. Without a suitable green screen the edge becomes too complicated so you can't use any Photoshop tools to speed up this step.
After you create the path, click on the dotted circle icon at the bottom of the path box to create a selection. Select > Inverse and Delete the background (or create a mask to hide it). If your object is complicated, then your paths may take some time to create. Repeat this step with all the boat images (cars, shoes, or any images you've chosen).
Step 8
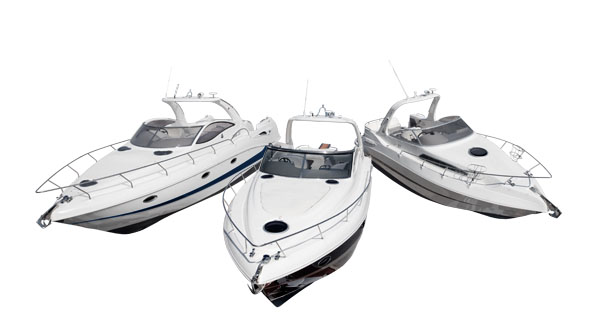
Use three different layers to work on the boats. At the end, you should have a good composition like this.
Step 9
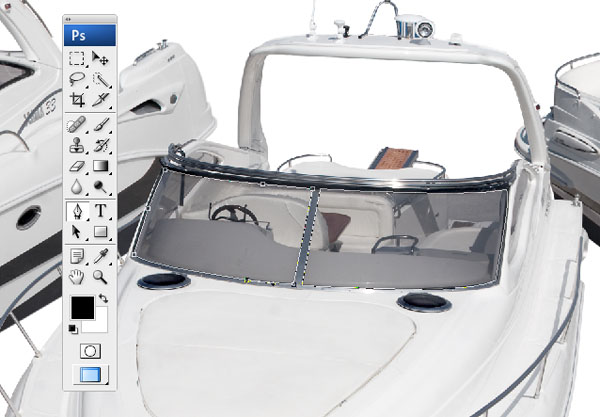
Now the boats need some improvements. Start with the opaque glass. Select the Pen Tool (P) and create a path around the shape of the glass.
Step 10
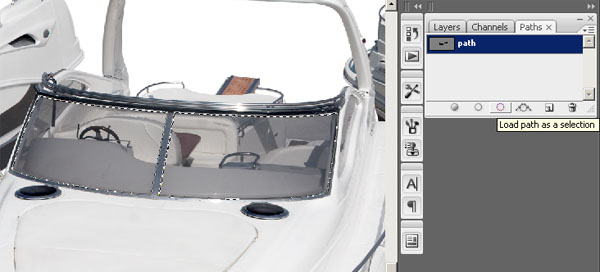
Go to the Path Palette. Click on the dotted circle icon at the bottom of the box to create a selection from the path.
Step 11
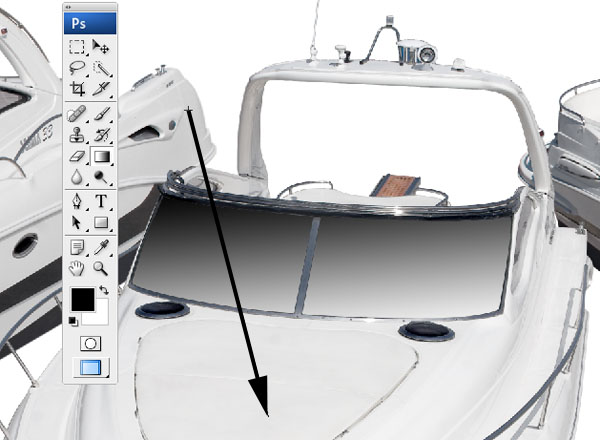
Add a new layer called "glasses" over the boat layer and fill it with a gradient using white to black for the colors following the direction of the arrow shown below.
Step 12
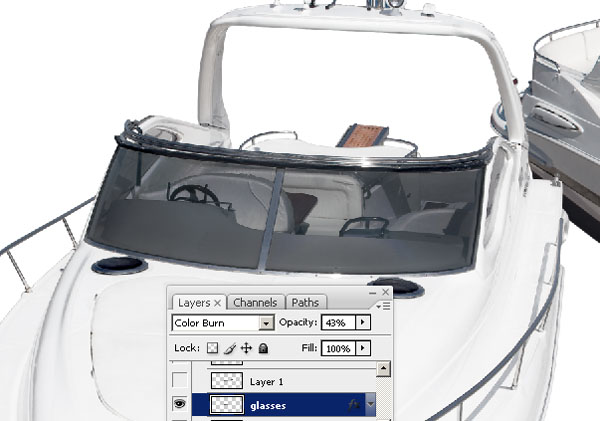
For the Blend Mode use Color Dodge. Also, set the Fill Opacity to 60%.
Step 13
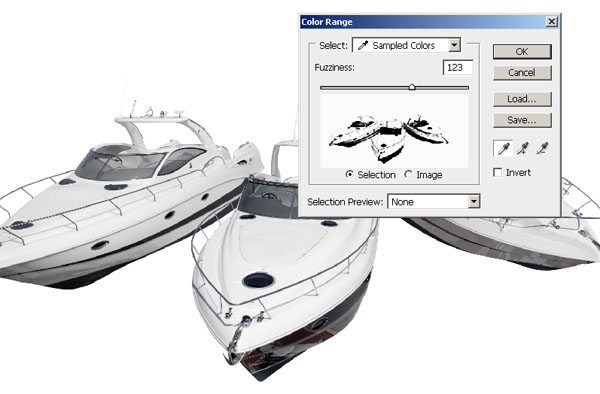
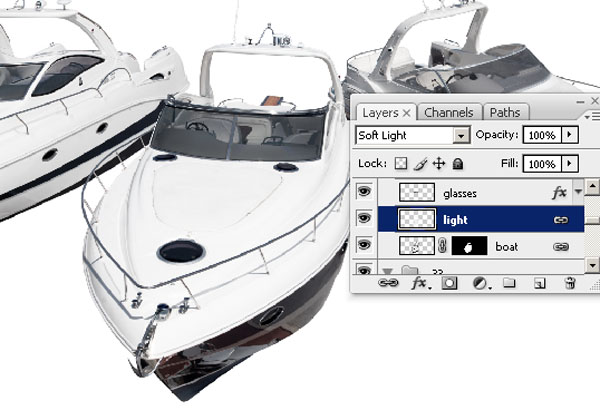
Repeat this step for all the boats. Now we must improve the color of the boats. Start with Select > Color range. Then pick a white point on the foredeck of one boat with the Eyedropper and set the Fuzziness to 123.
Step 14
With this new active selection, copy the white color from the boat layer and paste it into a new layer called lights over the boat layer. For the Blend Mode use Soft Light and set the Fill Opacity to 100%. Repeat this on the other boats. Now the foredeck appears brighter.
Step 15
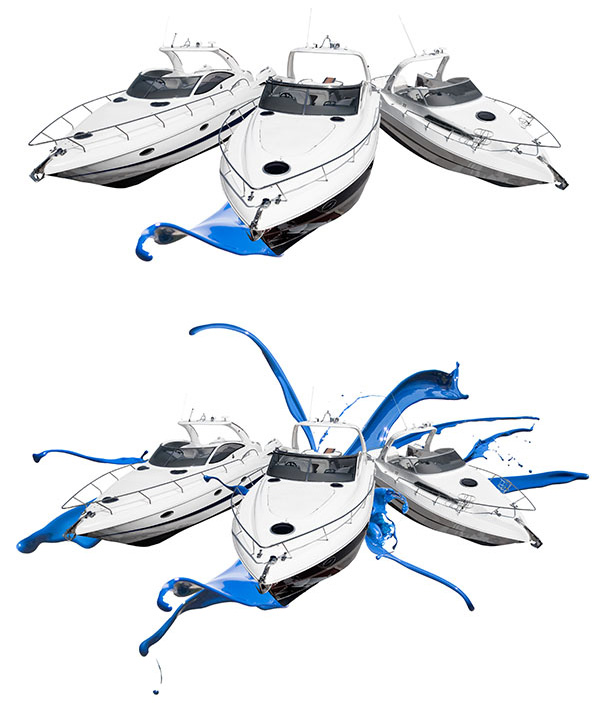
Start revealing every single splash layer and move them below the boat layers. Keep in mind, you can put some layers of paint below one boat layer, while being above another boat layer. Mix and match until you have a nice composition, like the second image below.
Step 16
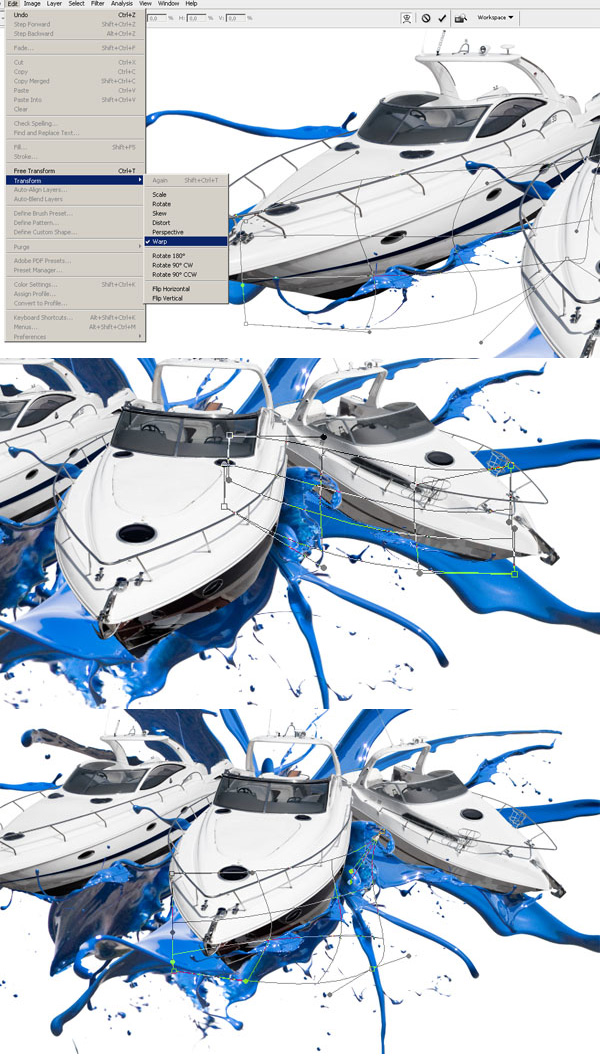
The Warp Tool is the magician of this tutorial. From the Top Menu go to Edit > Transform > Warp. Move the anchor points creating the spray from the paint waves, bringing the splashes near the hull.
Step 17
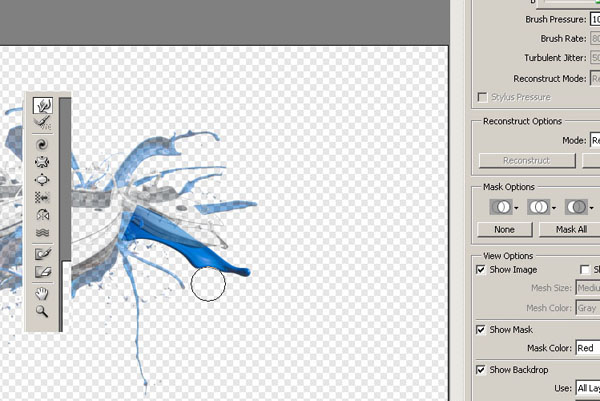
You can also create new splashes from your images by changing their shape with the Liquefy Filter. Go to Filter > Liquify. Use a medium brush to change the shape of the blue splashes.
Step 18
Your design so far should look like the image below.
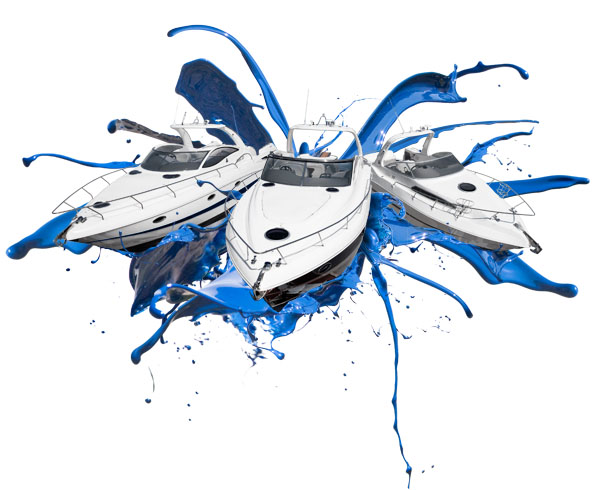
Step 19
Create a new layer over the splashes. Select a brush similar to the one used in the image below. Set the Hardness to 0%. Then, with a dark blue color selected, draw shadows below the boats.
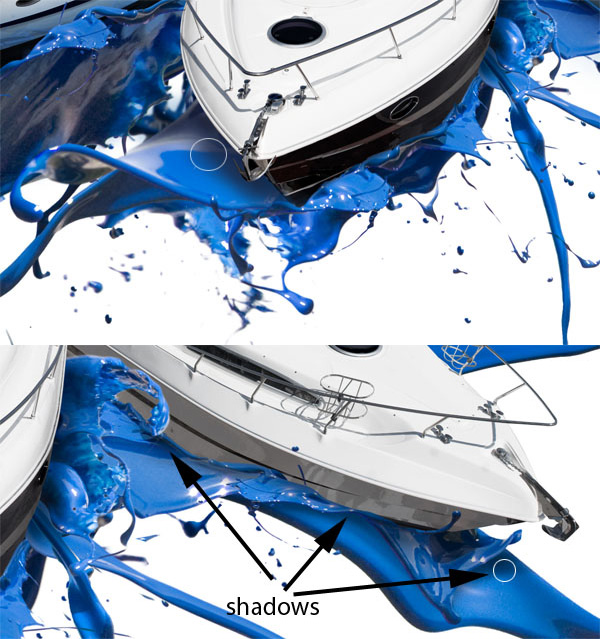
Step 20
For each boat, duplicate a splash layer near the hull. Move this new layer over the boat. Call it "reflections." For the Blend Mode use Overlay. Then set the Fill Opacity at about 60%.
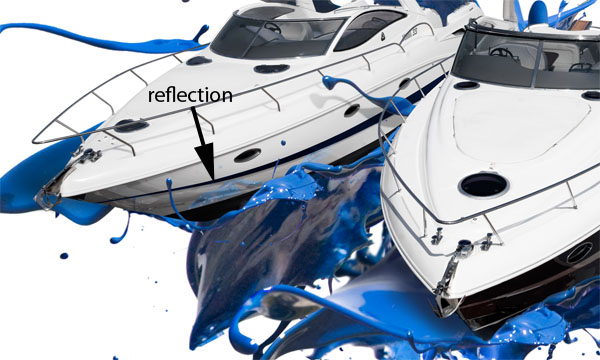
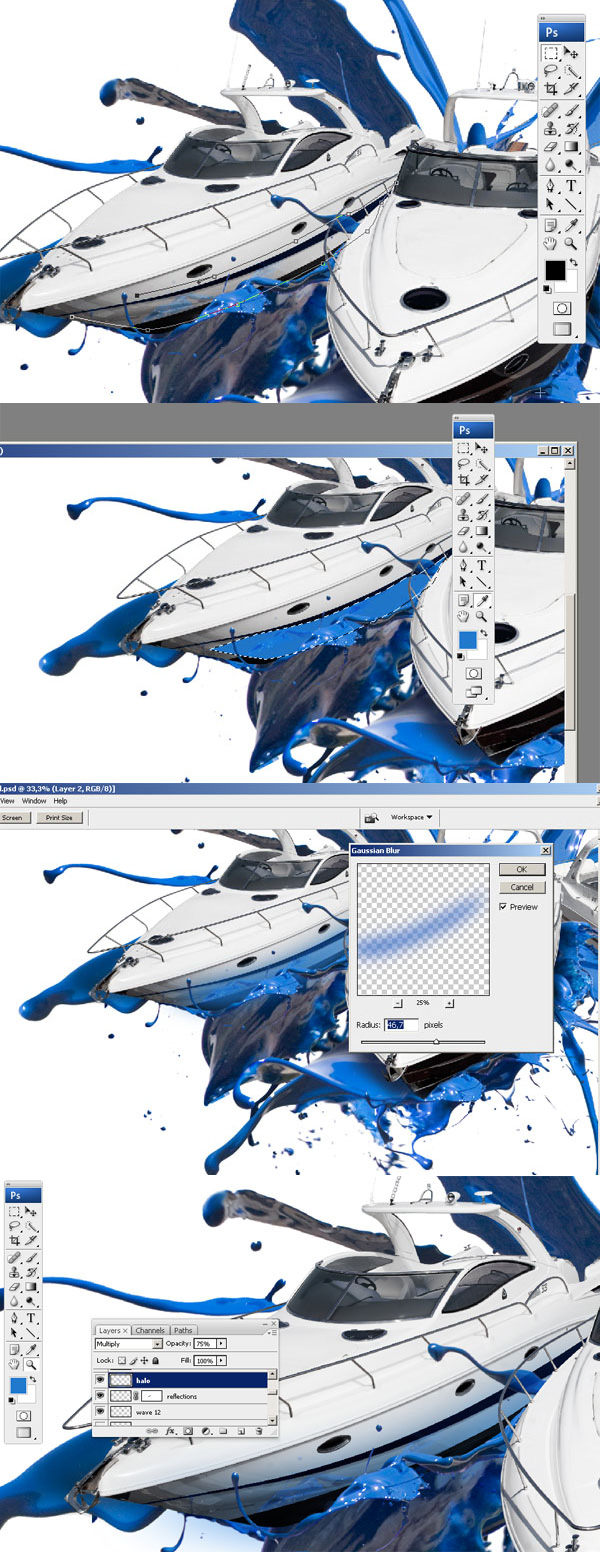
Step 21
Select the Pen Tool (P) and create a path along the lower side of the yachts. Create a selection from the path. Then create a new layer above the boat layer. Fill the selection with a blue color picked from the blue waves. Call this new blue layer "Halo."
Deselect (Command/ctrl+D) and from the Top Menu choose Filter > Blur > Gaussian Blur. Apply a Radius similar to the settings below. For the Blend Mode use Multiply. Then set the Fill Opacity to about 75%. Now you have a blue reflection on your hull. Repeat this process for every hull (which includes this step and the previous step).
Step 22
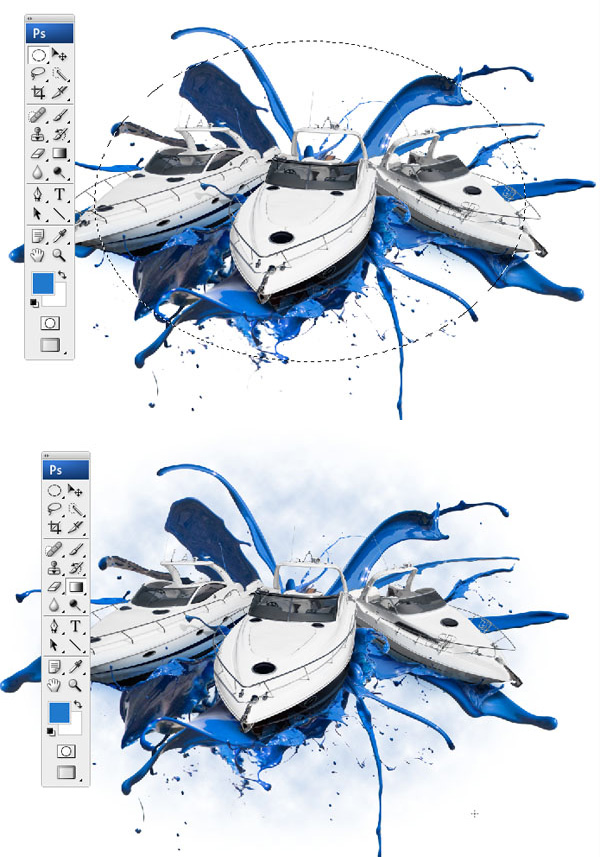
After having completed the shadow and reflection, now we'll create a light background. Create a New Layer (Shift+Ctrl+N). Call it background. Put this layer below the others. Use the Elliptical Marque Tool to draw an Ellipse.
Then Select > Modify > Feather and set the Radius to about 40px. From the Menu go to Filter > Render > Clouds. Use white for the foreground and a light blue for the background. Set the Opacity to 70%.
Step 23
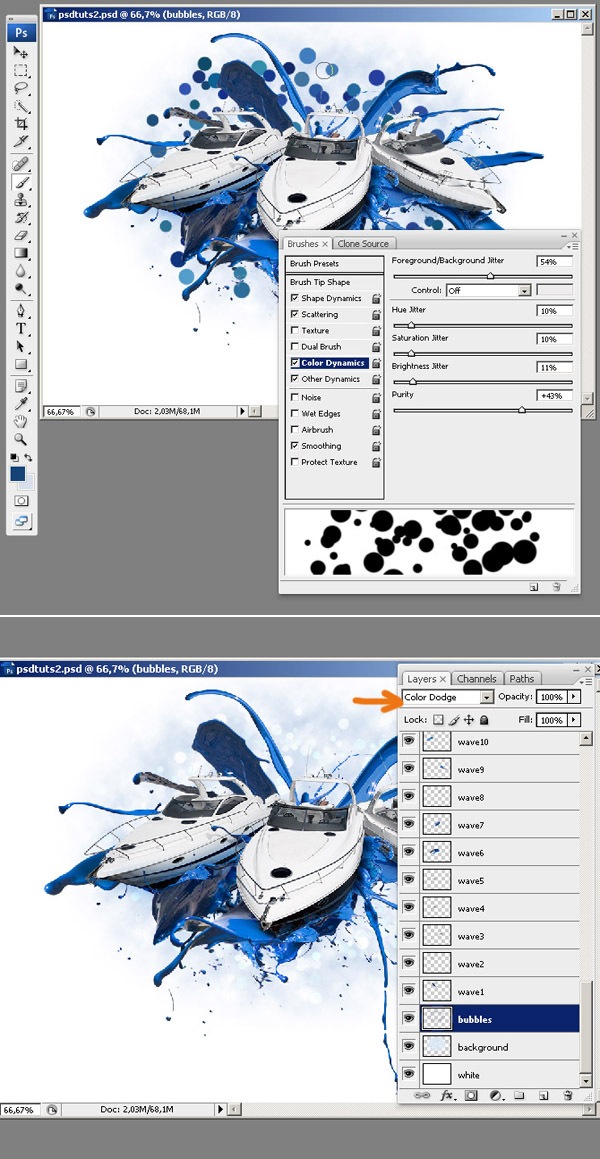
Now we'll add a background using Photoshop Brushes. Select a Rounded Brush and play with options like Shape Dynamics, Color Dynamics, and Scattering to create a good distribution of random bubble patterns. On a new layer, called bubbles, draw a texture with a light blue foreground and a dark background. After this, select Color Dodge for the bubbles layer in the Layer Palette.
Conclusion
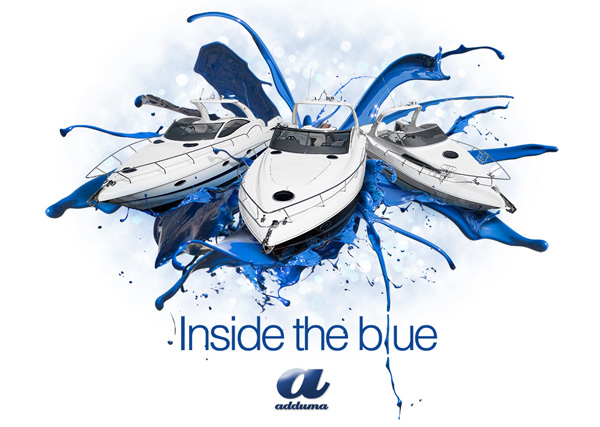
Now you can add anything you want to your advertisement design. I placed a logo and some text in the image below. Good job, your work is finished! Remember to use your software well, but also use your crazy brain. See you at the next tutorial.
NOTE : ALL CREDITS FOR THE ORIGINAL TUTORIAL MAKER :)
=================================
=== For more tutorials keep visiting ;) ===
= http://photoshop-manic.blogspot.com =
=================================

No comments:
Post a Comment