Step 1
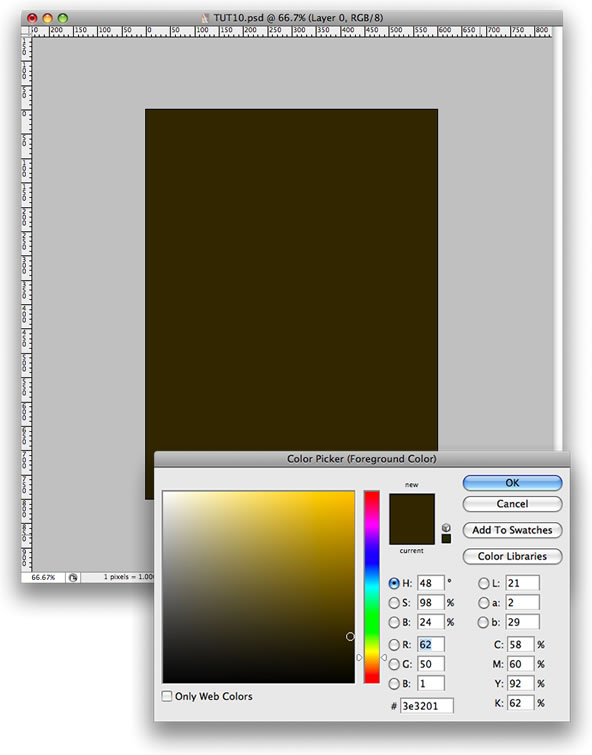
Create a new document. Fill the background layer with a dark brown.
Step 2
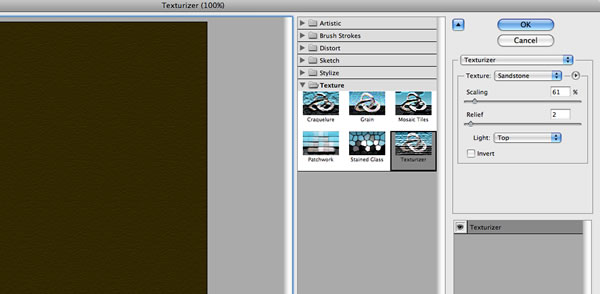
Set the background color to black and the foreground color to white. Select the background layer and go to Filter>Texture>Texturizer.
Step 3
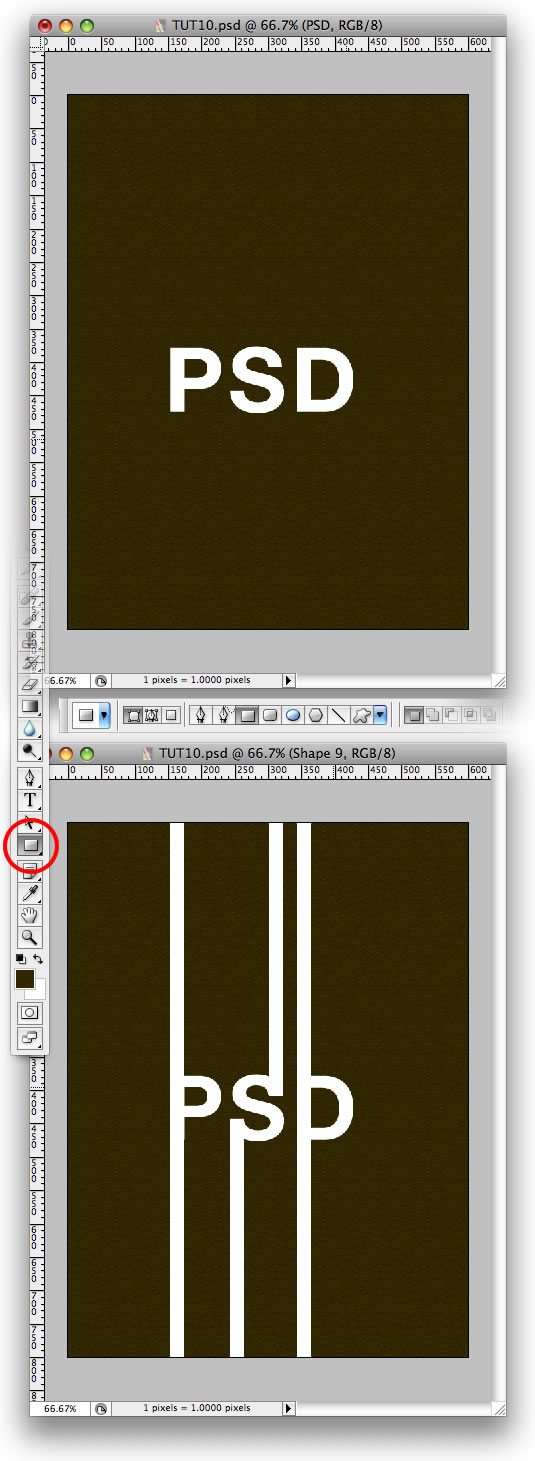
Select the Horizontal Type Tool (T) and type PSD. Then Select the Rectangle Tool (U) and create some shapes like the image below. After that, group the PSD text and the rectangles. Rename the group to "white lines."
Step 4
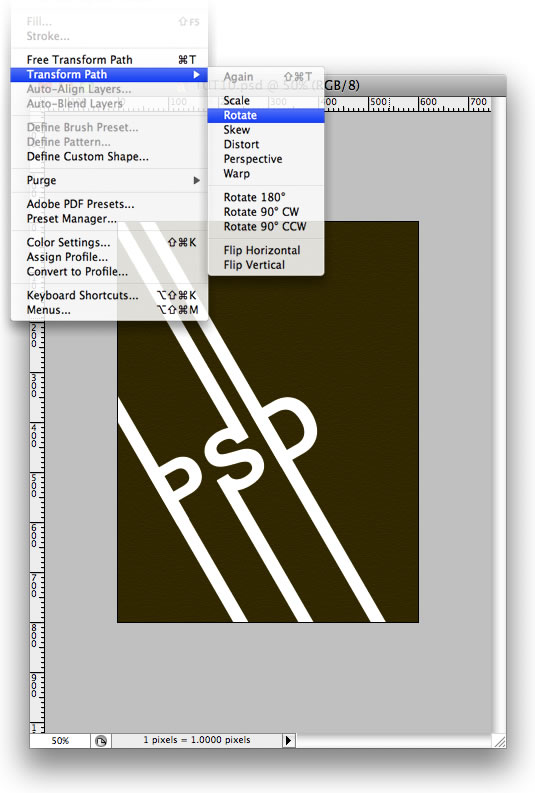
Rotate the group like the image below.
Step 5
Using the Pen Tool (P), create some shapes to fill the gaps before the P, the S, and the D. Make sure that these shapes are beneath the "white lines" group. Use yellow for the first shape, red, for the second, and blue for the third. After that, group these layers and name the group "colors."

Step 6
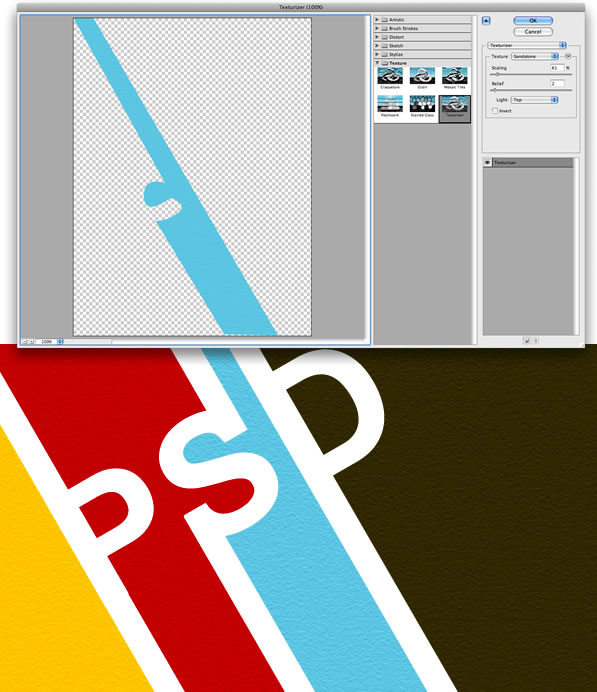
If you use Photoshop CS3 convert the yellow, red, and blue shapes to Smart Filters and go to Texture>Texturizer again. Apply the filter to all three shapes. If you don't use the CS3 version, just apply the filter.
Step 7
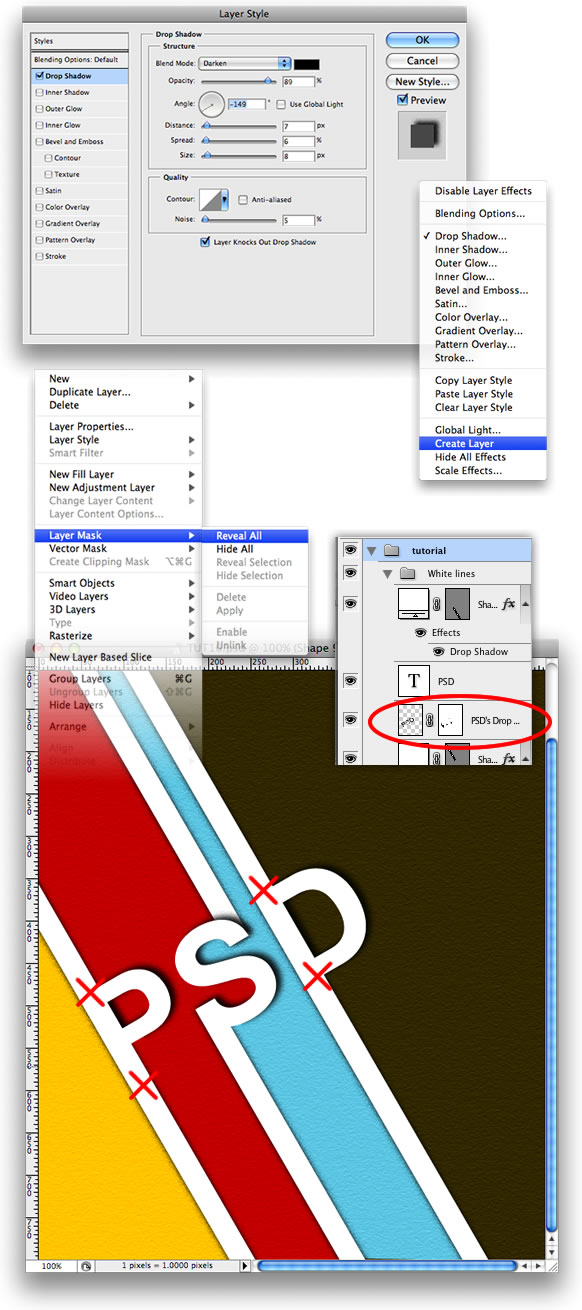
Now select the white lines and using the Layer Styles, select Drop Shadow. After that put the PSD text layer in front of the lines.

Step 8
Double-click on the PSD text layer and in the Layer Style box, select Drop Shadow This time let's make a bigger and stronger shadow. After that, click with the right button of the mouse over the text layer and select Create Layer. That command will create a layer only with the shadow. Then go to Layer>Layer Mask>Reveal All and delete some parts of the shadow that go above the white lines. Make the text and the lines be the same.
Step 9
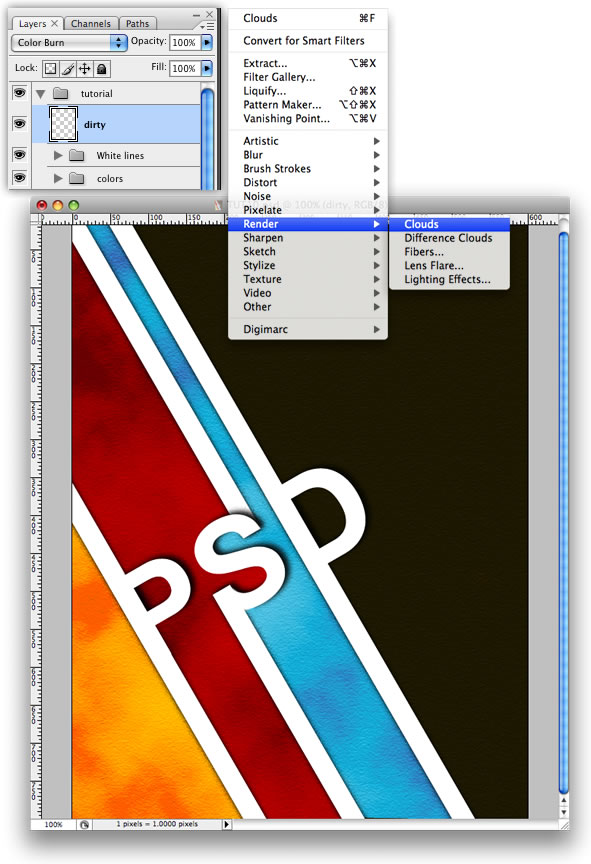
Create a new layer and name it "dirty." Change the Blend Mode to Color Burn. Select black for the background color and a white for the foreground color. Go to Filter>Render>Render Clouds.
Step 10
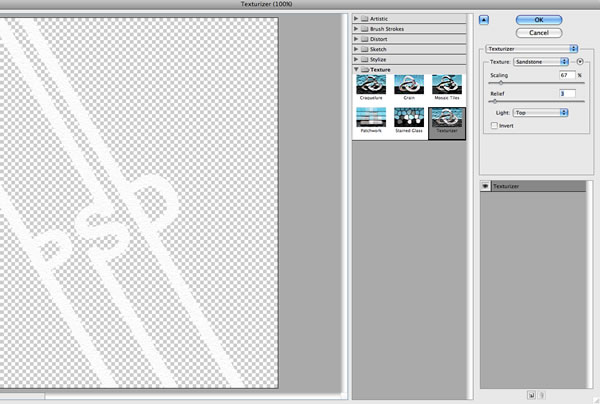
Hold the Command Key (Mac) or Control (PC), and click on the thumbnails of the layers, which will create selections from the layers. With all white objects selected, create a new layer and fill the selection with white. After that go to Texture>Texturizer...
Step 11
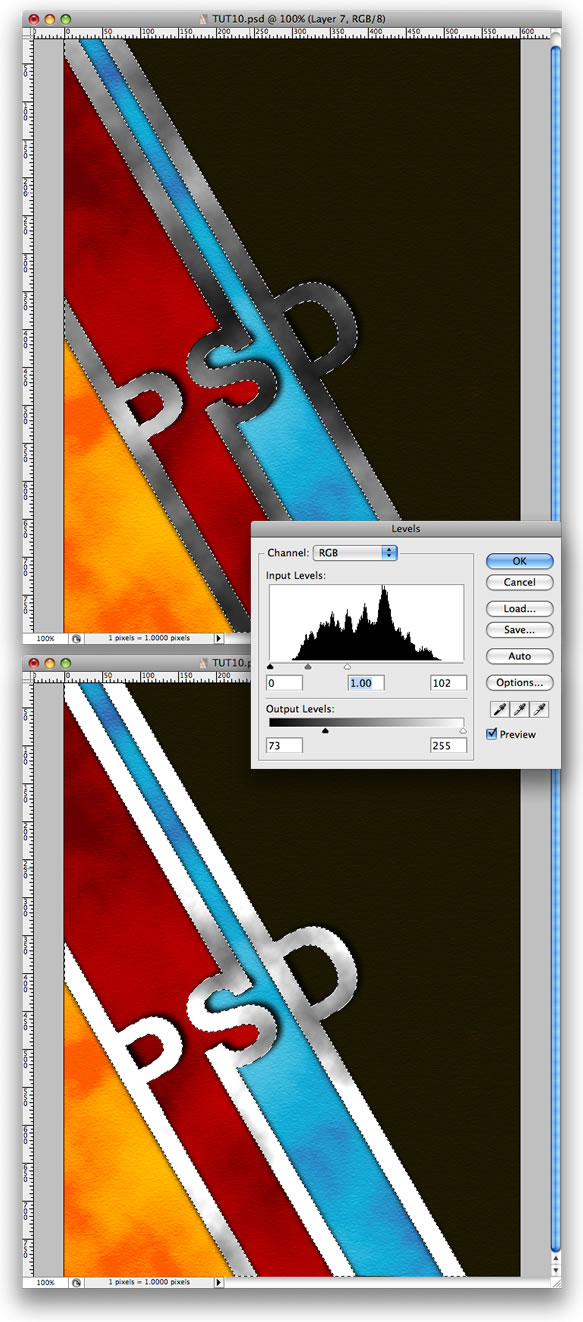
Select the white objects again and create a new layer. Then go to Filter>Render>Render Clouds. After that go to Image>Adjustments>Levels and add more white to the clouds.
Step 12
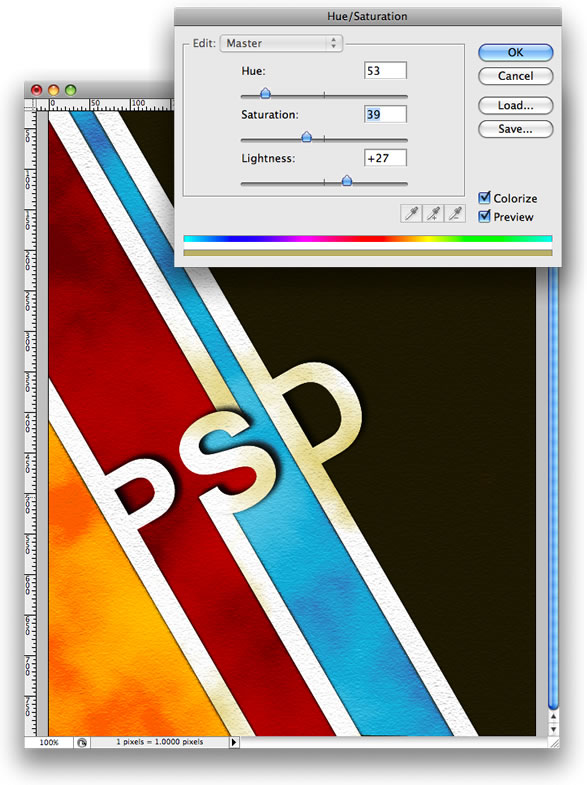
Now go to Image>Adjustments>Hue/Saturation. Select the colorize option and change move the sliders until you get a beige color.
Step 13
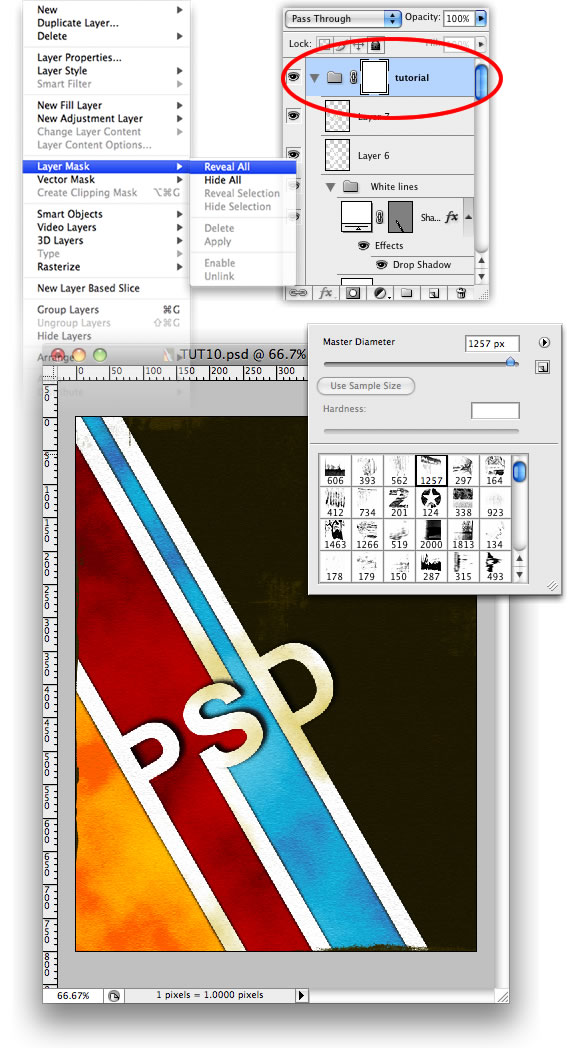
Select all layers and group them. With the group folder selected go to Layer>Add Layer Mask>Reveal All. Now select some grunge or dirty brushes and start deleting some parts of the image. You can get amazing brushes at http://www.brusheezy.com/brushes
Step 14
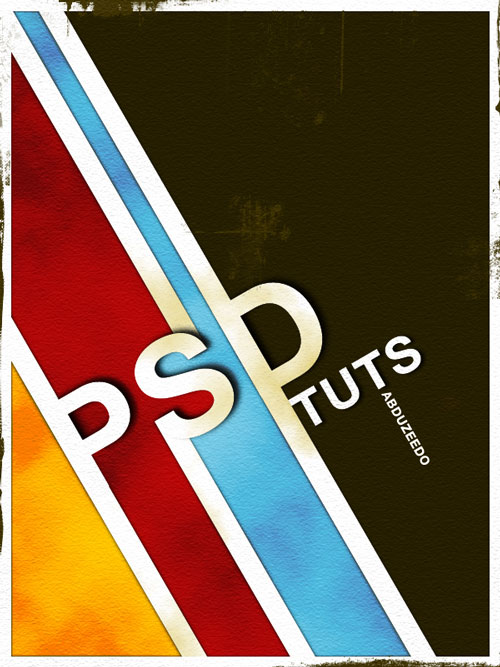
Using the Horizontal Text Tool (T), create the word TUTS. Rotate it to the same angle as the other text, perpendicular to the lines. And you can repeat the Texturizer filter as well.

Conclusion
You can use this technique in lots of different projects, like logos, posters, and Web site headers, for example. The most important thing, again, is to play with the tool and change some values to see what happens, like with the Render Clouds Tool. This time we use that filter to create stains in our design, a totally different approach from when we used it to create lighting effects.
NOTE : ALL CREDITS FOR THE ORIGINAL TUTORIAL MAKER :)
=================================
=== For more tutorials keep visiting ;) ===
= http://photoshop-manic.blogspot.com =
=================================
No comments:
Post a Comment