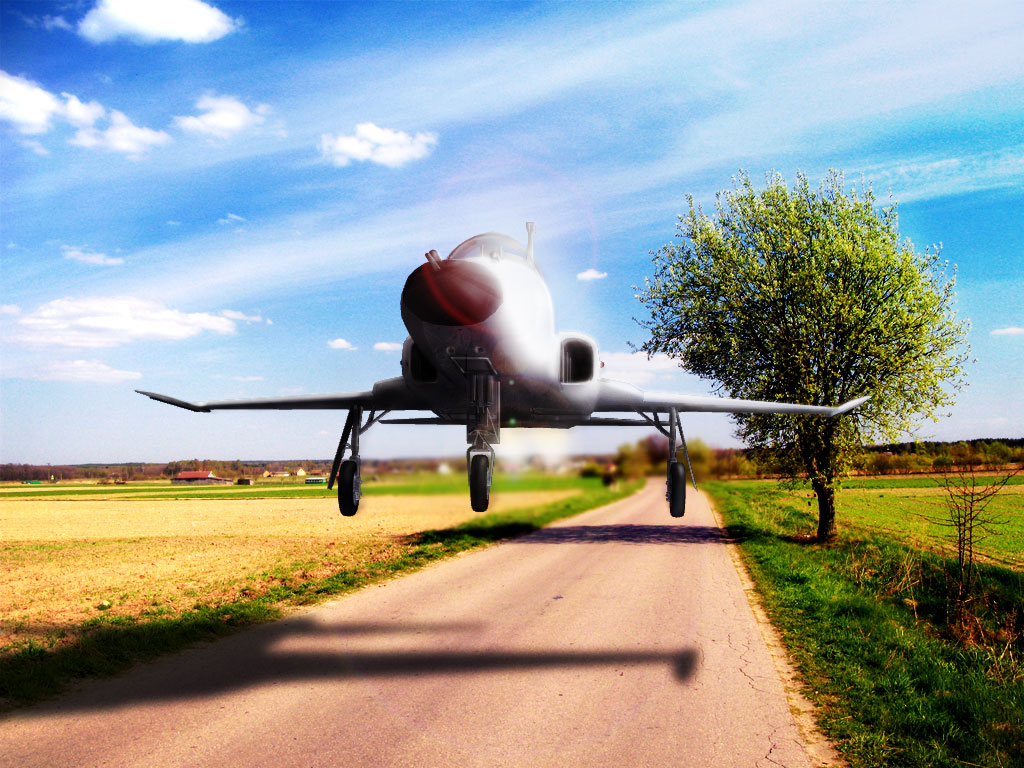
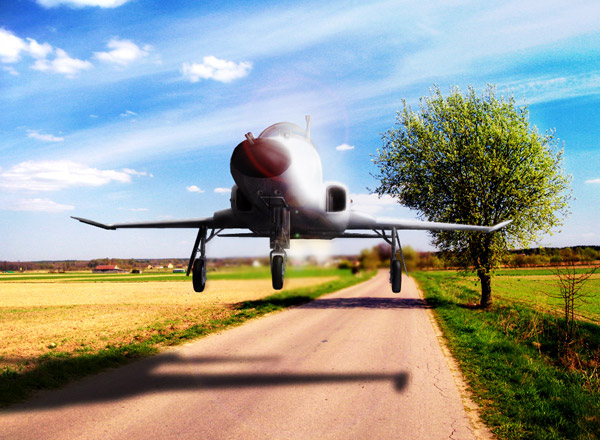
Final Image Preview
Step 1
Create a new document set 1024px by 768px, RGB, and 72 pixels/inch. Search for a nice landscape image, paste it into a new layer, and call it "Landscape." I choose this image because it has a huge tree that helps find the position of the shadows.

Step 2
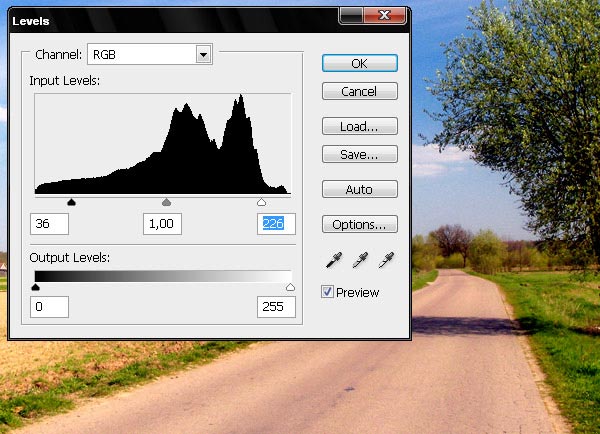
Press Ctrl+L and adjust the input levels with the values in the image below.
Step 3
Here comes the fun! Search the Web for a free 3D model that you can use, and if you have one, use it! If you want to buy one, that's another option as well.
In this tutorial I used an airplane, a Tiger F-5E that I downloaded from Mesh Factory. The designer of the 3D model has asked that we include the following license restrictions for the model: By purchasing the tutorial files you agree to the final user license of the 3D model attached, but you are not purchasing the model itself. You cannot lease, sell, re-sell, rent, or sub-license this archive and/or its contents.
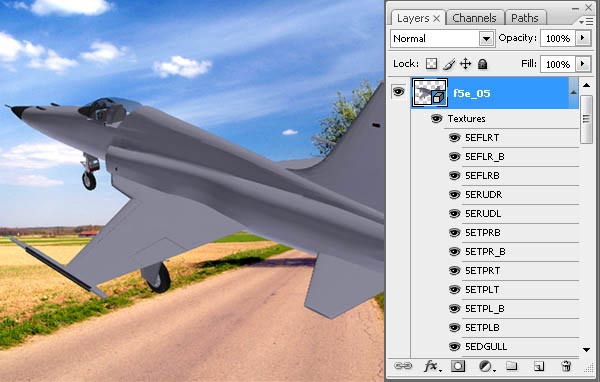
There are many three-dimensional formats: OBJ, 3DS, MAX, and others. In this case, I used the format 3DS. This format allows you to edit textures directly in Photoshop CS3 Extended. This version of Photoshop can handle 3D objects. For this you must create a new 3D Layer by clicking: Layer > 3D Layers > New Layer from 3D file. Then browse your file system, find f5e_05.3ds (the airplane), and click Open. Once you open the object, you'll get something like the image below.
Step 4
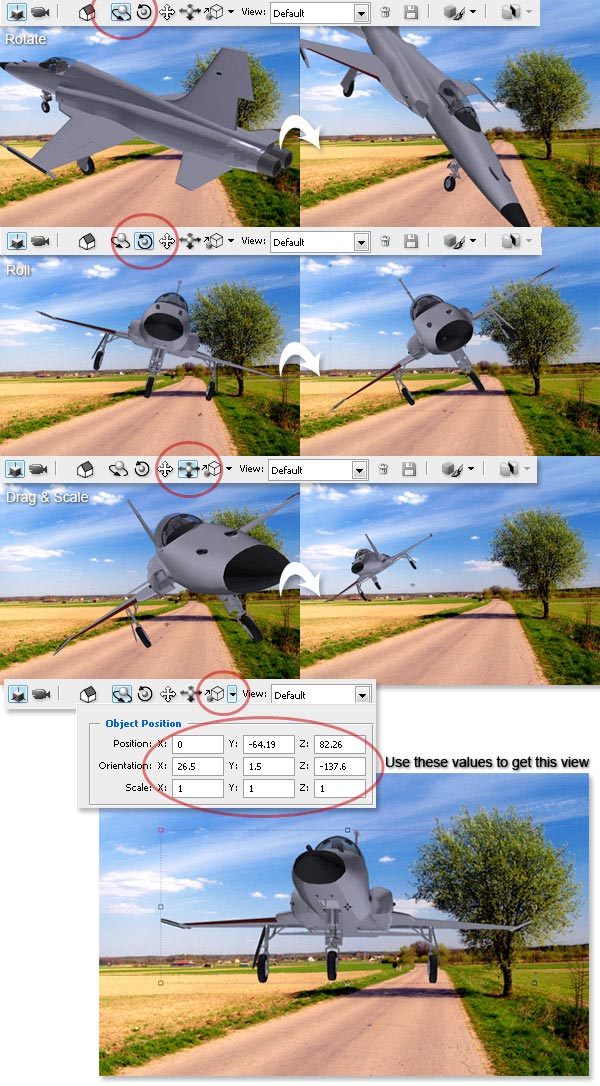
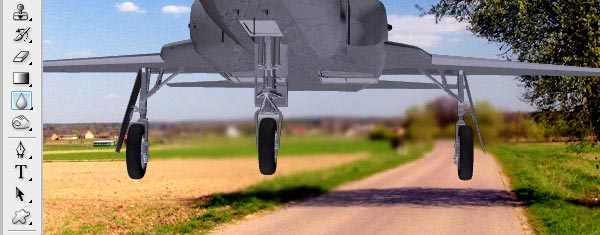
To rotate the airplane and match it with the perspective of the background image, use the: Rotate, Roll, Drag, Slide, and Scale Tools. Double-click the 3D layer to activate it. Play with the Tools or use the values that I used below and apply the 3D transformation. If your airplane is too far left or right, just move the 3D layer using the move Tool (V). If you apply the transformation with some parts of the airplane out of the image bounds, Photoshop's render engine will cut these parts. So try to keep all the airplane inside the document.
Step 5
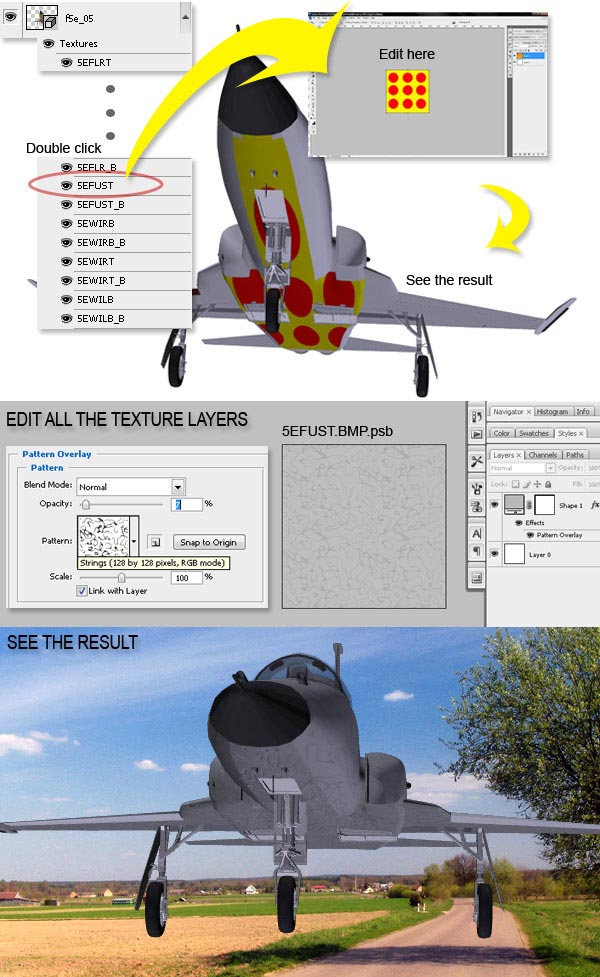
It's time to edit textures. The model I chose has lots of textures. It can become a bit difficult to edit them all. As you can see below the 3D layer, there are many layers with some weird names. These are the Texture layers.
Each area has a texture associated. For example, the 5EFUST layer is the texture of the airplane's base. To edit the texture you must double-click on the respective layer. Then a new window is going to appear. Make some changes on the texture content, and save it. Then you'll see the result. The first image below shows an example of how this works.
In this tutorial, I decided to repeat the same texture all around the plane. This is done to save time. You could choose to get more detailed in your work. Double-click a texture layer. Then create a vector rectangle, background color: #B9B9B9. Add the effect Pattern Overlay > Patterns> Strings, set the Opacity to 7%, then save the texture. Repeat this as many times as there are texture layers in the 3D model. Don't worry about the windows, wheels, and nose, as these colors and textures are embedded in the 3D file.
Step 6
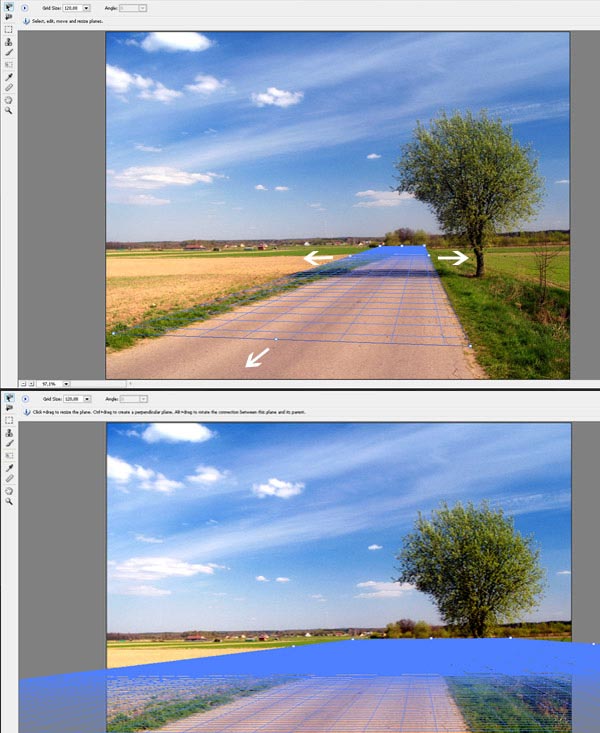
Next we'll add the airplane's shadow. We will use the Vanishing Point filter. First hide the 3D layer for now. Then select the "Landscape" layer, and click Filters > Vanishing Point. Draw a plane over the road and resize it. Click OK, and show the 3D Layer again. If you need a review of the Vanishing Point Filter visit this tutorial here on PSDTUTS.
Step 7
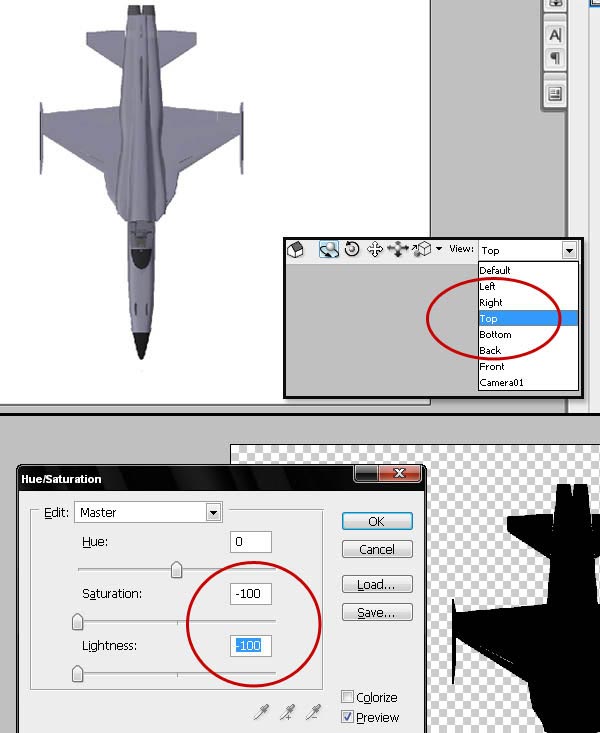
Let's create the shape of the airplane's shadow. Click on File > New, and create a blank image 1024px by 768px, RGB, and 72 pixels/inch. Then make a new 3D layer by going to Layer > 3D layers > New layer from 3D file, use the same 3D model as before.
Double-click the 3D layer to edit it. Change the View option to Top. Then Rasterize the 3D layer by clicking Layer > Rasterize > 3D. Select the rasterized airplane's view and hit Ctrl+U to change Hue/Saturation. Set Saturation to -100 and Lightness to -100. Then select all, and Copy the black airplane.
Step 8
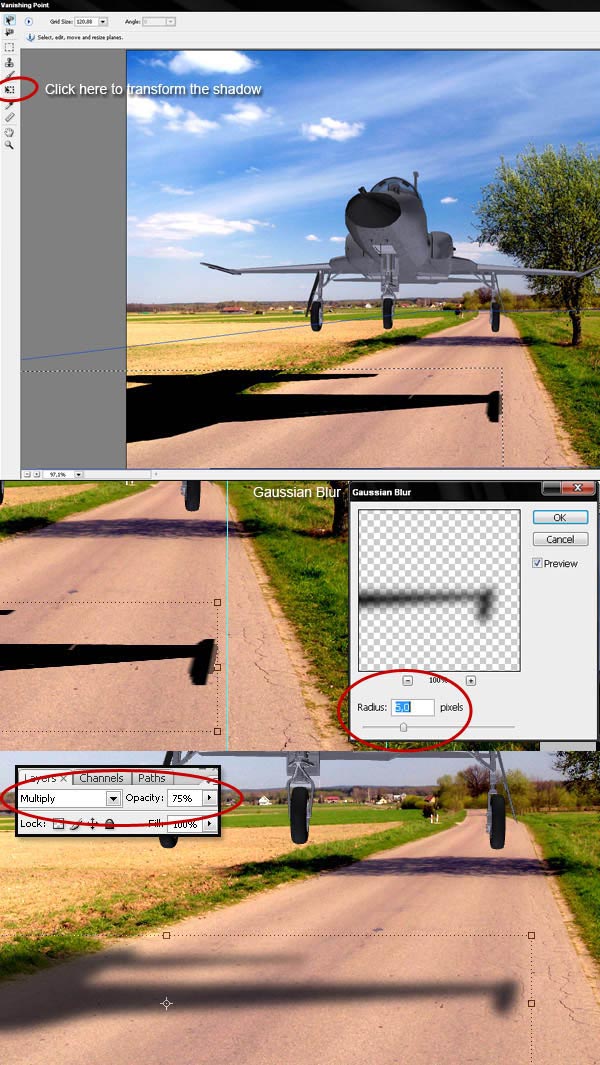
Create a New Layer just above the "Landscape," name it "GroundShadow" and select it. Click on Filters > Vanishing Point. Then paste (Ctrl+V) the black airplane. Drag it over the grid. Change the size and edit the position to set the shadow in a proper place—not exactly below the airplane, but a little bit to the left to create the illusion of altitude. Then click OK.
Select the "GroundShadow" layer and do the following: apply a Gaussian Blur, with a Radius of 5px, set the Opacity to 75%, and set the Blending mode to Multiply. Done! The tree shadow is an excellent guide to position the airplane shadow. The light is located exactly on the right side.
Step 9
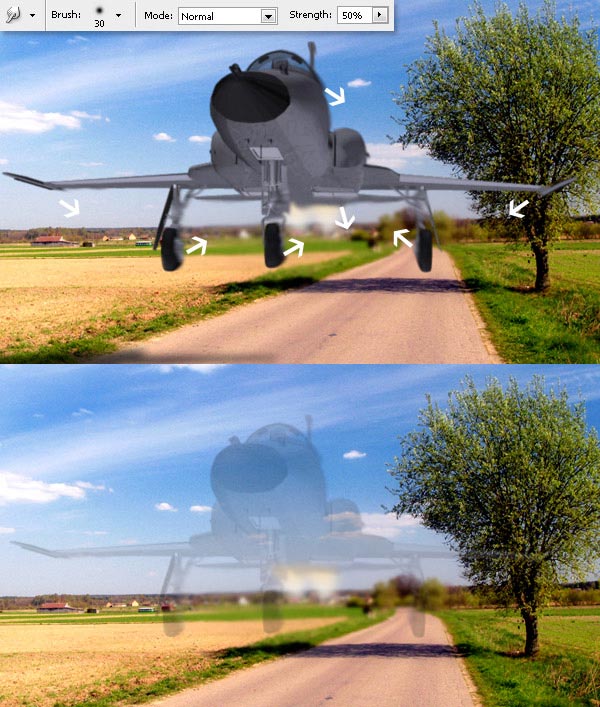
Now it's time to give it some realism! Let's add the turbines. Select the "Landscape" layer. Use the Blur Tool to blur the image just behind the airplane, but not behind the wings. I used a 50px brush, with a Hardness of 0%, and Strength set at 50%.
Step 10
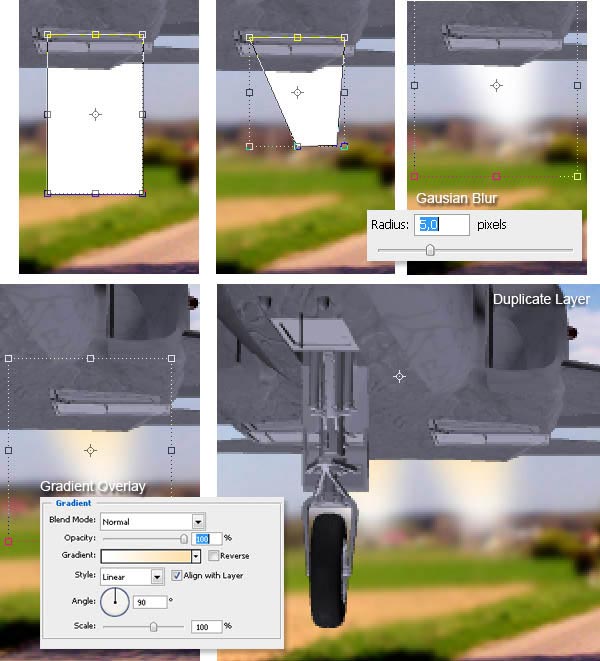
Create a new Layer above the "GroundShadow" Layer and call it "Engine." Make sure it is below the 3D layer. Draw a White Rectangle, and Ctrl-click the corners to transform the shape; or you can use the Pen Tool.
Apply a Gaussian Blur with a Radius of 5px once. Then press Ctrl+F to do it twice. Add a soft Gradient Overlay that goes form yellow (#FFE0AA) to white (#FFFFFF). Then change the Opacity to 80%. You need to duplicate the engine layer, as our plane has two turbines. Alt-click and drag the layer, as shown below.
Step 11
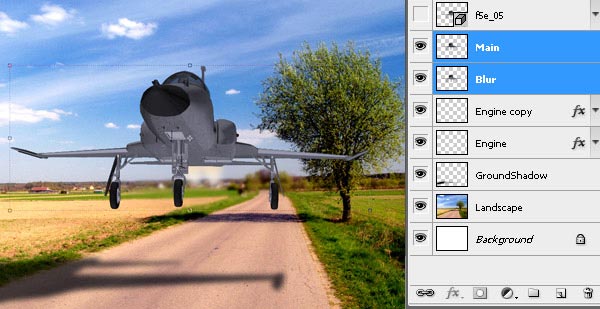
Duplicate the 3D Layer two times, and Rasterize the two copies. Name the first "Main" and the second "Blur." Then put the original 3D layer on top and hide it.
Step 12
Hide the "Main" layer. Then select the Blur layer. Click Filter > Blur > Blur. Do it again (Ctrl + F). Use the Smudge Tool and blur the airplane according to the arrows, use a 30px brush with strength at 50%. Finally change the layer Opacity to 25%. Set 3D layer's Opacity to 10%.
Step 13
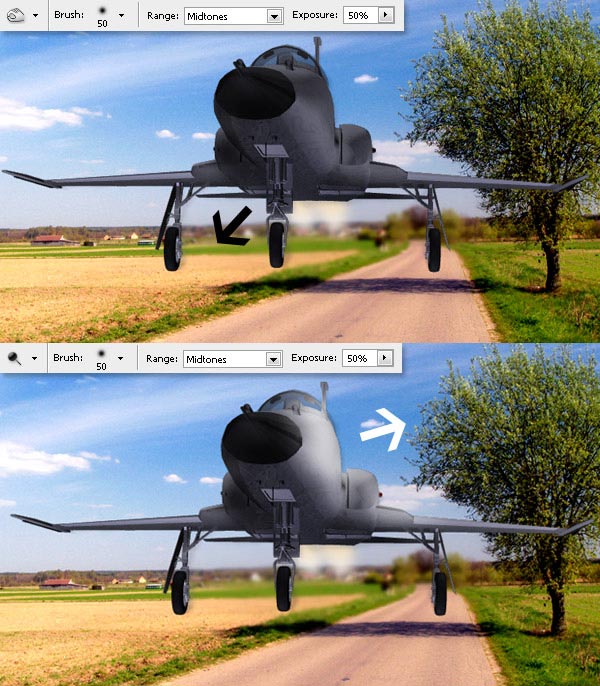
Show and select the "Main" layer. Use the Burn Tool to darken some areas below the airplane, the wings, and the tail. Use a 50px Brush, with Hardness set to 0%, a Range set to Midtones, and Exposure at 50%. Now with the Dodge Tool brighten the areas facing the light. Use a 50px Brush, with Hardness at 0%, a Range set to Midtones, and Exposure of 50%.
Step 14
Now we'll add some details using the Brush Tool. Create a new layer above the "Main" layer and name it "Shadows." We'll brush the airplane's dark areas next.
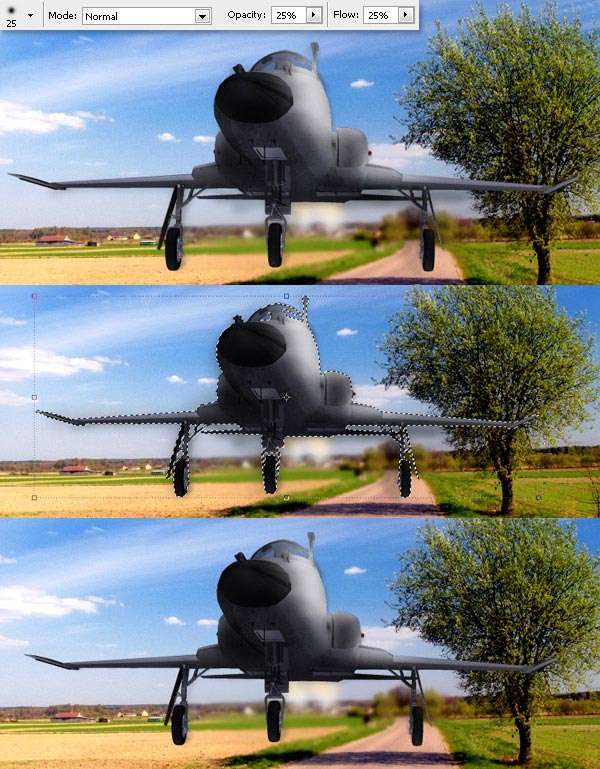
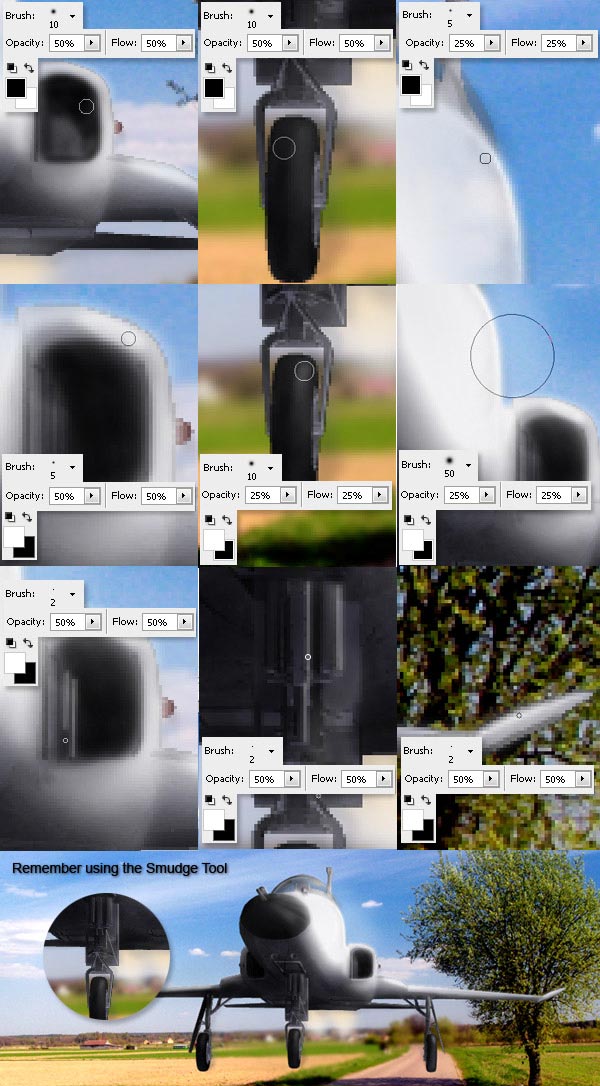
Begin with a 25px brush with Hardness set to 0%, mode set to Normal, Opacity at 25%, and Flow at 25%. Also, use a dark color; black is OK. Paint all dark areas below the airplane's wings and tail. Brush the turbines' air tunnels too. Resize the brush making it bigger (50px) for the nose, or smaller (5 - 10px) for some small areas, like the landing train. Don't worry about the details yet.
If you are painting outside the plane's bounds, don't worry! Ctrl-click the 3D layer and Ctrl+Shift+I to inverse the selection. Then delete the extra painting. If you need to erase something, do it with the Erase Tool. Set it as 25px brush Mode as Normal, Opacity set to 25%, and Flow at 25%. To make the shadow softer, use the Smudge Tool with 25px Size and Strength set to 50%.
Step 15
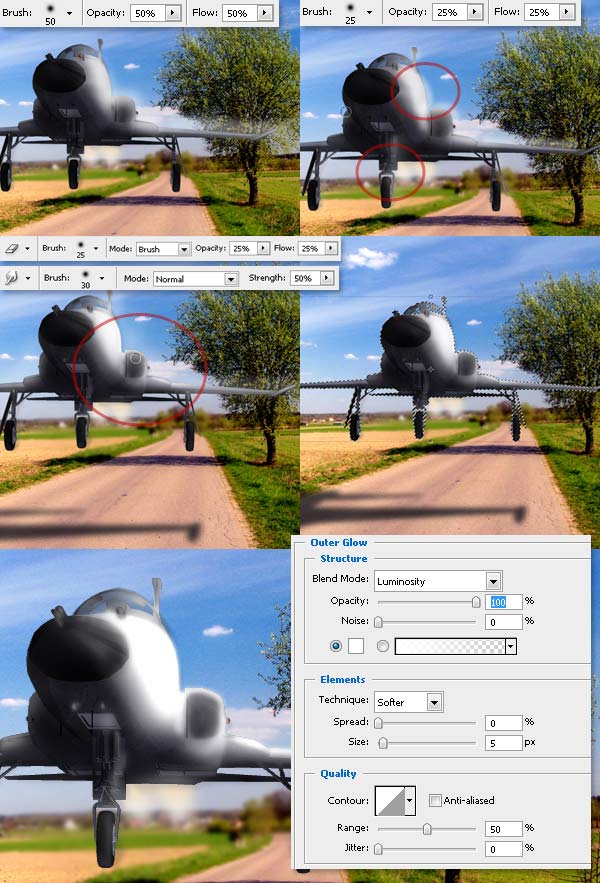
For the light areas, create a new layer, and name it "Lights". Then select it, use a white-colored 25px brush with these values: Hardness set to 0%, Mode set to Normal, Opacity at 25%, and Flow at 25%. Paint all over the airplane's left side. Then change the brush size to 25px and paint the borders.
Use the Erase Tool to delete the air tunnel and the Smudge Tool to soften the brushing. Then Ctrl-click the 3D layer, invert the selection in "Lights" layer and delete it. Finally add to this layer an Outer Glow effect, with the values of the image below.
Step 16
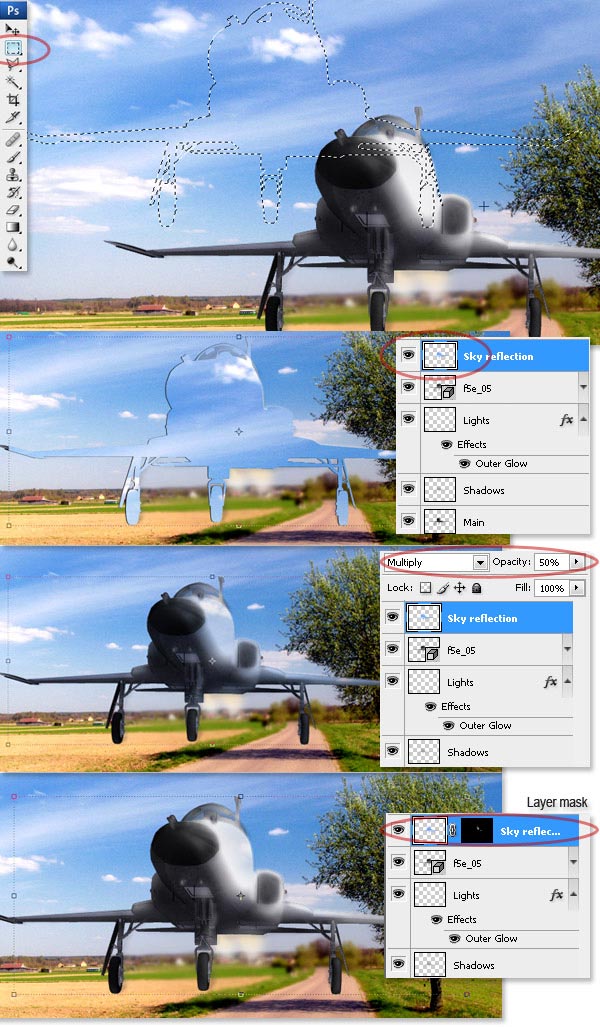
We're getting close to finished. Next add a soft sky reflection over the airplane's light areas. Place the "3D" layer above all the other layers. Create a new blank layer, and name it "Sky Reflection." Ctrl-click the "3D" layer. Then select the "Landscape" layer and use the Rectangular Marquee Tool to move the selection to copy a piece of sky. Paste the selection hiding the airplane.
Set the "Sky Reflection" layer Opacity to 50% and Blend Mode to Multiply. Use a layer mask to hide all. Click the layer mask, and use a white brush to show only a few areas of the reflection over nose and wing.
Step 17
Add two blank layers above the "3D" layer. Name it "Light Details" above and "Dark Details" below. Set the "Light Details" layer blending mode to Lighten. Set "Dark Details" layer to Multiply.
Edit both light and dark zones simultaneously. Start with dark areas, and use black, soft brushes with Hardness set 0% to 50%; sizes of 5px, 10px, and 15px, and Opacity-Flow at 25% to 50%. For light areas, use white, soft brushes, Hardness set 0% to 70%; sizes of 2px, 5px, 10px, 15px, and 50px, and Opacity-Flow of 25% to 50%. Remember to use the Smudge Tool to soften the brushing. Use a size between 25px and 50px and set the Strength at 50%.
Step 18
Now you have a beautiful scene. Remember to save your work. Go to Save As and name your work with a name like "Rendered Scene." This will create a new file. Now we'll add some final details to this new file.
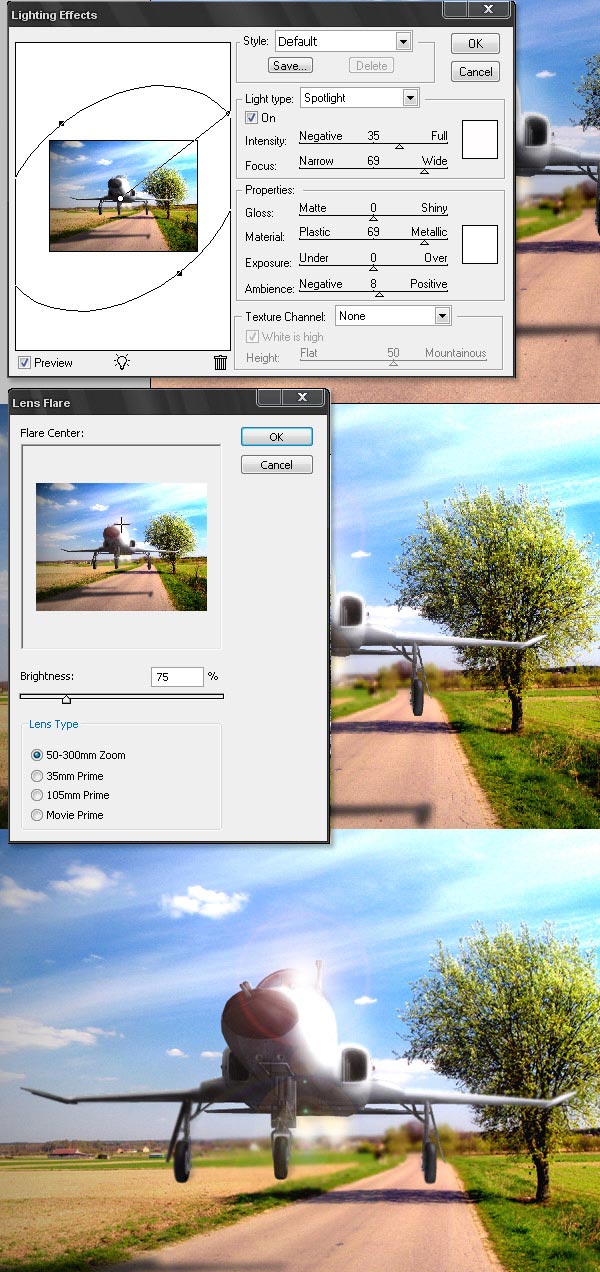
On the "Rendered Scene" file, flatten all the layers and click Filter > Render > Lighting effects. Use the values in the image below. Add a Lens Flare over the cabin by clicking Filter > Render > Lens Flare. Set it to a Brightness of 75%. Use the Dodge Tool to add some lights to the lighted side of the tree. Blur the image on the wings and wheels a little bit with the Brush Tool set at: 25px Size, Hardness at 0%, and Strength at 50%. Select all and copy the image.
Step 19
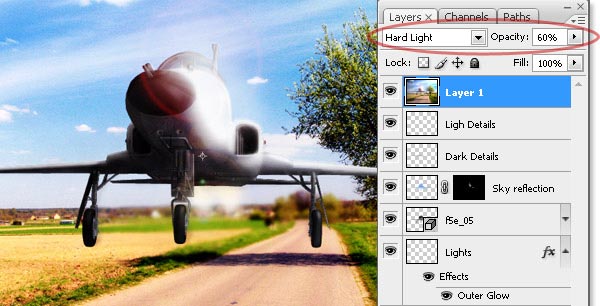
Go back to your original document. Create a new layer above all the rest and paste the Rendered scene. Then set the Opacity to 60% and blending mode to Hard light. Render a new Lens Flare with Brightness set at 100% over the cabin. And voila, we've got an HDR-style scene designed!
Conclusion
The final image is below. Let your imagination fly.
No comments:
Post a Comment