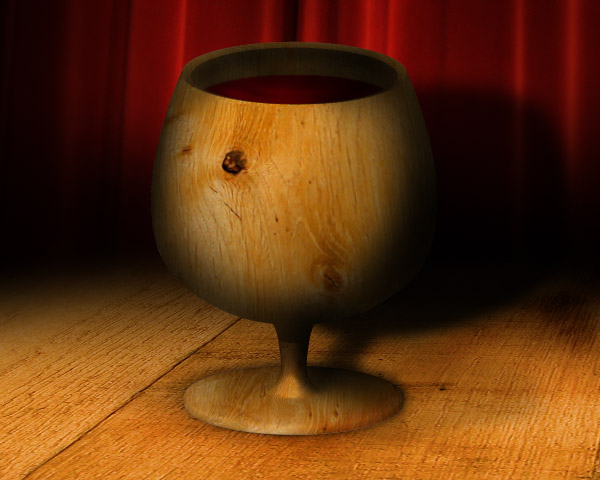
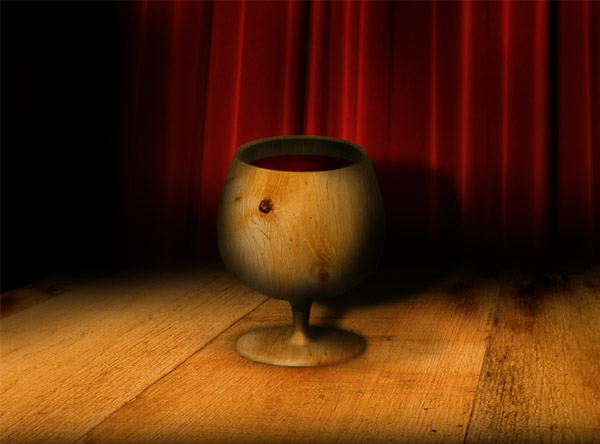
Final Image Preview

Step 1
This is a beginners tutorial, for this we're going to use two of the most popular filters Displace and Vanishing Point. We'll also use Illustrator to render the 3D cup.
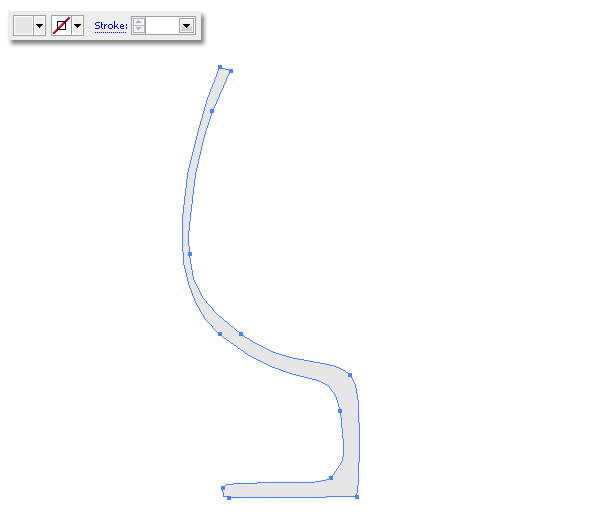
Let's get it started. First of all open Illustrator, I'm using Illustrator CS3 to render the cup. Create a new Web Document that is 1024 pixels by 768 pixels. Next, draw a shape with the Pen tool, as in the image below. Ensure the foreground color is a light gray (#E6E6E6) and set the Stroke Color as None.
Step 2
Revolve our shape to make it spin from the left or right side, you can see a detail tutorial about using this technique over at VECTORTUTS: Working with 3D Objects and Transparencies to Make a Vector Cola Bottle Design, but as this is a Photoshop tutorial I'll keep it simple.
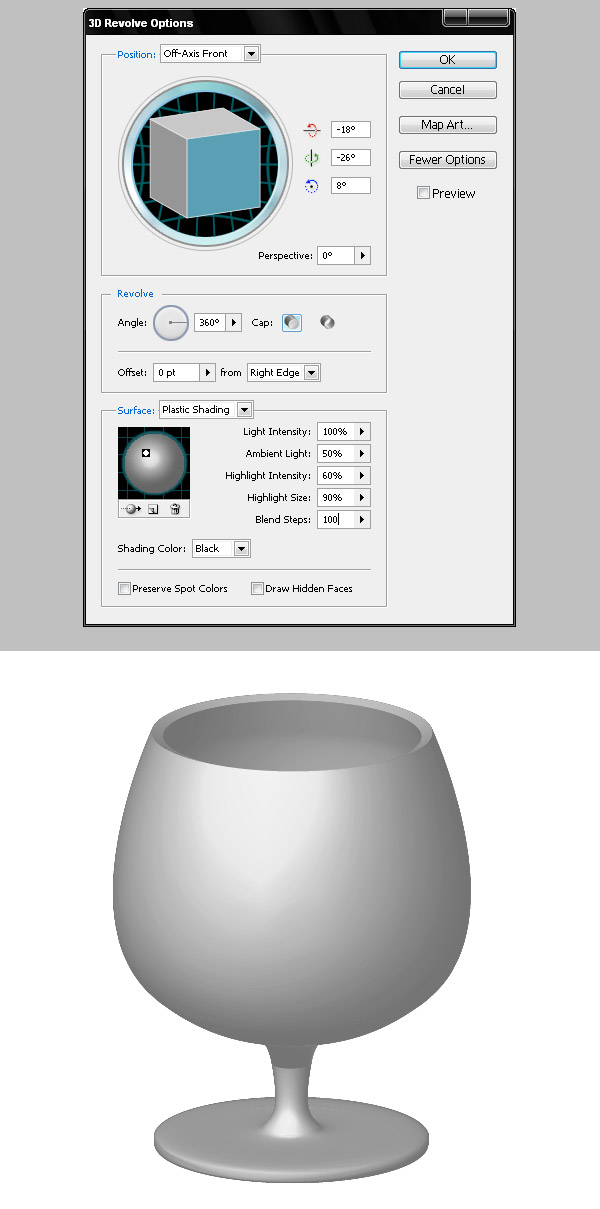
Go to Effect > 3D > Revolve, in the popup dialog click on More Options and set the following values: Angle at 360º, Offset 0px from the Right Edge, Surface of Plastic Shading, and Blend Steps set at 100. Use the following image as a guide. After clicking OK, you'll see how our ugly 2D shape turns into a nice 3D cup.
The cup's hole must have the same diameter as the cup's base. When you've finished the cup, copy (Command + C) the vector shape.
Step 3
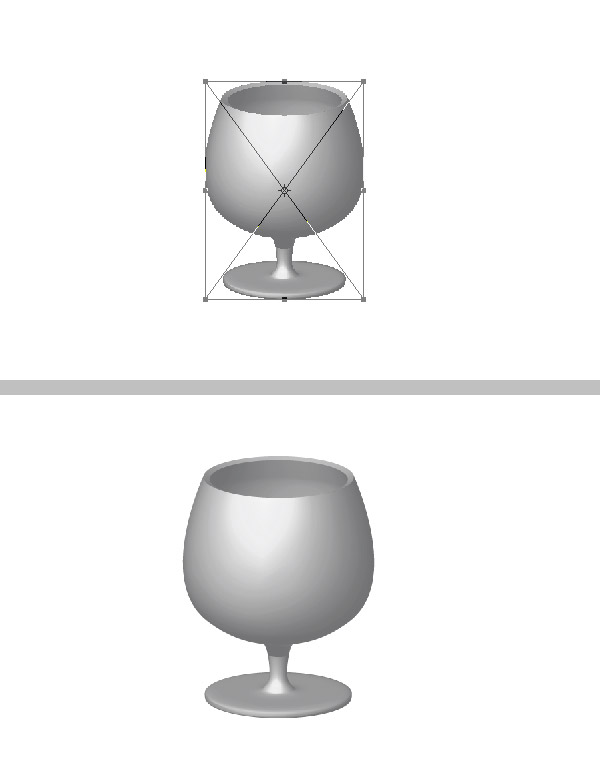
Then open Photoshop, create a new document 1024 pixels by 768 pixels set to RGB 72 dpi, and paste the clipboard into a new layer (be sure to paste the cup as a Smart Object). Make the object a little bit bigger and hit Enter.
Step 4
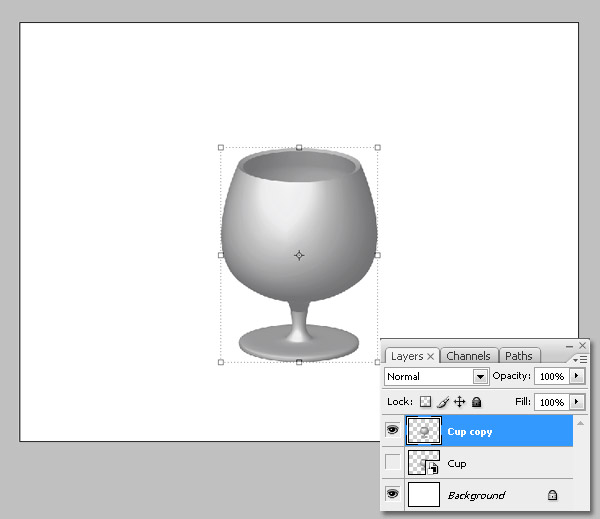
Duplicate the vector object by dragging the layer miniature over the New Layer mini-button and go to Layer > Render > Smart Object to render the copy.
Step 5
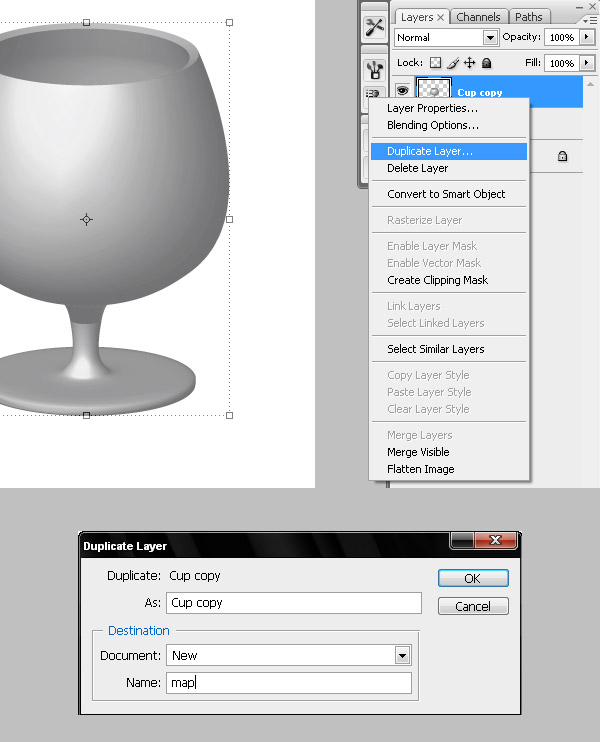
Now we're going to create a Displacement Map using the cup's deep levels. Select the "Cup copy" layer and Right-click (Alt-click) over it, then select Duplicate Layer. In the popup dialog under the Document option select New from the drop down and type a name like "map." Save the new document somewhere.
Step 6
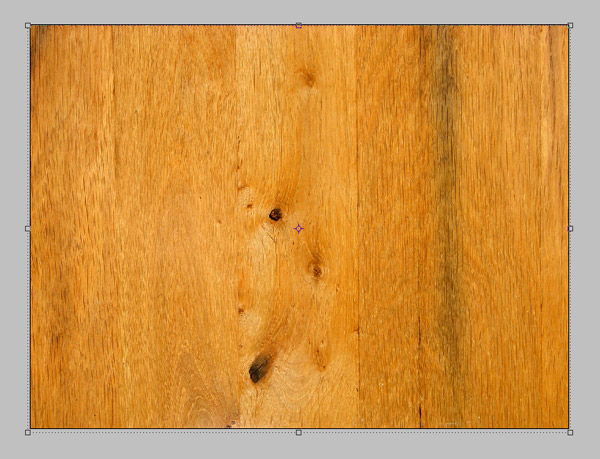
Create a new document 1024 pixels by 768 pixels and paste this image into a new layer. You can create a texture from scratch if you want. I'm using stock this time.
Step 7
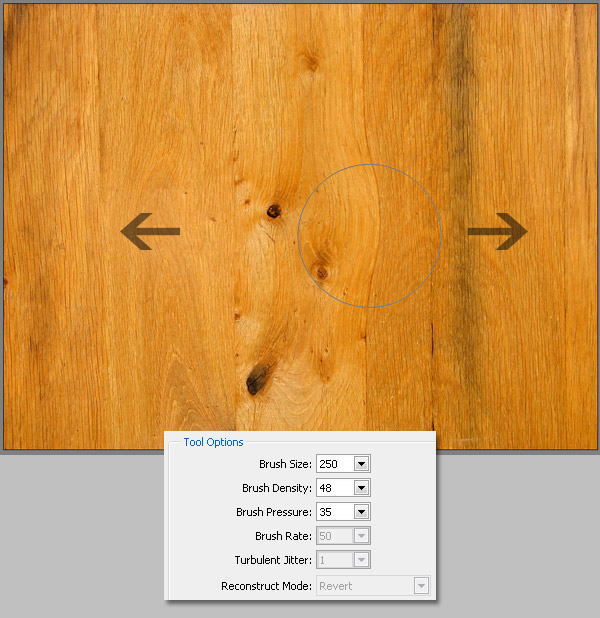
Go to Filter > Liquify to make some curves in the vains of the wood texture, as shown below.
Step 8
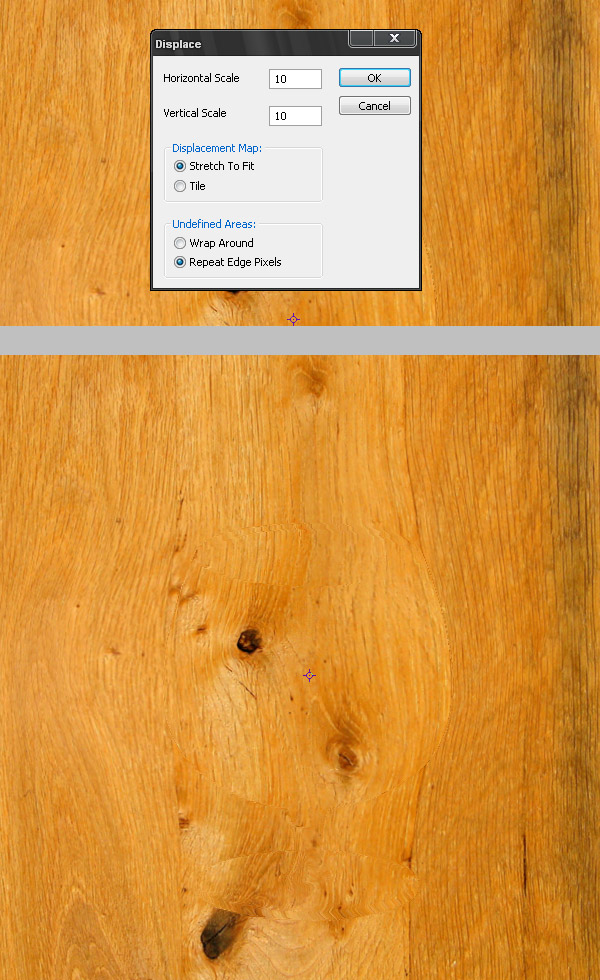
To apply the Displacement Map go to Filters > Distort > Displace, set both the Horizontal and the Vertical scale to 10, then select Stretch To Fit and Repeat Edge Pixels. Select all (Command + A) and Copy (Command + C) the selection.
Step 9
Paste (Command + V) the document into a new layer above all the other layers in our main document, then name it "Wood1." Also, change the layer's Blend mode to Multiply. At this point you must see the cup.
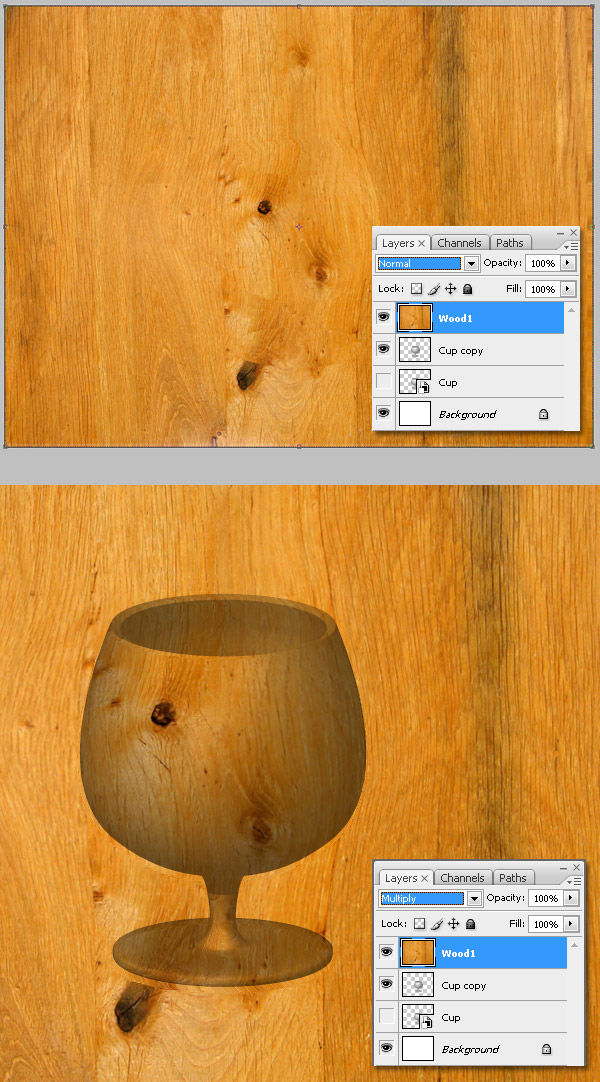
Step 10
Now Command-click the "Cup copy" layer miniature, then Command + Shift + I to invert the selection. Select the "Wood1" layer, go to Layer > Layer mask > Reveal All, and fill the selection with black using the Fill tool (G). Finally, add a new Fill layer as a black background.

Step 11
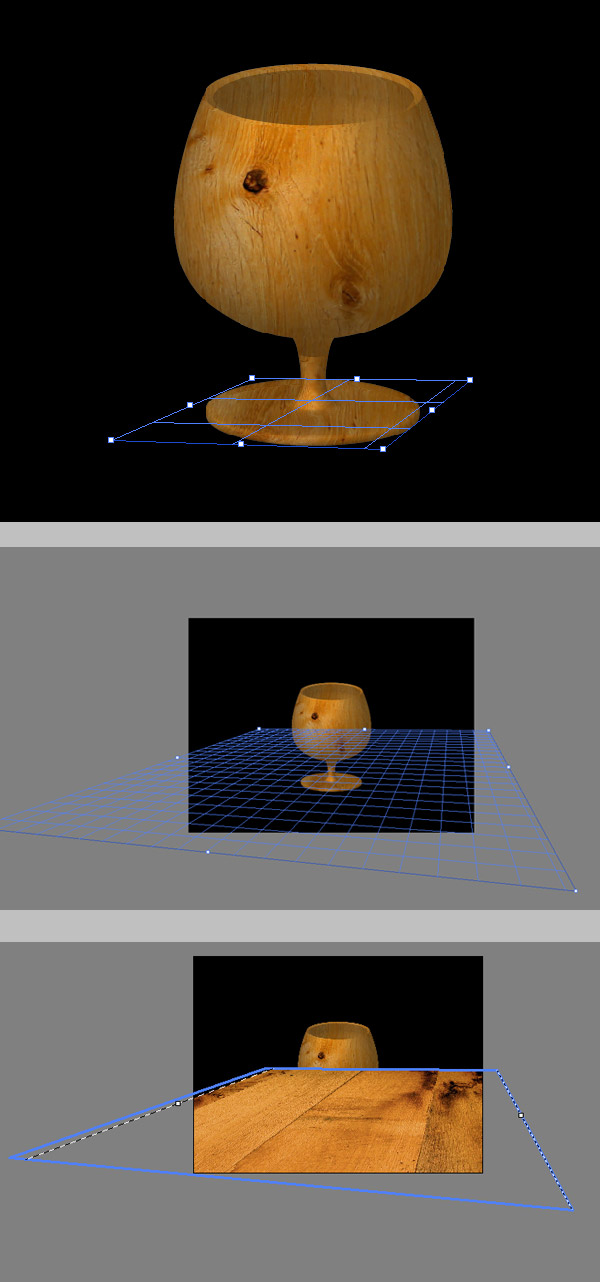
Create a new layer below the "Cup" layer, name it "Floor" and select it. Go to Filters > Vanishing point and draw a plane using the cup's base as a guide, then expand the plane as much as you want. We're going to paste the "Floor" texture in this plane, grab this image, or any other, and paste it into the vanishing point plane.
Step 12
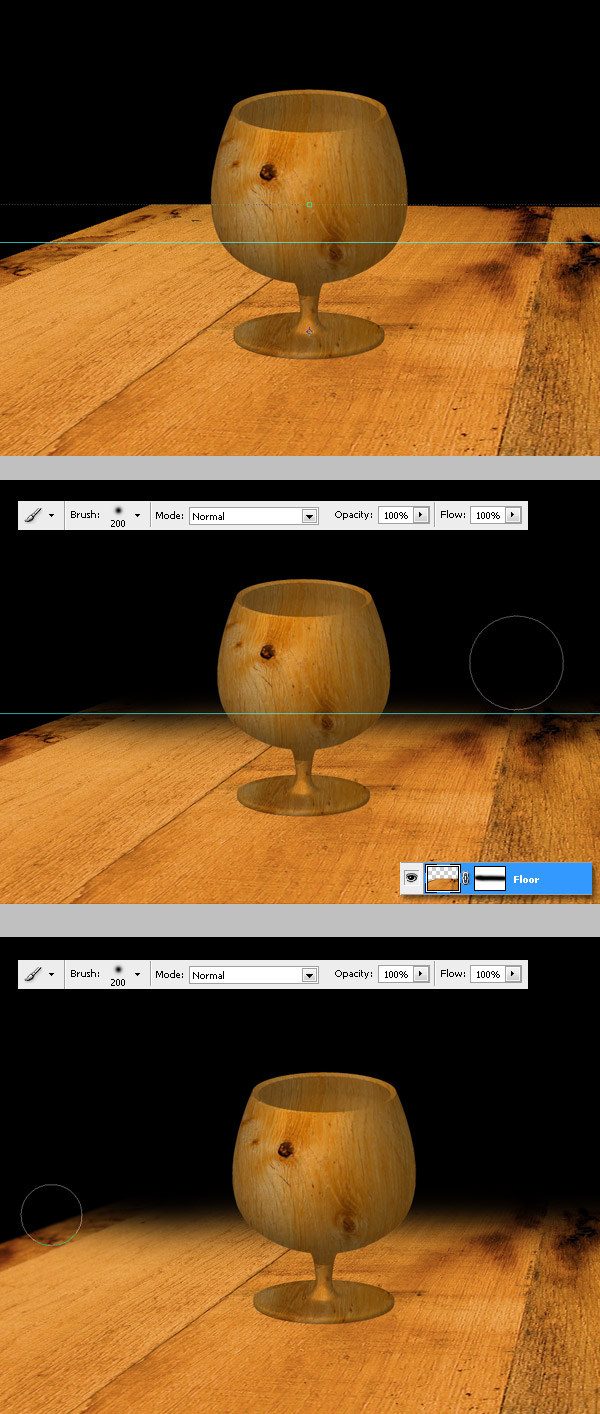
There's a nice wood surface to work with. Hide the farthest side of the surface, show the ruler (Command + R), and drag a horizontal guide. Select the "Floor" layer and add a Layer mask > Reveal all. Using a big soft black brush, paint some areas of the layer mask hiding some areas of the surface. You can use the guide to get a straight line. Also, you can hide a little bit of the surface's front side.
Step 13
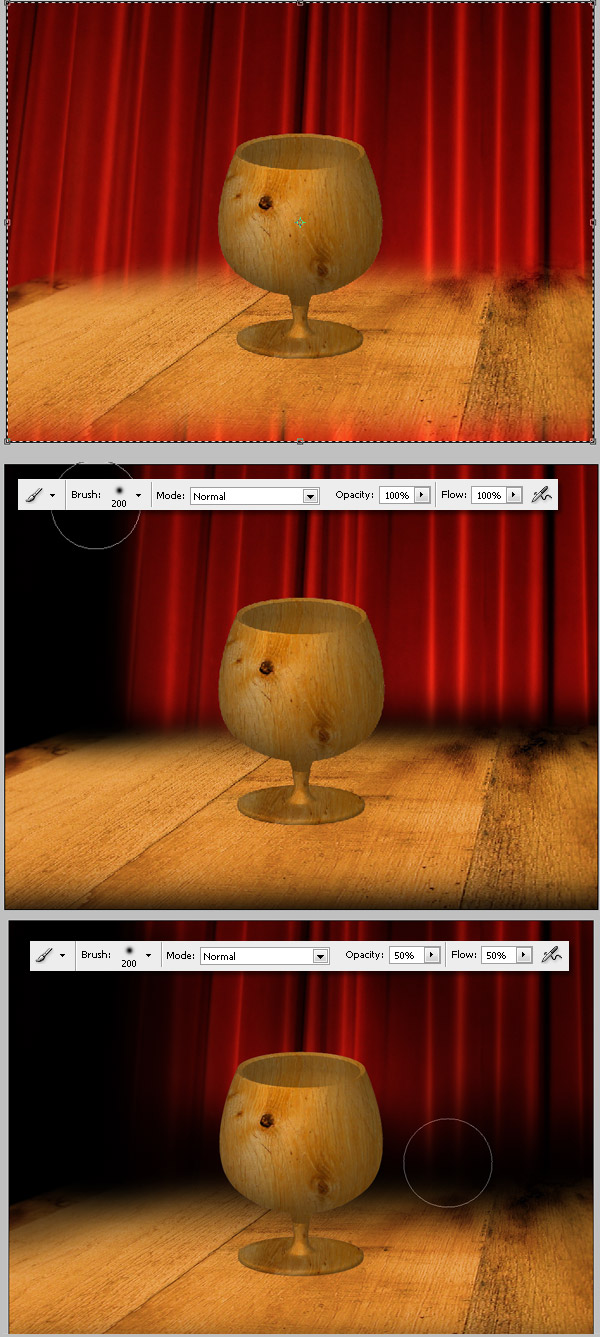
Now we're going to add a background picture, a curtain. First, flip the image horizontally and paste it into a new layer named "Curtain." Using the same idea as the previous step, add a Layer Mask > Reveal all to the "Curtain" layer. Using the same big brush draw some black areas on the layer mask. Once you've finished hiding the main areas, change the brush's Opacity and Flow to 50%, and hide more areas.
Step 14
Now for some Dodge and Burn! Our two best friends. Select the "Cup copy" layer, then using the Burn tool (O) set to 100px, Hardness 0%, and Exposure 20%, burn some areas against the light direction. Do this inside the cup as well. Do it very carefully, and if you need to Dodge some areas of the cup as well.
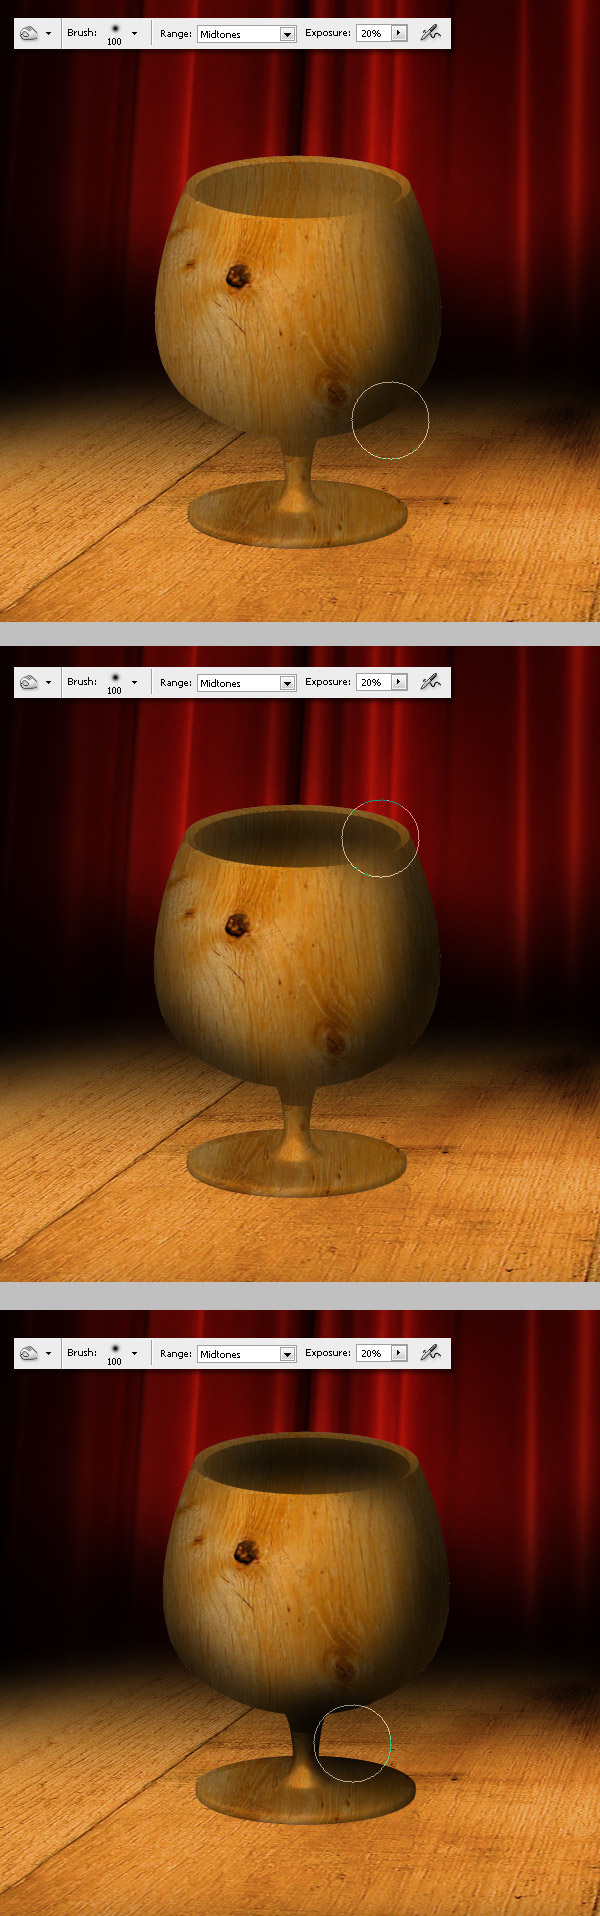
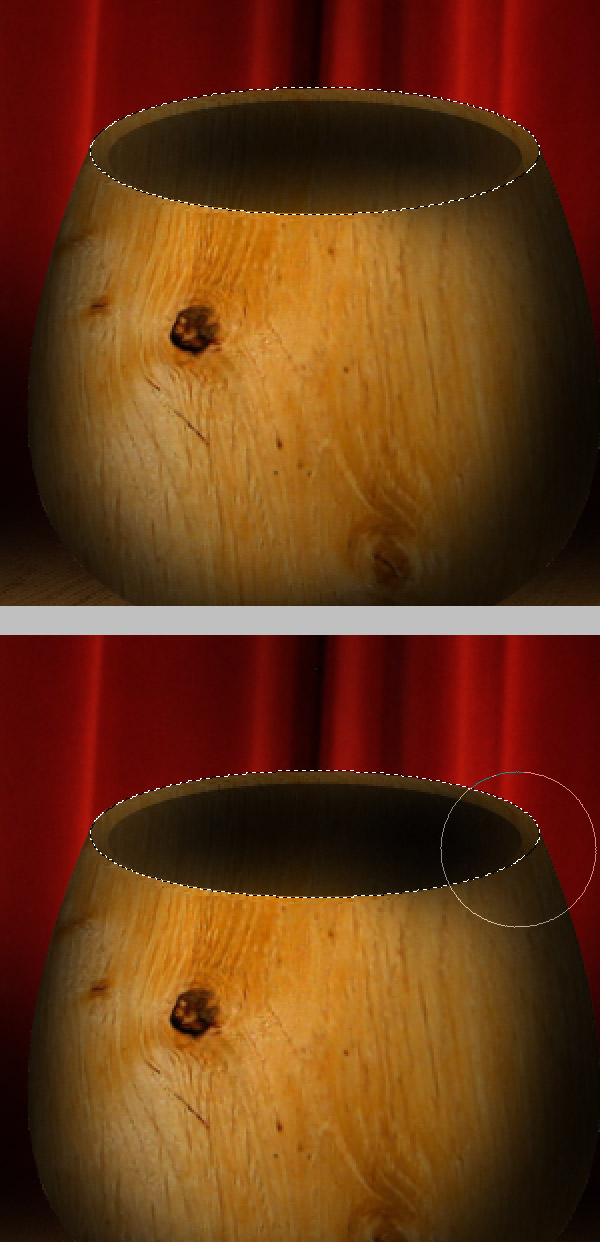
Step 15
A quick tip to burn only the inside of the cup. Select the "Cup copy" layer. Make an elliptic selection covering the entire hole, then select the Burn tool, and start painting. It only burns inside the selection, as you can see below. If you want to dodge outside the selection, Command + Shift + I to invert the selection, then select the Dodge tool and start painting.
Step 16
Duplicate the "Cup copy" layer, then place it above the "Floor" layer and below the "Cup copy" layer. Press Command + U to adjust the Hue/Saturation and set the Lightness value to 100. Select all and cut (Command + X) the black copy.

Step 17
Go to Filters > Vanishing Point and paste the image over the plane. Distort the shadow to make it look like the image below. Next, using a Layer mask or the Eraser Tool, delete some areas of the shadow next to curtain.

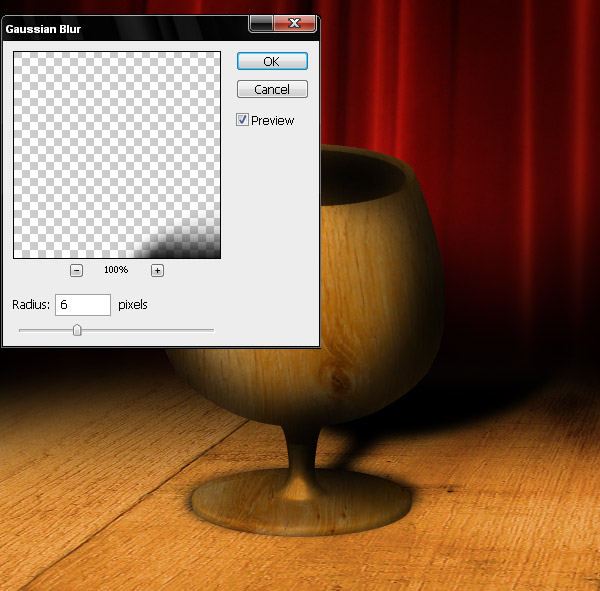
Step 18
Select the "Cup copy 2" (Shadow) layer and go to Filters > Blur > Gaussian Blur, then set the Radius value in 6px. Set the shadow's Blending mode to Multiply and Opacity to 85%.
Step 19
As you can see, there's a tiny part over the cup's base without any shadow. To fix this duplicate the "shadow" layer and paste it above the "cup" layer, then delete everything but the tiny shadow of the cup's leg.
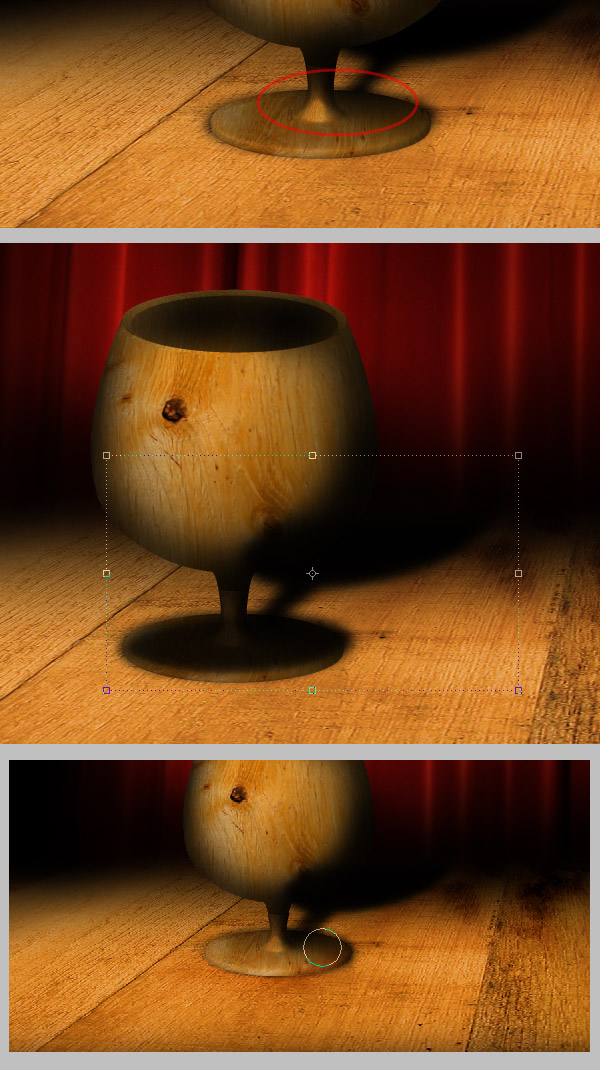
Step 20
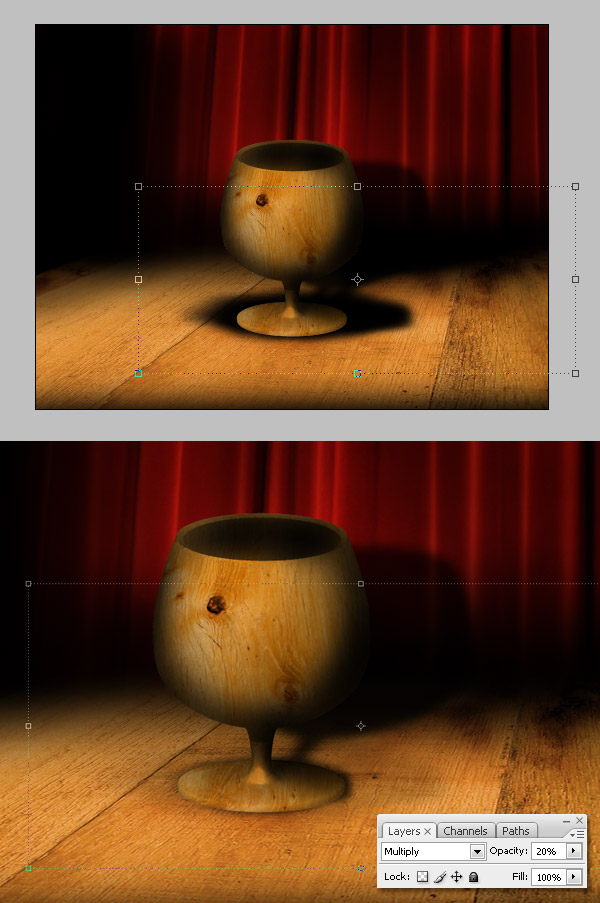
Paste the dark cup again, but this time into a new layer below the floor shadow. Press Command + F to re-apply the gaussian blur, then using a soft Eraser or a Layer mask delete all the extra shadow; We only need the shadow over the curtain. Finally, change the Blending mode to Multiply and the Opacity to 75%.
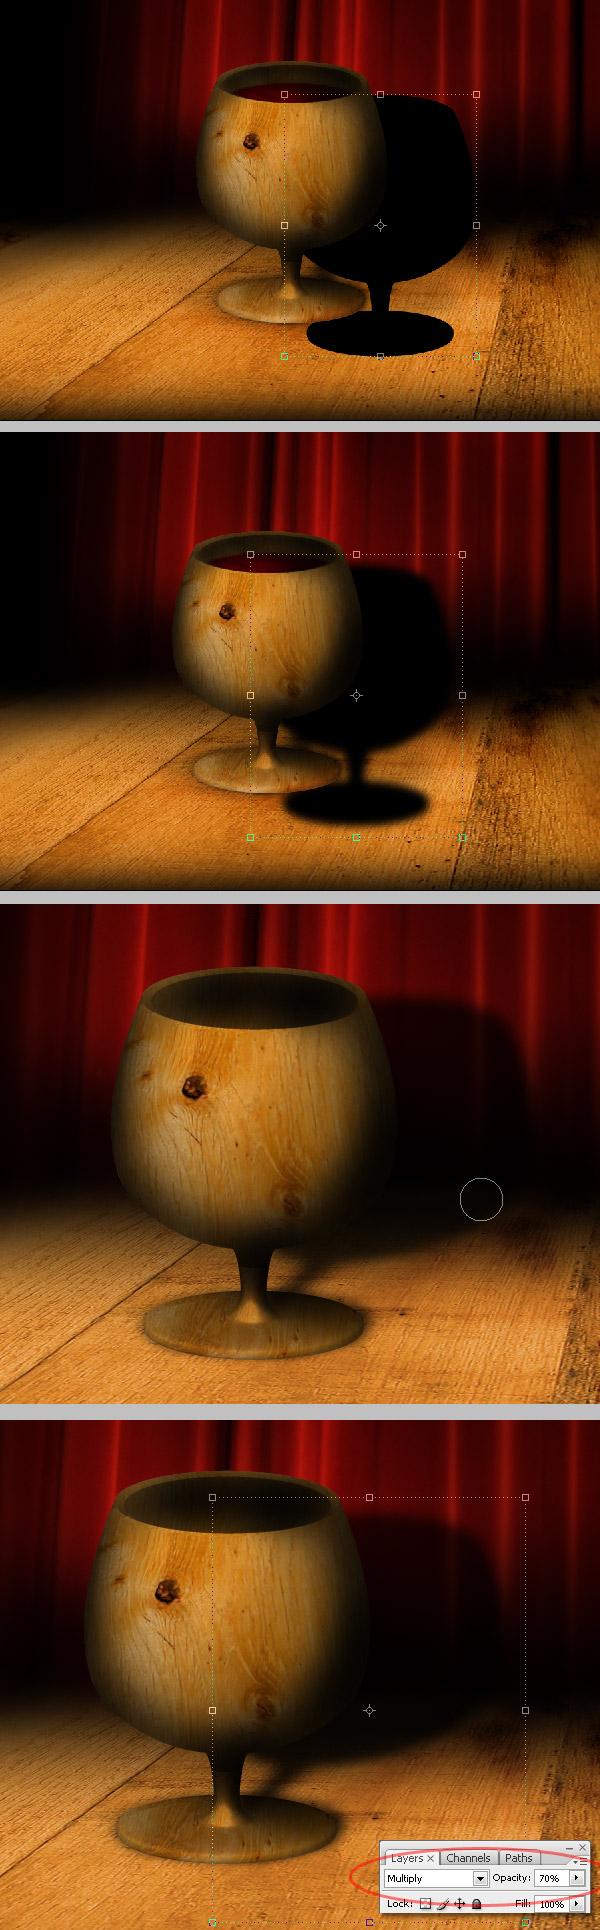
Step 21
Now for an additional shadow detail, duplicate the "floor shadow" layer, make it wider and change the Opacity to 20%.
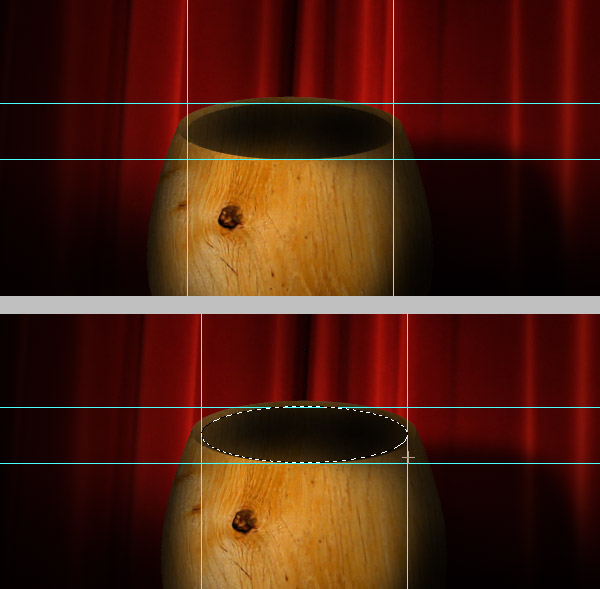
Step 22
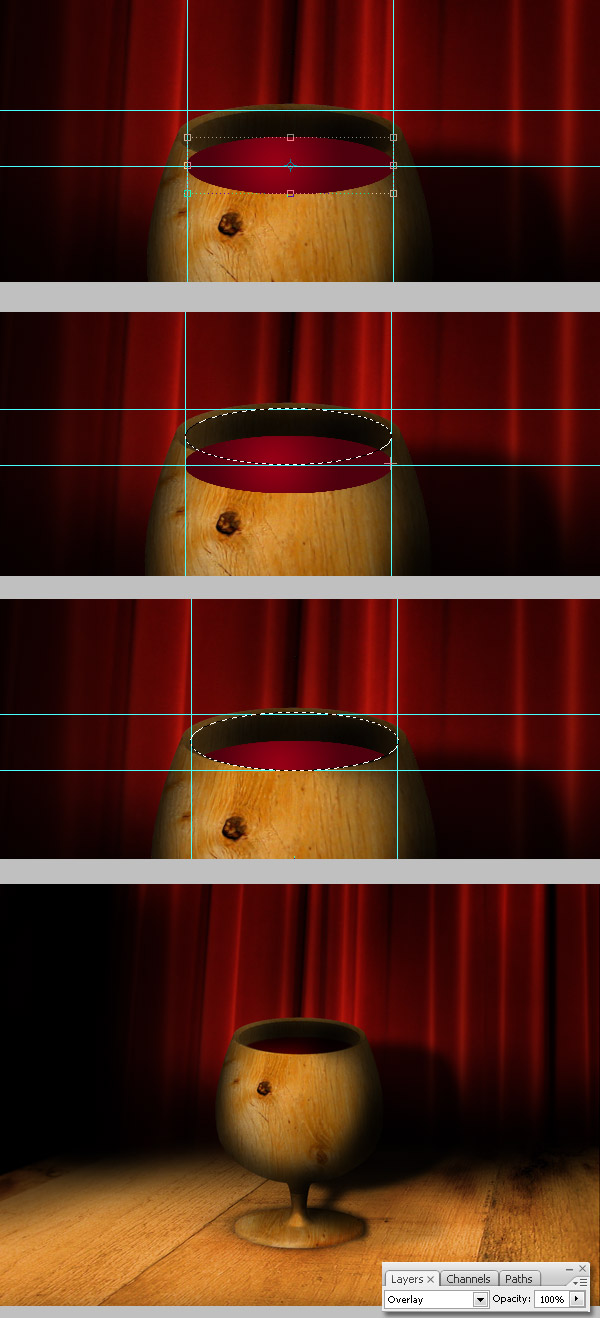
Now, add a bit of liquid to our design - wine is perfect. Show the Guides and draw two horizontal and two vertical guides tangent to the cup's hole. Then using the Eliptical Marquee tool, draw an ellipse using the tangent guides as boundaries.
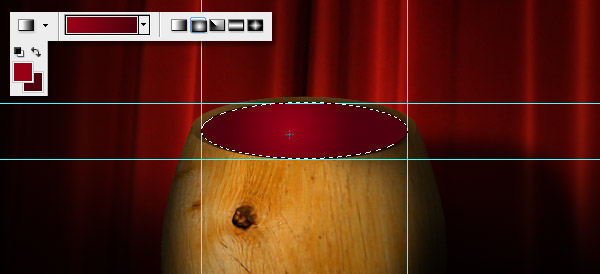
Step 23
Select the Gradient Fill tool, set the Radial gradient mode, then change the Foreground and Background colors to #980015 and #4C000F respectively. Also, fill the selection with the gradient.
Step 24
Move the "Wine" layer a few pixels down. Make the same selection again, Command + Shift + I to invert the selection. and hit Delete to remove the selection. Finally, change layer's Blending Mode to "Overlay."
Step 25
Now you can add more details to the wine, I added two ripples by using a soft white Brush opacity and flow below 50%.
Conclusion
That's it! Of course, you can try to create your very own scene, design different objects, apply other textures, and get outstanding results. Try it! You can view the final image below or view a larger version here. Also, sign up to the PSDTUTS RSS Feed to stay up to date with the latest tutorials.
No comments:
Post a Comment