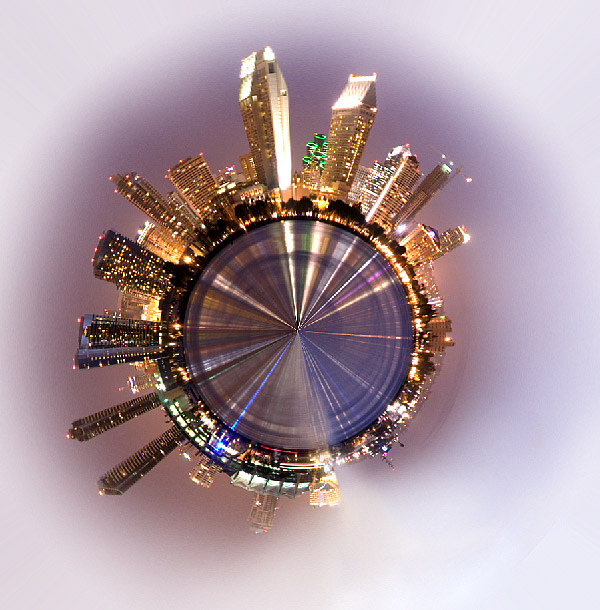
Final Image Preview

Step 1
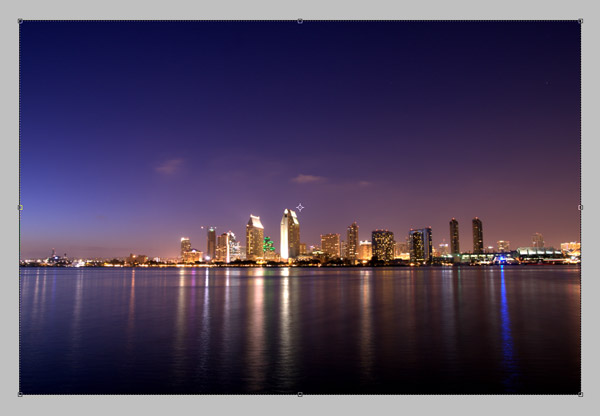
First, search for a panoramic or skyline picture, I found this one. Try to use a big resolution and wide format picture. This is because when creating the planet view, you'll reduce the image's width a lot. Next make a new document with the same dimensions as your picture. Then paste your image into a new layer.
Step 2
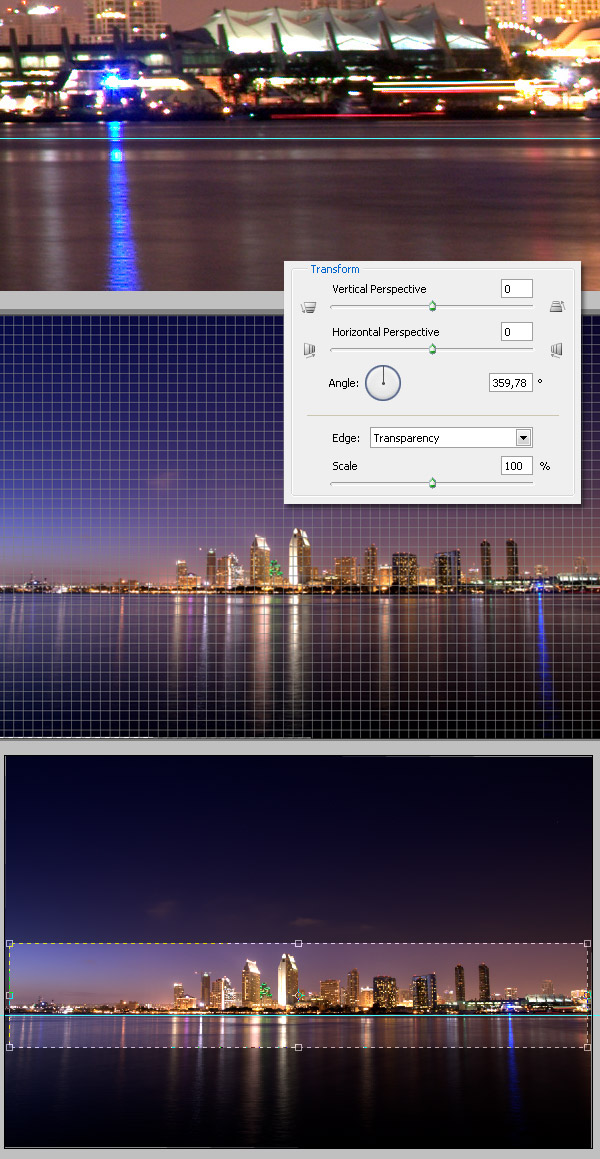
Details are the most important. Draw a horizontal guide to ensure the horizon is fine. In this case, the horizontal perspective it's a little up on the picture's right side. To fix this, go to Filter > Distort > Lens Correction. Then set the angle a tiny bit down on the right side (356,78º it means less than one degree).
You can play with the Perspective angles when you're using a different picture. This is a crucial step. If you don't do it well, you'll have more to do on Step 4 by changing the Offset. Finally, crop the image deleting all the extra sky and sea that we don't need.
Step 3
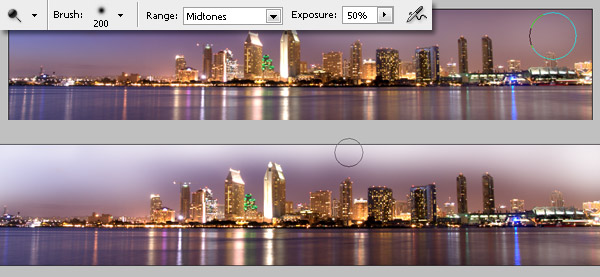
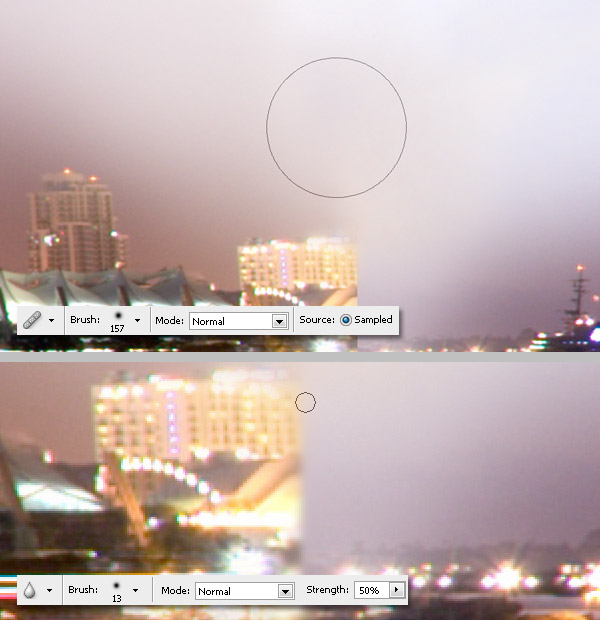
Using a soft Dodge tool (O), highlight the sky. Try to get almost white on both the left and right sides of the sky. Also, highlight the right side water a little bit.
Step 4
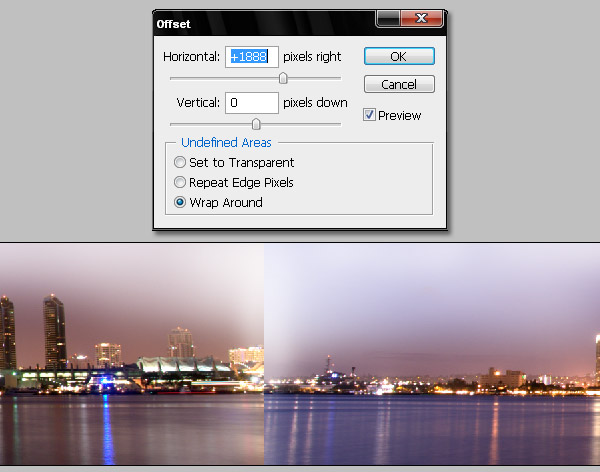
To create the "planet" we need to change the Offset of our image. Go to Filter > Other > Offset. Then change the horizontal value to change the offset to the center of the image. I learned this effect a long time ago watching a video tut on the SXC blog (Create a Photo Planet).
Step 5
Now using the Healing Brush tool (J), fix the hard offset line over both the sky and the water. Also, using a small Blur tool (R), blur the sharpen line of the building next to the offset.
Step 6
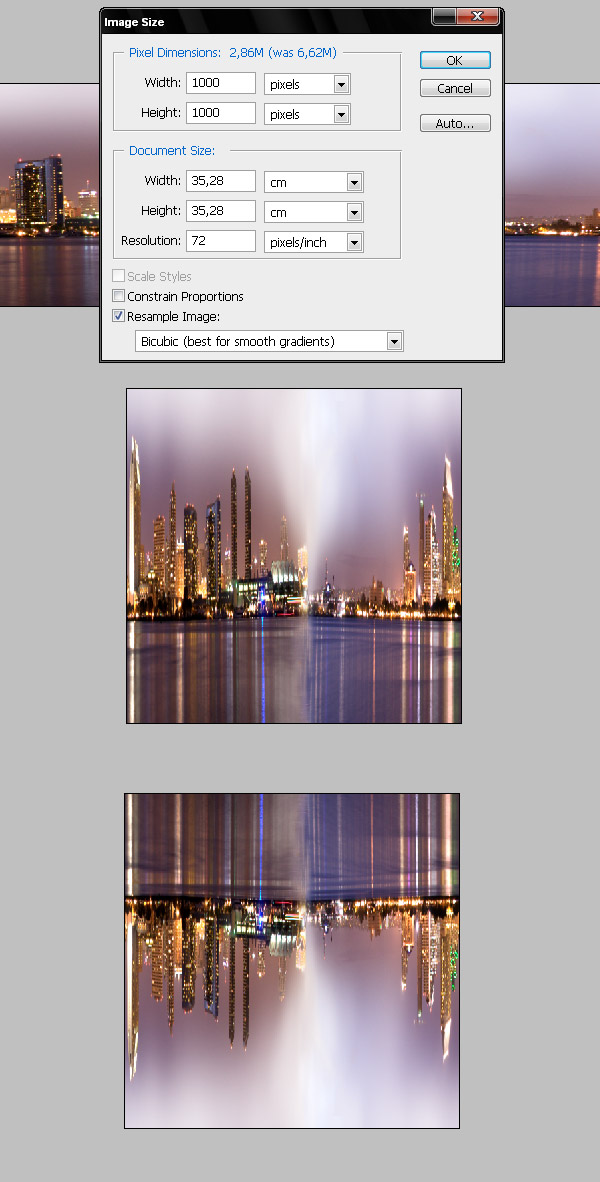
Now go to Image > Image Size and resize the image. Try to keep the height of your original document to preserve the good quality. In this case, I'll make it a little bigger 1000 pixels by 1000 pixels.
Step 7
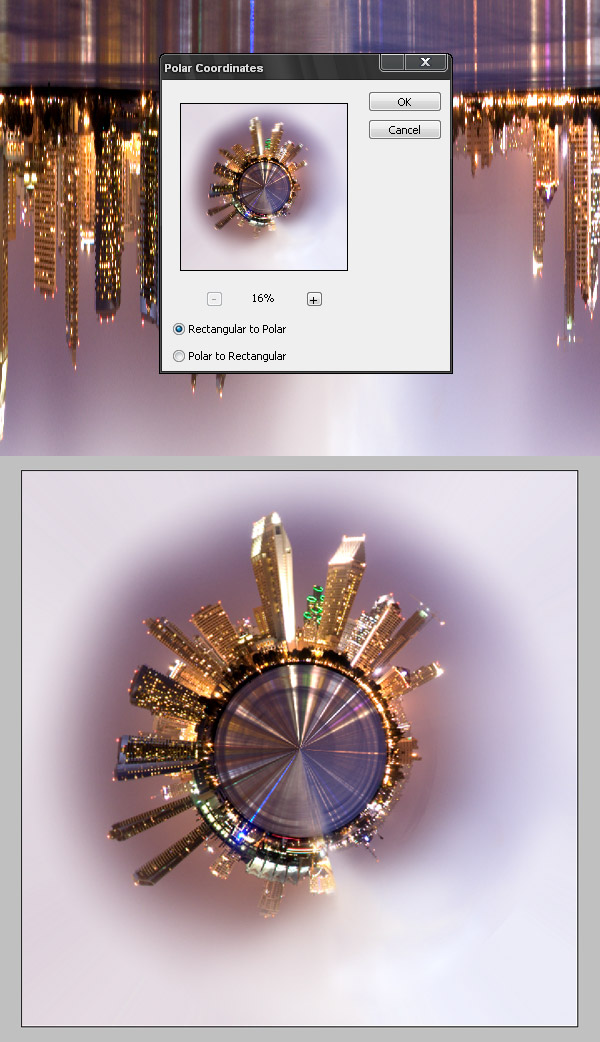
Go to Filter > Distort > Polar Coordinates and select Rectangular to Polar. This way you have a nice "planet" view, but its still needs a few more adjustments.
Step 8
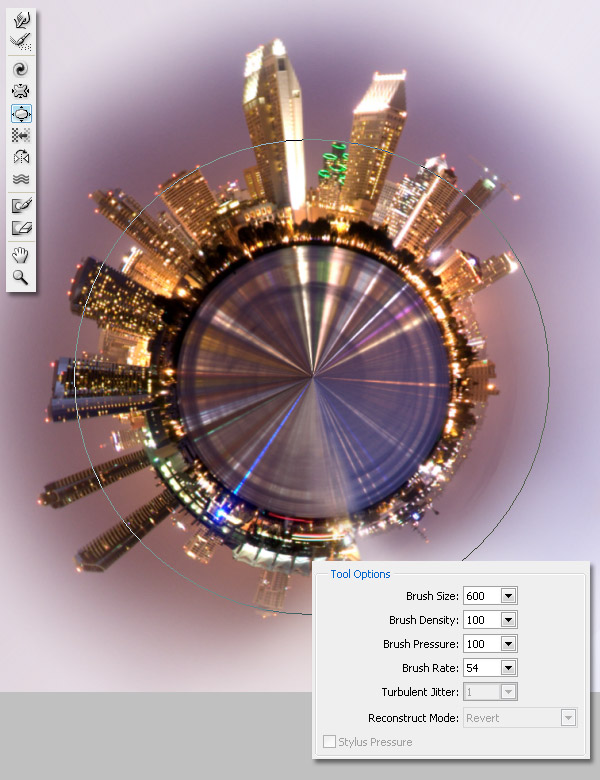
Using the Liquify Filter window, select the Bloat tool. Then use a large brush, like 600 pixels, and make a few clicks to inflate the center of the planet.
Step 9
Apply a quick Filter > Sharpen > Sharpen More. Then you'll can see the building's windows glowing better.
Step 10
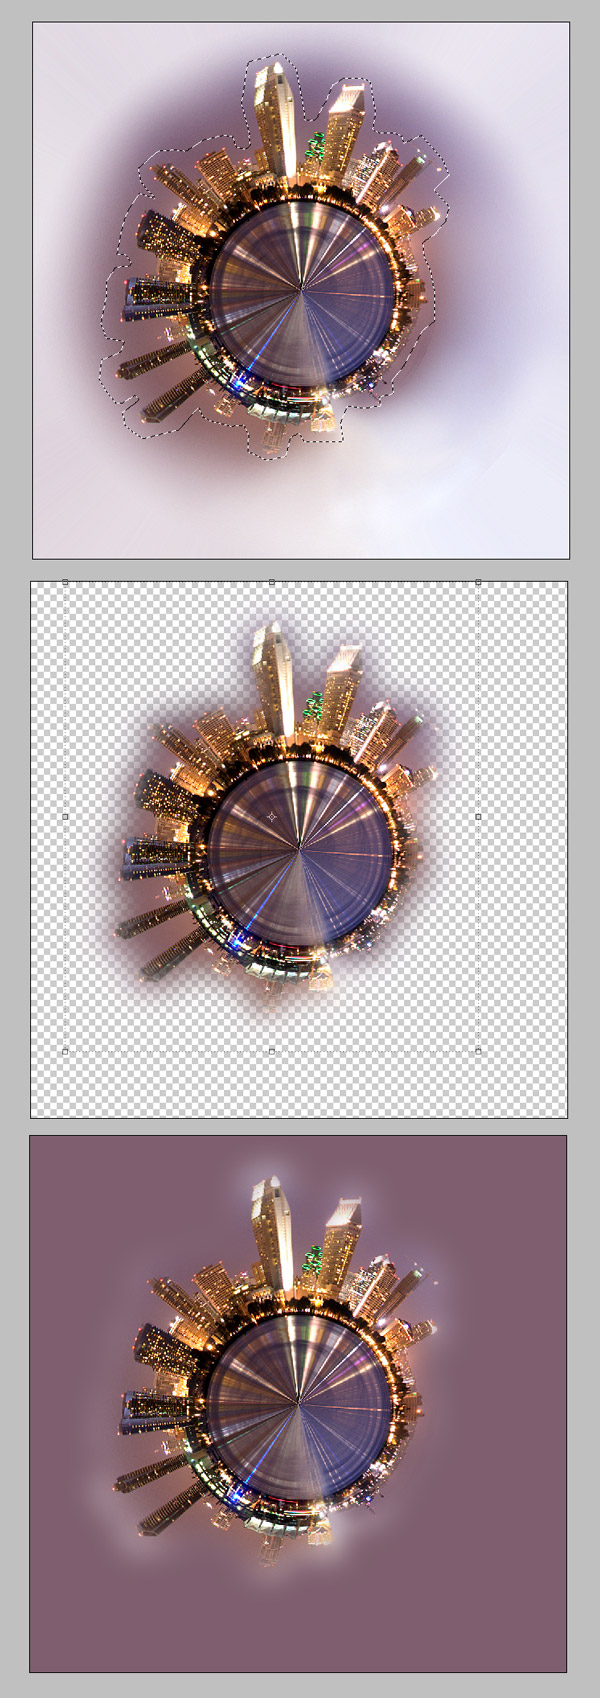
Using the Lasso Tool (L), select the building's shapes. Leave some space between the selection and the buildings. Feather the selection (Ctrl + D) 30 pixels. Then hit Ctrl + Shift + I to invert the selection. Then delete it. Finally, add a new Solid Color Layer (#7F5E6F) below the "planet" layer.
Step 11
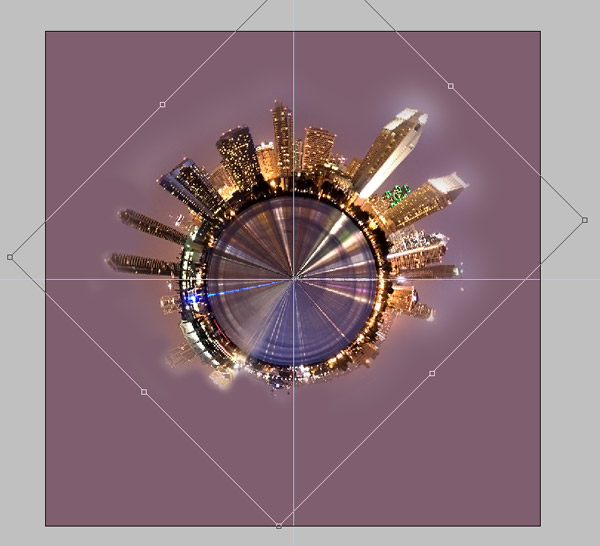
Rotate the "planet" a few angles to put most of the buildings on the top.
Step 12
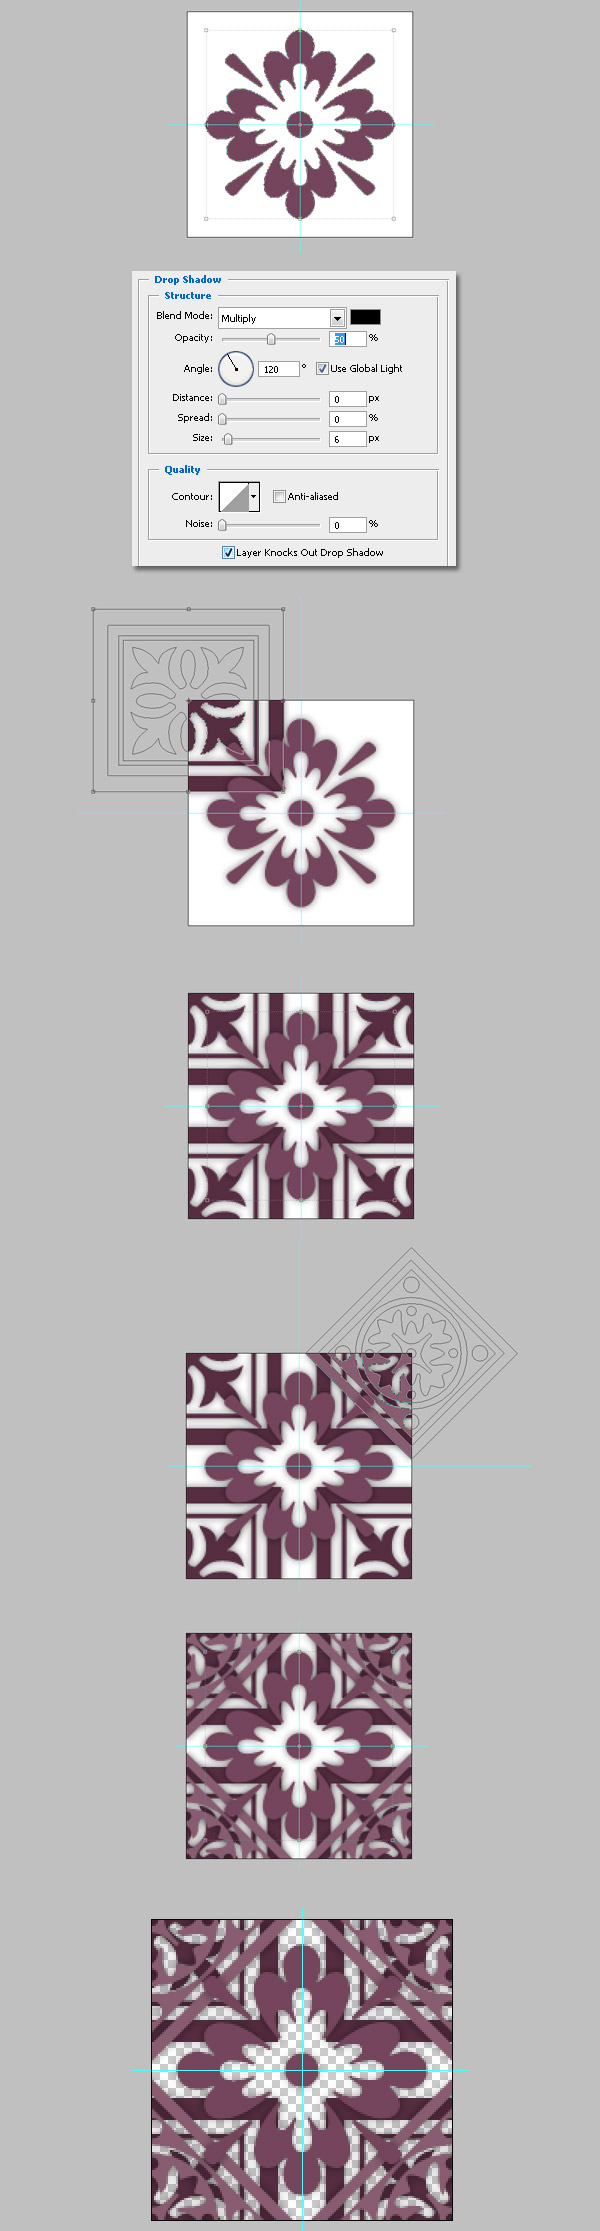
Now we'll create a pattern background. For this I'll use some default shapes that come with Photoshop CS3. Create a new document 150 pixels by 150 pixels. Draw a shape in the middle of the document and apply a Drop Shadow to it.
Then draw more objects over the four corners using the same Drop Shadow effect. Use any color, I used #75455D, #572D41, and #8B5B71. Then delete the background. Go to Edit > Define Pattern and type some name for it.
Step 13
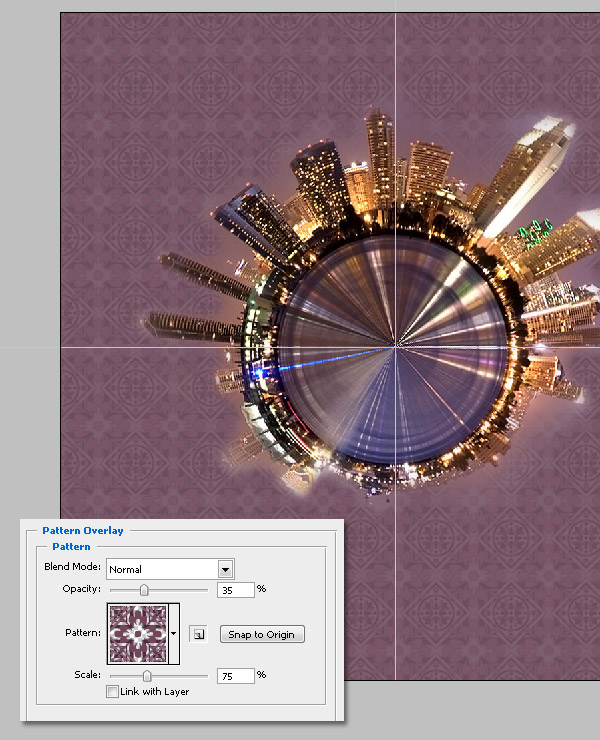
Apply the pattern overlay to the background layer. Use the values shown below.
Step 14
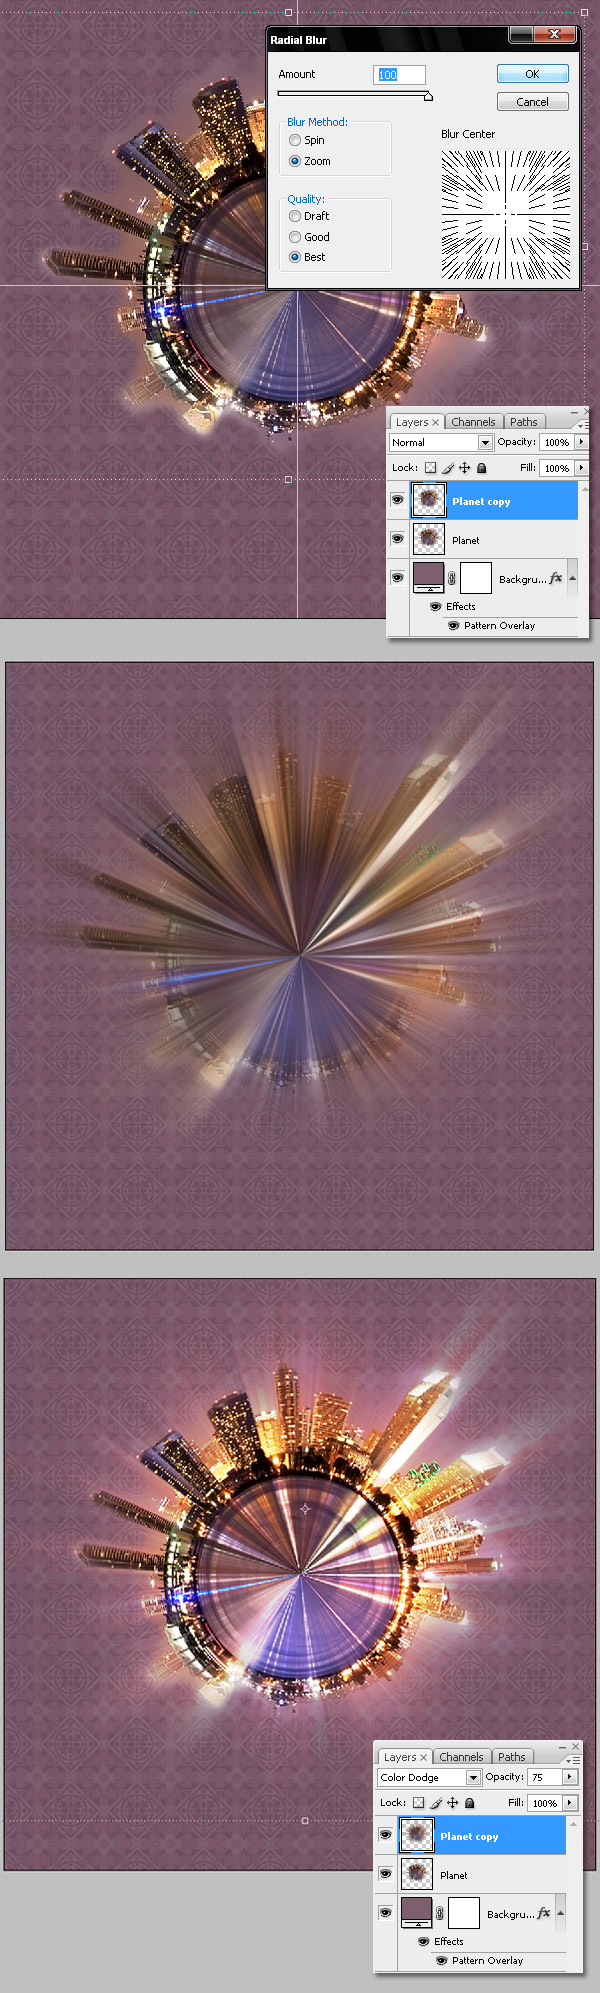
Duplicate the "Planet" layer. Then go to Filter > Blur > Radial Blur and apply a Zoom Blur. Do it twice while pressing Ctrl + F. Finally, change the "Planet copy" Layer Blending Mode to Color Dodge and Opacity to 75%.
Step 15
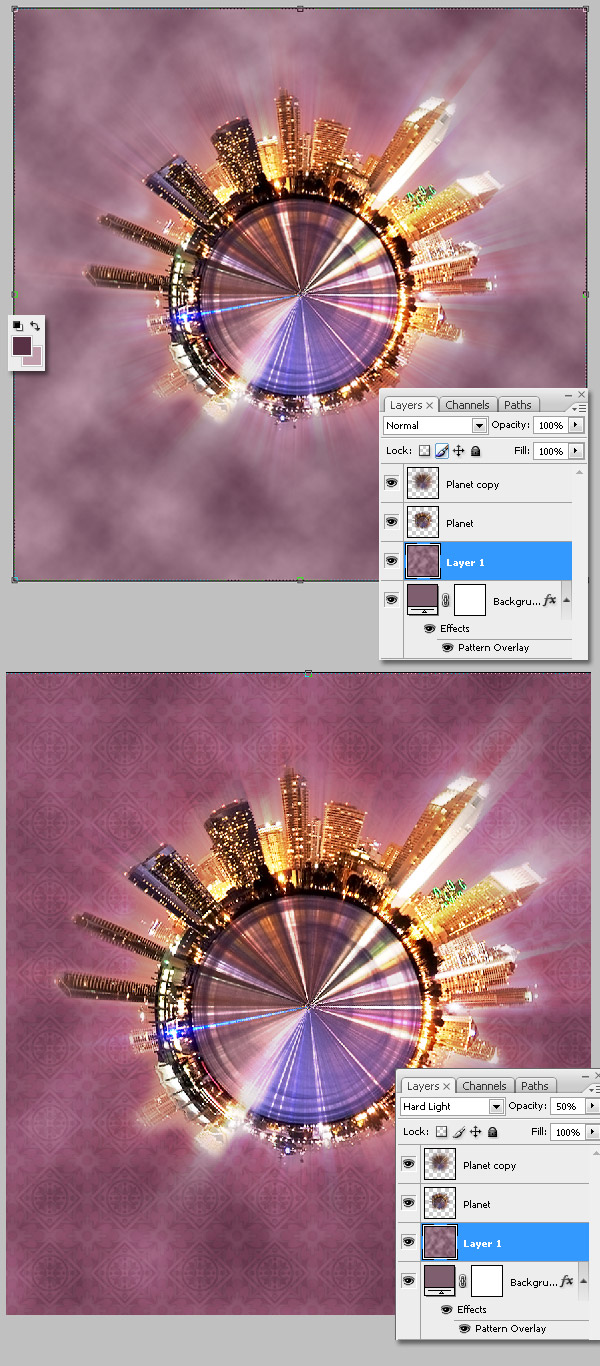
Render some Clouds (Filter > Render > Clouds) into a new layer above the "Background" layer. Use a Foreground color of #583144 and Background color of #C29CAB. Then change the Blending Mode to Hard Light and Opacity to 50%.
Step 16
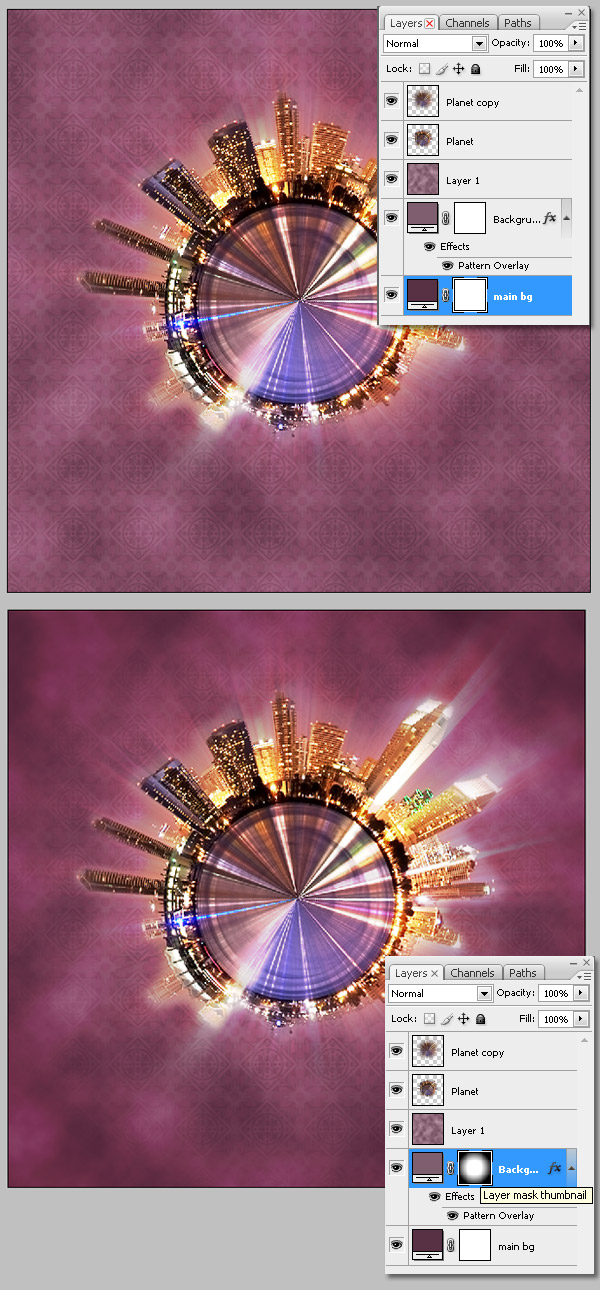
Create a new background layer (#583144) below the pattern background. Select the pattern background, and apply a Layer mask > Hide all, filled with a radial (black - white) gradient.
Step 17
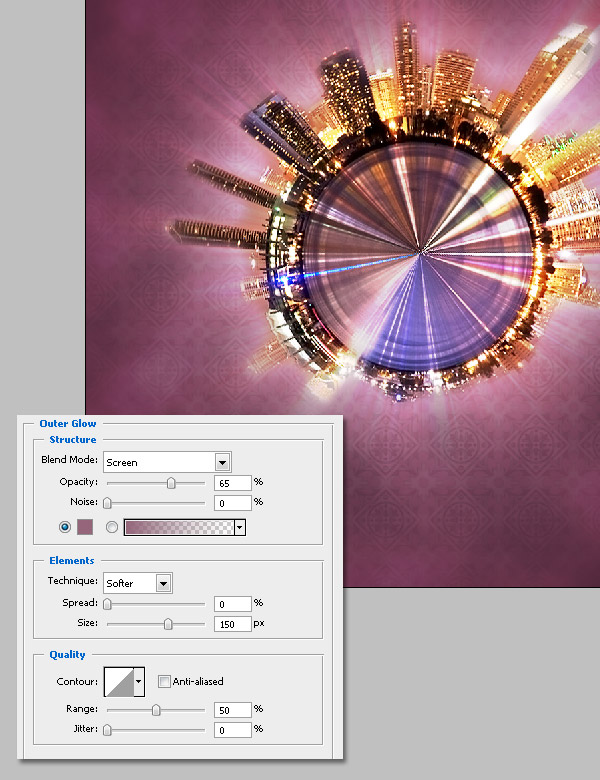
Apply an Outer Glow to the "Planet" layer using the values shown below.
Step 18
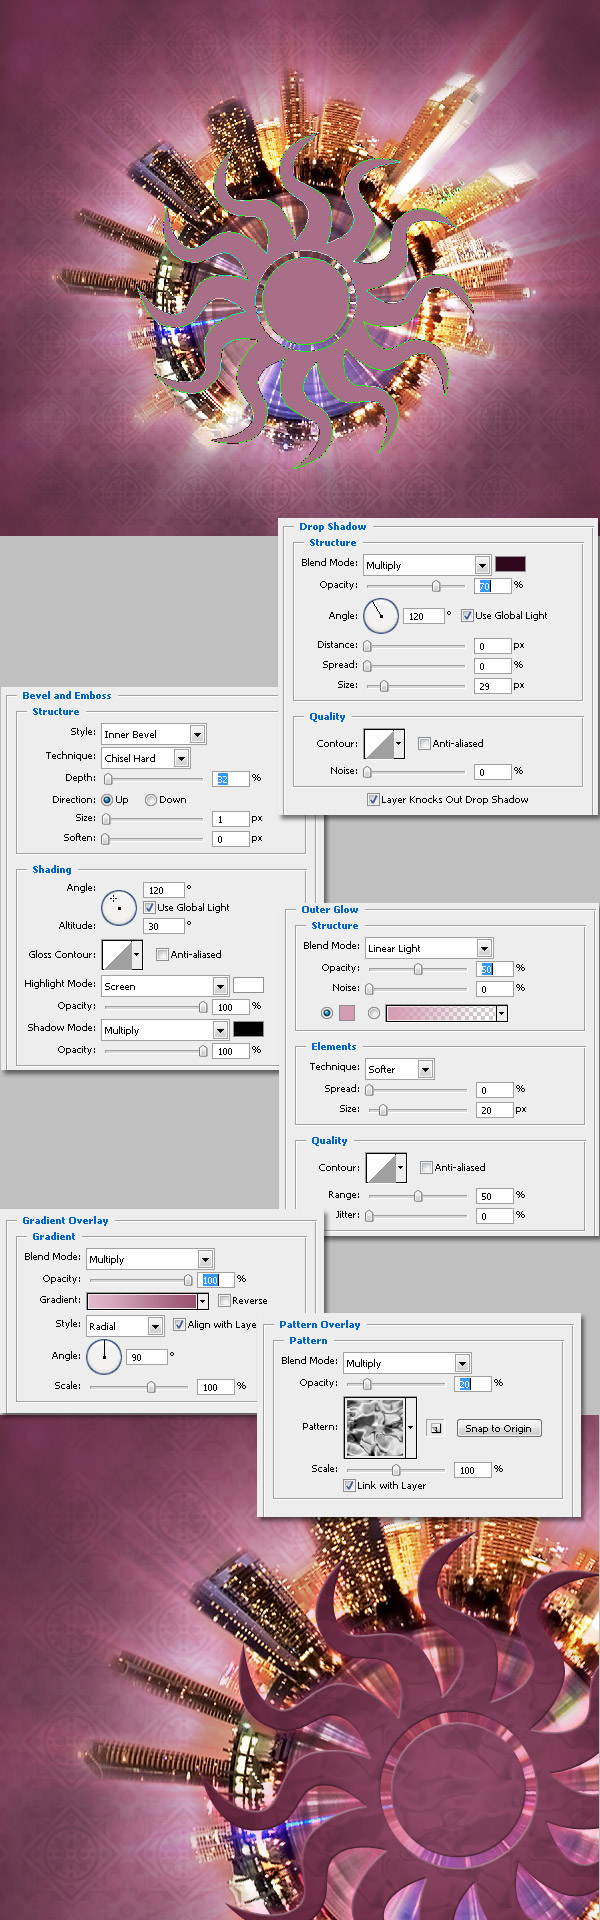
Now draw Photoshop's default "Sun" shape. Below is the list of the effects applied to that shape to make it more impressive.
Step 19
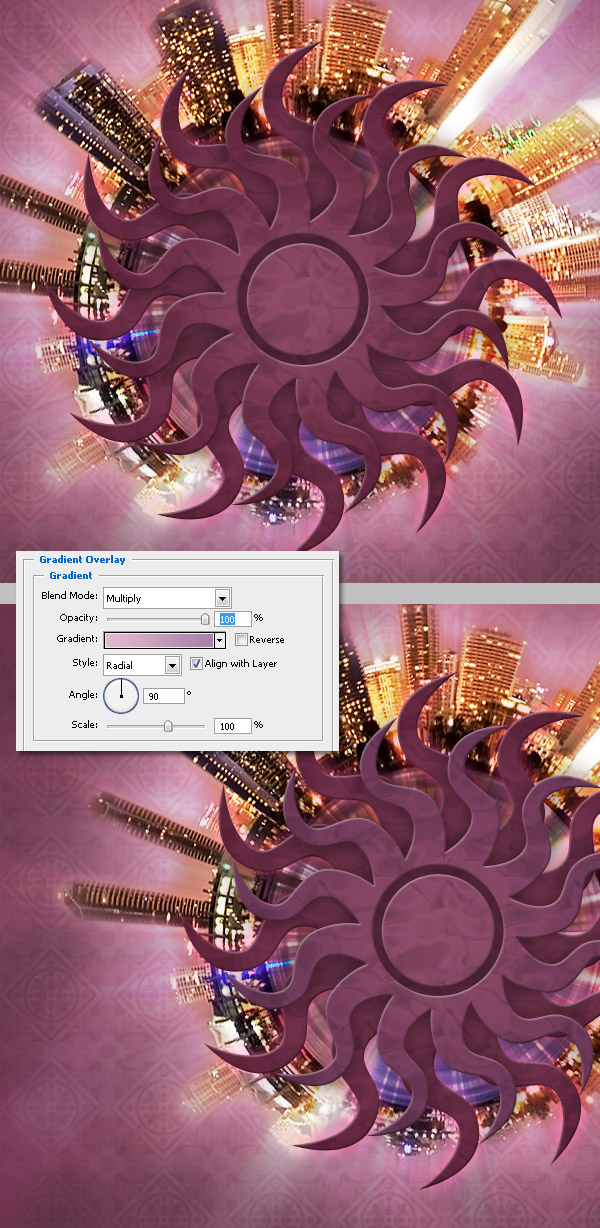
Duplicate the "Sun" layer. Make the copy smaller than the original. Rotate it a little bit. Then change the colors of the Gradient Overlay to make it lighter.
Step 20
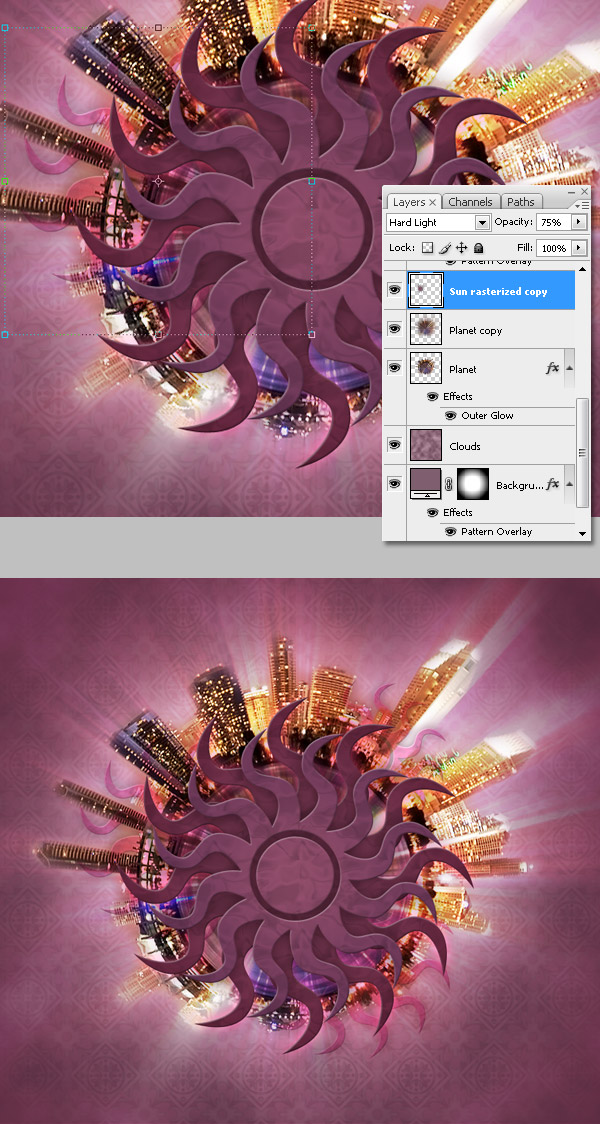
Duplicate the "Sun copy" layer, resize it, and place the copy above the "Planet copy" layer. Make it 60% smaller, and rasterize the copy including the effects. A quick way to do it is by creating a new blank layer above the shape, select both, and press Ctrl + E to merge them. Then change the "Sun rasterized copy" Blending Mode to Hard Light and Opacity to 75%. Make two more copies of it and put them somewhere around the planet.
Step 21
Now let's add some text to our design. I found this old school font called Pacmania. Type the text, "PSDTUTS." Then apply all the Layer Styles in the image below to the text.
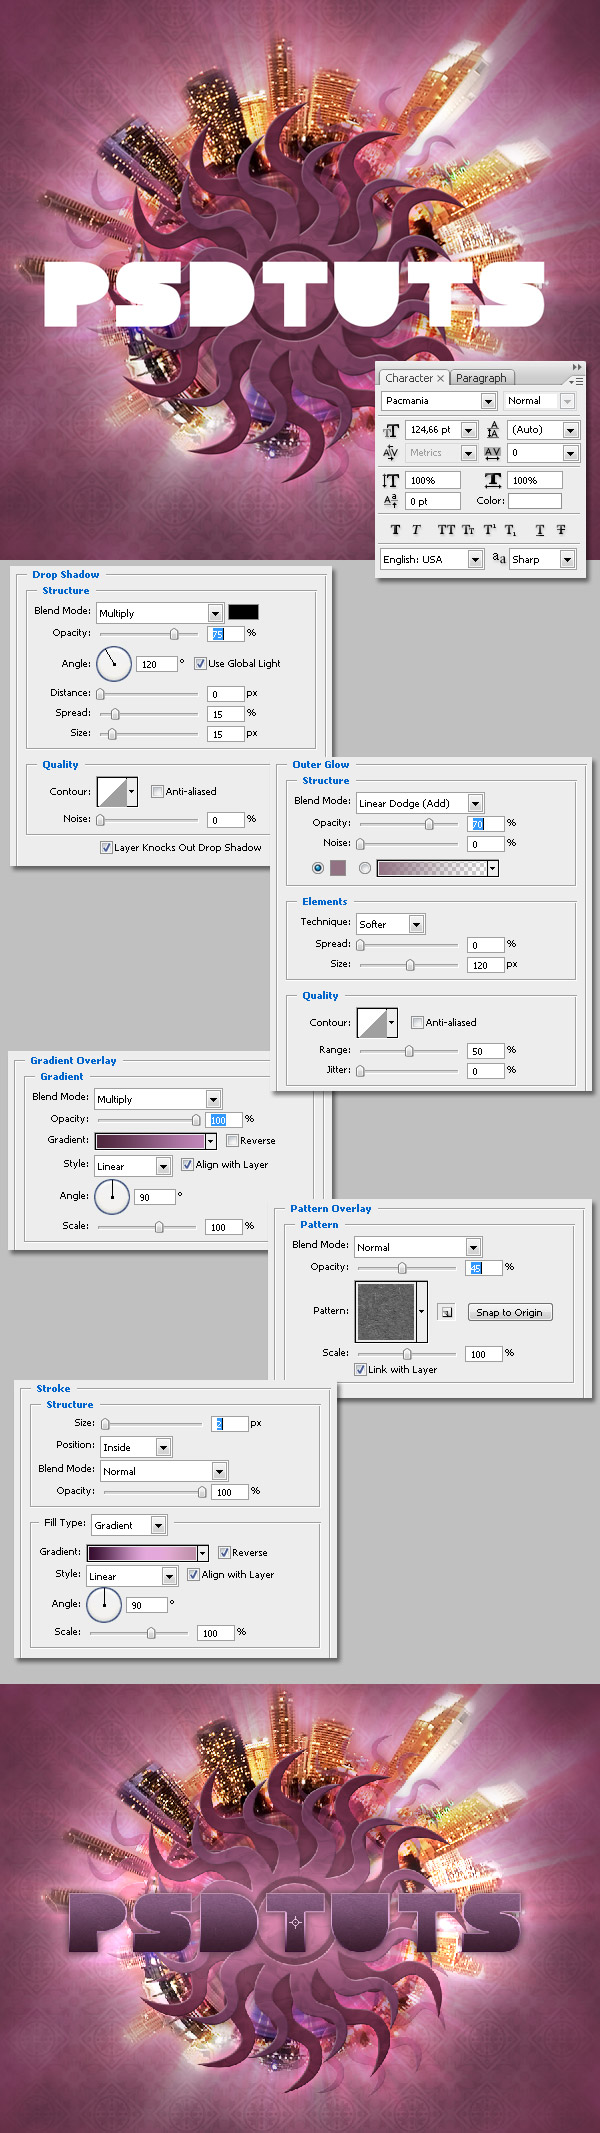
Step 22
Finally, I decided to apply a Layer Mask > Hide All (filled with a white-black gradient) to the "Clouds" layer. You can skip this step if you want to. It's used to add a finishing touch, but at this point it's up to the eye of the designer.

Conclusion
And that's it! A very quick way to get a glowing planet, try your own! Remember the higher quality the panoramic picture, the best the result. I hope you found this tutorial fun and useful.

No comments:
Post a Comment