In this Photoshop tutorial I’ll show you how to create an Alpha Channel using the Calculations dialog and we’ll use it to get a really great abstract photo effect.
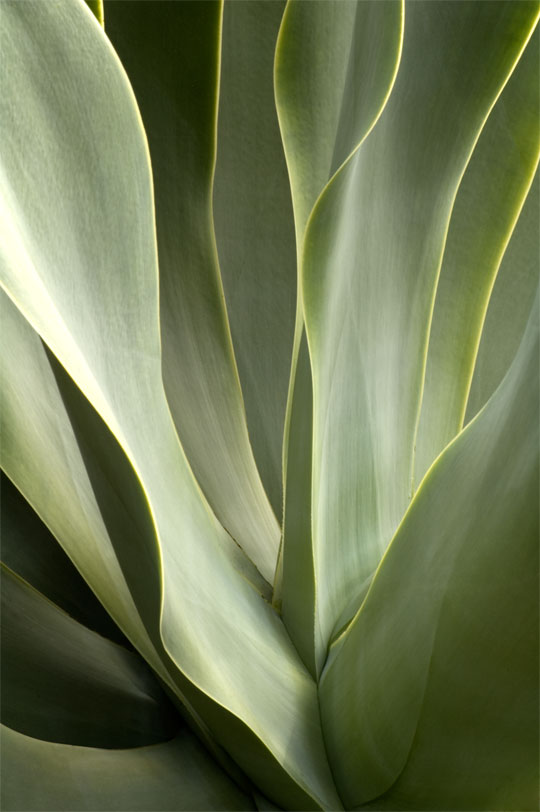
Lets get started by taking a quick look at the photo we’ll be applying this effect to. I shot this close up of a California Succulent and although it makes for a compelling abstract by itself I thought it could make a much bolder statement. The shot is a vertical, so I apologize for the amount of scrolling you’ll have to do in this tutorial due to the image height.
We’ll jump right in and have a little discussion about using Calculations to create a Black & White composite. Although many photographers shy away from using Calculations for it’s reputation of being complex and confusing, it’s actually a rather simple and straightforward method. The Calculations dialog basically allows us to combine any two Alpha Channels together using any of Photoshop’s standard blend modes.
The basic method is this:
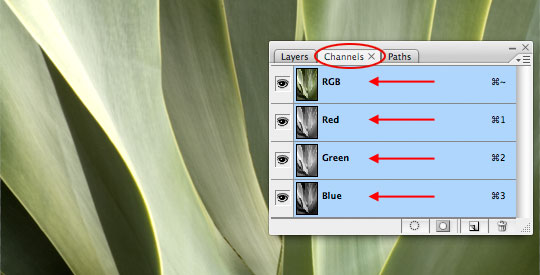
Open the Channels palette by choosing Window>Channels from the main menu (by default it’s a tab in the Layers palette set). In the Channels palette of an ordinary image you have 4 color channels: RGB which is the combined color information for all 3 basic color channels, RED which contains only the information for red, Green witch contains all the information for the green tones in the image and obviously Blue which as you may have guessed contains the blue tonal ranges.
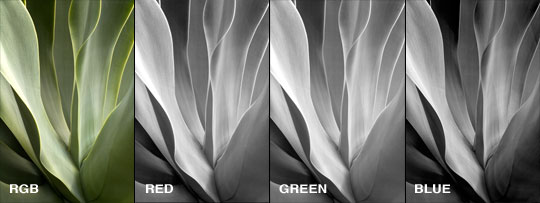
By clicking on each channel individually in the Channels palette we can examine in more detail what information each channel holds. In my image I notice that the Red and Green channels are very similar and that the Blue channel contains quite a bit more contrast and detail. Although we can play with the channel combinations once we open the Calculations dialog, I find it’s very useful to know what’s going on before I get started.
When you’re done examining your channels, click back on the RGB composite channel and switch back to the Layers palette.
Without further hesitation lets jump right in and open the Calculations dialog by choosing Image>Calculations from the main menu. As soon as the dialog opens, you will notice that your image instantly changes to a black and white version representing the default settings for the Calculations dialog. Although we haven’t (and won’t) done anything to alter the original image the stage is now displaying what the color and blending combination we’ve selected will look like.
I’m going to go ahead and use the Blue channel as my first working channel since I know it holds all the heavy contrast for this image. Although the Red and Green channels are very similar, I do know that I liked the detail in the Red channel a little more than the Green so I’ll go ahead and select Red as my second working channel. Finally I’ll choose the Overlay blend mode at the bottom. The Blend Mode is actually a really cool setting to play around with as it will yield drastically different final results. Make sure the Result is set to New Channel and click OK.
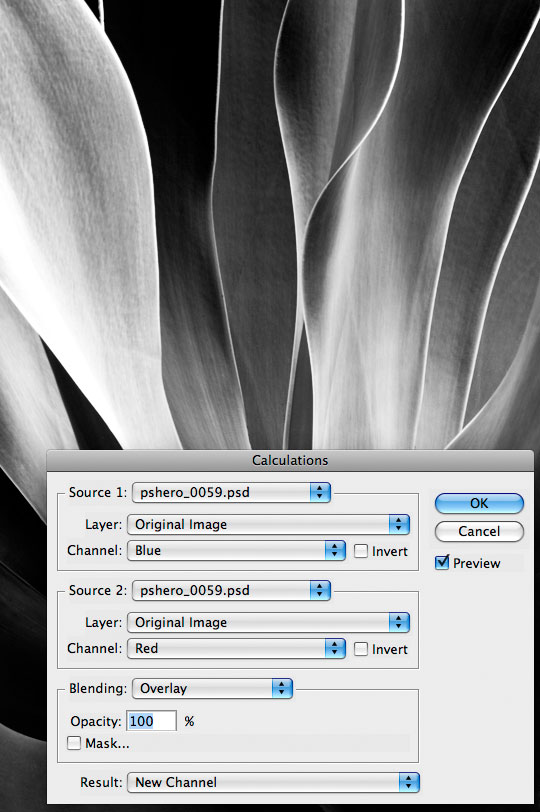
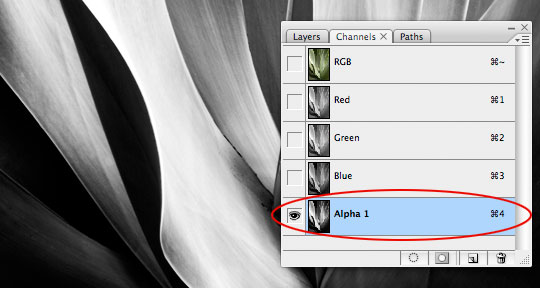
You’ll notice that when you click OK your image doesn’t switch back to the color view, this is because we just created a new Alpha Channel and by default it is automatically selected. Click back over to the Channels Palette for a closer look.
As you can see in the image below a new channel has been created at the bottom of the Channels palette called Alpha 1.
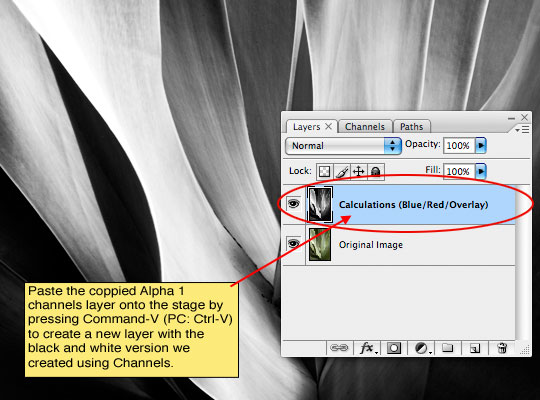
We’re going to copy this channel and paste it on a new layer in the Layers palette so (with the Alpha 1 channel still selected in the Channels palette) start by pressing Command-A (PC: Ctrl-A) to select the entire canvas then press Command-C (PC: Ctrl-C) to copy the contents of the channel. Now click back up to the RGB composite channel to turn all the standard channels back on. Switch over to the Layers palette and press Command-V (PC: Ctrl-V) to paste what we just copied onto the stage. This will automatically create a new layer and place the black and white version we created into it. See, Calculations aren’t so scary!
(*note: I suggest naming the layer based on the Calculations method you used to create it incase you need to know later.)
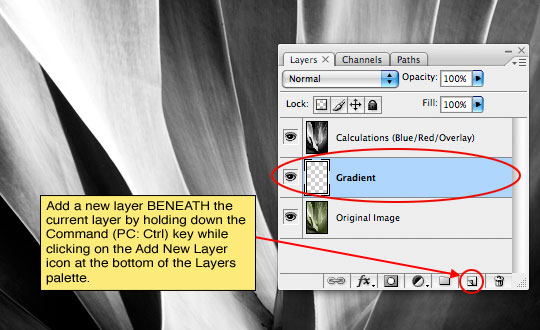
Next we’ll add a layer below the Calculations layer and add a gradient for the layer to interact with. Here’s a neat little trick for you: If you hold down the Command (PC: Ctrl) key when clicking the new layer icon at the bottom of the layers palette the new layer will be added below the current layer. Call this layer Gradient.
Lets set our foreground and background colors in preparation for our gradient. Set the foreground color to a nice light color, I’m going to be using a red/orange gradient so my light color will be #c34614 and the background color (the darker color) will be #561800. Press the G key to invoke the Gradient tool and choose Foreground to Background from the gradient picker in the Gradient options bar and make sure that Radial Gradient is selected.
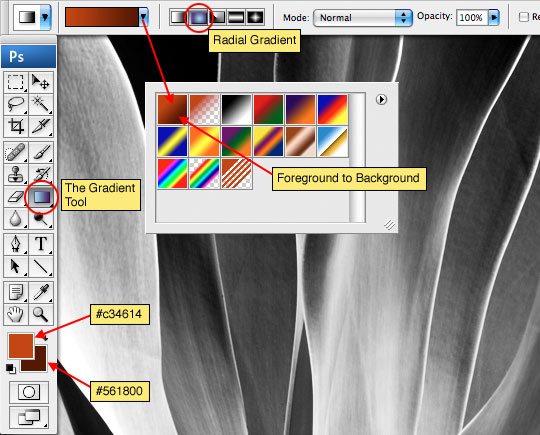
I’m going to now click and drag on the stage to add the radial gradient. Because the lighter color is set as the foreground color, the gradient will naturally go from light to dark so I’ll start at the area I want to highlight and drag away from it to the furthest edge of my image.
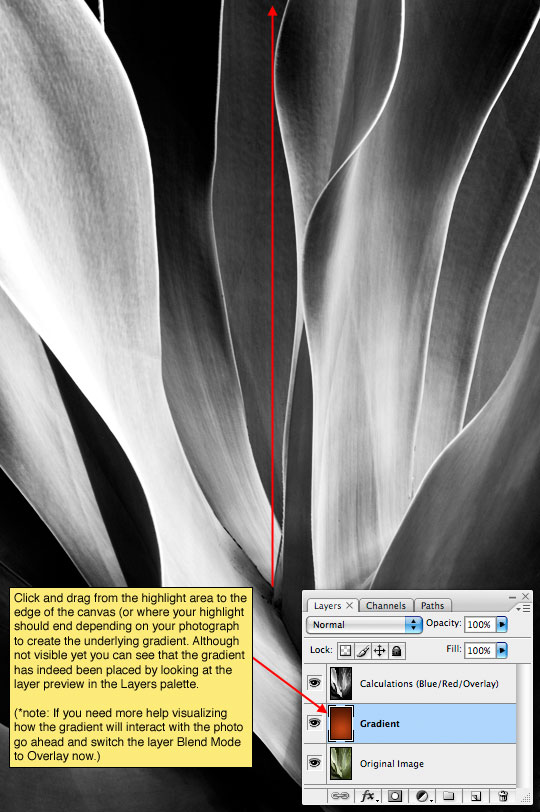
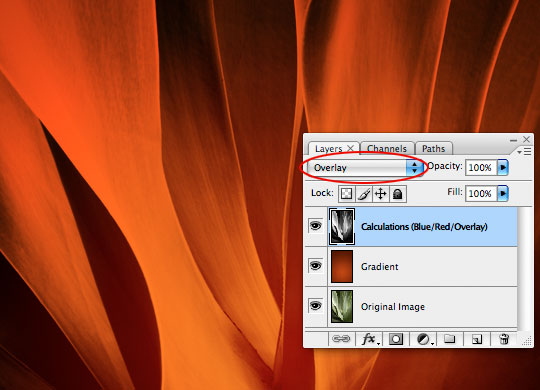
Now lets get these two layers talking to each other by clicking on the Calculations layer and changing it’s Blend Mode to Overlay.
(*note: It may help you to actually perform this step before placing your gradient so you can experiment with different gradients until you figure out what works best for your photo.)
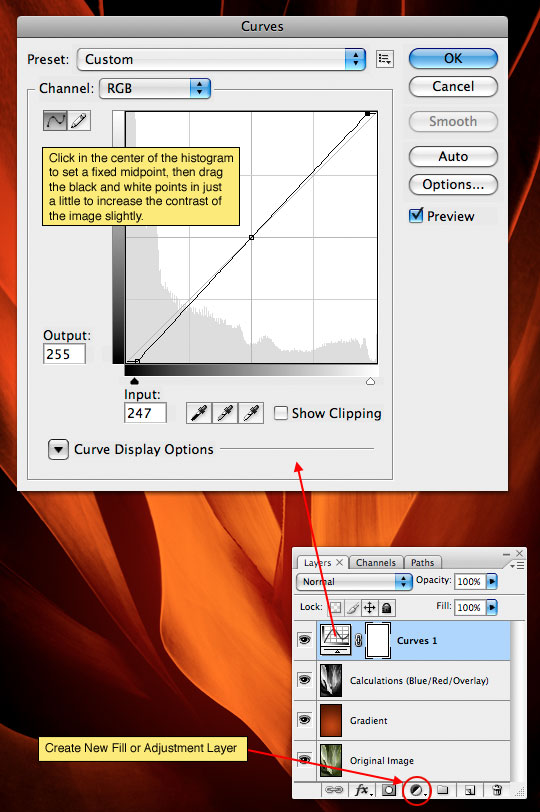
After completing the process you may find that your image needs a little more punch (or maybe not, but mine did), you can achieve this easily by clicking on the Create New Fill or Adjustment Layer icon at the bottom of the Layers palette and adding a Curves Adjustment Layer to the top of the file.
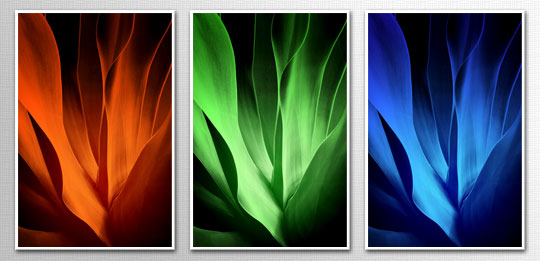
Here’s what my final image looks like… Quite a contrast from the mellow photo we began with.
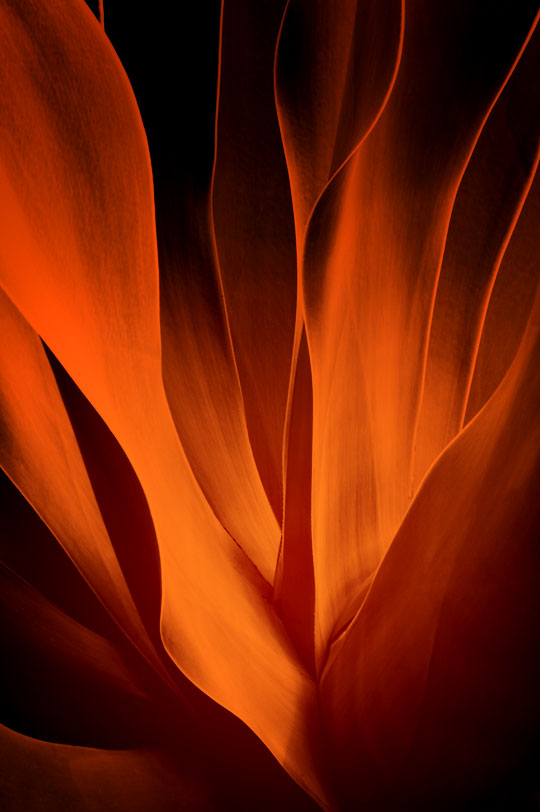
This technique works great for creating multiple versions of the same image in different colors. I hope you’ve learned a little something and that maybe you’ve discovered that the Calculations method of black and white conversion can actually be easy and produce some extremely nice results.
If you’d like to learn more about Calculations and the versatility of Channels in Photoshop you might want to pick up a copy of Scott Kelby’s Channels Book.
Download the psd file : http://pshero.com/assets/tutorials/0059/pshero_0059.zip
No comments:
Post a Comment