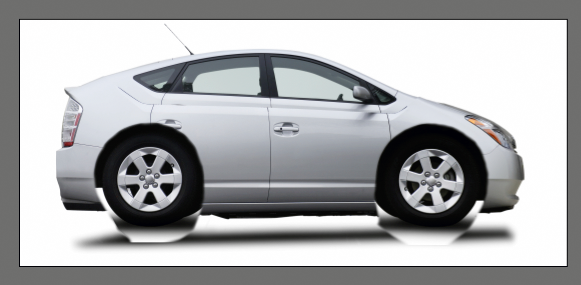
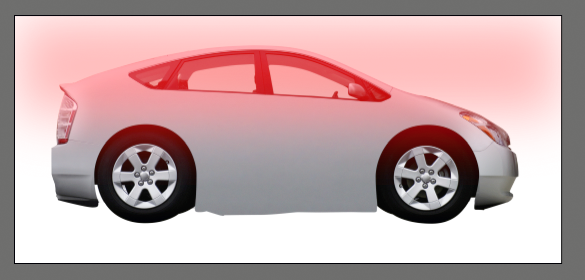
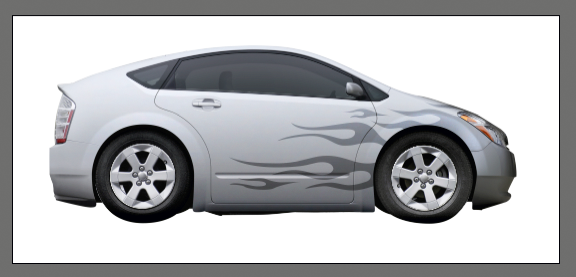
Final Image Preview

Step 1
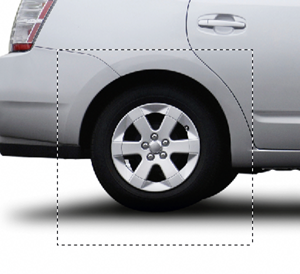
This is the link to the Prius image we'll be using. Create a new document and load the image. Make a selection around the back wheel. Hit Cmd/Ctrl+J to duplicate the pixels to a new layer. Do the same for the front wheel. Turn off those wheel layers for now.
Step 2
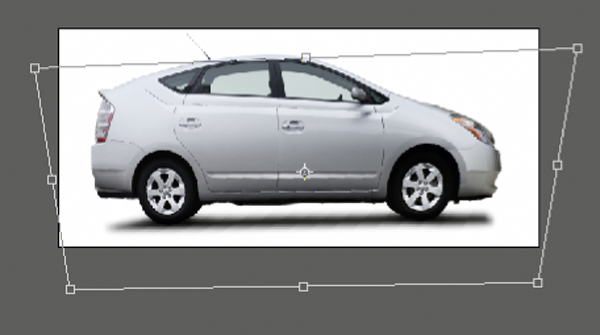
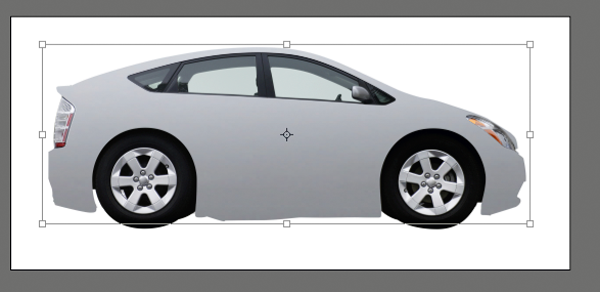
Select the background layer. Then make a selection of the body of the car that includes everything below the windows. Duplicate those pixels. Then transform the body layer by stretching it downwards. Hold Cmd/Ctrl and drag the corner handles to make the edges of the car line up as close as you can.
Step 3
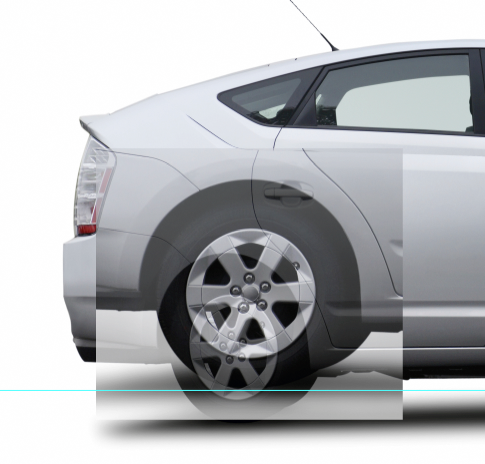
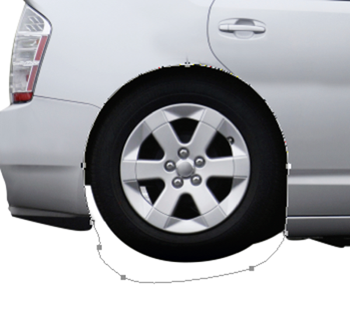
Make a guide where you want the ground to be, just below where the body ends. Turn on your wheel layers and bring the Opacity down to about 75%. This is so you can see what is going on behind them as you transform them. Transform the wheels so they are nice and big. The bottoms should sit right where your guide is. Then turn the opacity back up on the wheels.
Step 4
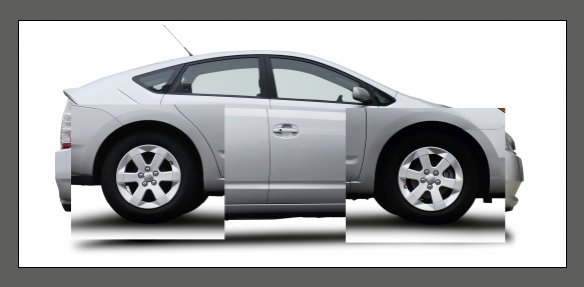
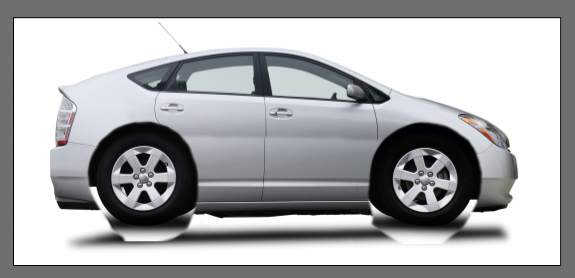
I know that this looks like a mess now, but if you squint, you can see the basic structure of what our car will look like.
Step 5
Nest both of the wheel layers in its own group. Put a mask on each of the groups. Then roughly paint out everything, except the wheels, and the wheel wells. For now, don't worry about being too neat. We are still just defining the structure of the car.
Step 6
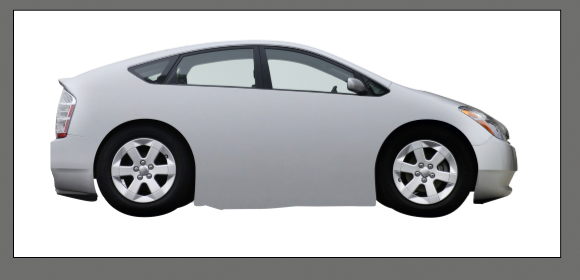
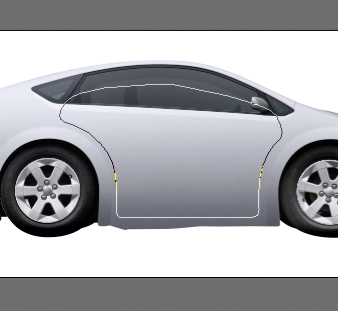
Put a mask on the body layer and paint out the handles and anything else that looks like it shouldn't be there. You should now have something like the image below.
Step 7
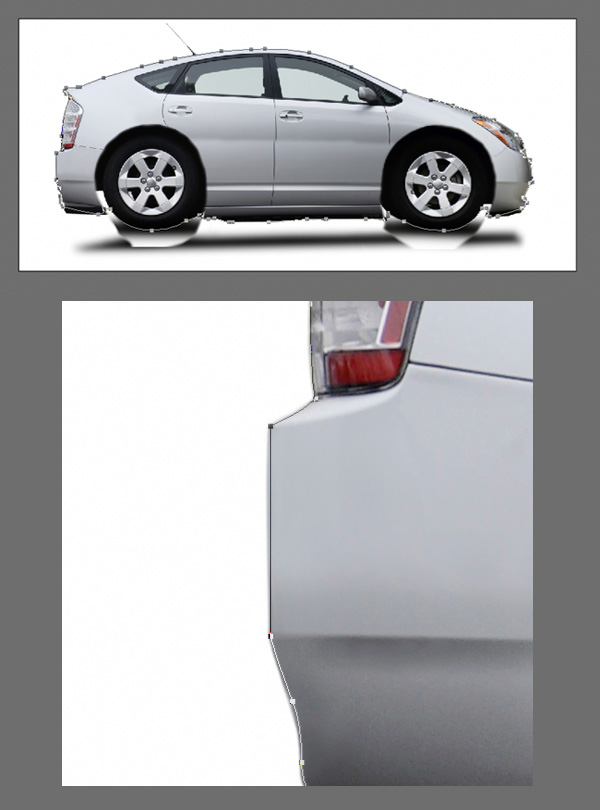
The first thing we want to do is draw a path around the boundary of the car. There are some parts around the wheels that you will have to make up". Below is what my path looks like.
Step 8
Notice from the step above, how my path is always inset into the car by a couple of pixels. This is important! Make sure that you do this. Here is how I handled the wheels and the wheel wells.

Step 9
Make a new layer group called "car." Put all of your layers into it, including the wheel groups and the background layer. Load the selection of the path you drew, feather it 0.5px, and apply the selection as a mask on the "car" group. Click on the path again in the Paths Palette. Then click on the Add Layer Mask button again to apply it as a vector mask on the "car" group. While holding Shift, click on the vector mask to turn it off.
I connected the path to the car in a vector mask so if I ever need to scale or move the car, the path will scale and move with it. This way, I can always have the path handy. If I ever need it later, it will still fit the selection.
Create a new Solid Color Adjustment Layer and fill it with white. Move that layer below the car group. It will serve as our white background.
Step 10
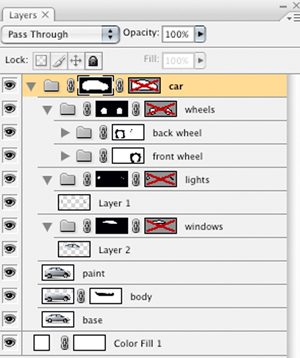
Now we need to isolate the basic components of the car. I am going to organize it into wheels, paint, lights, and windows. Let's start with the wheels.
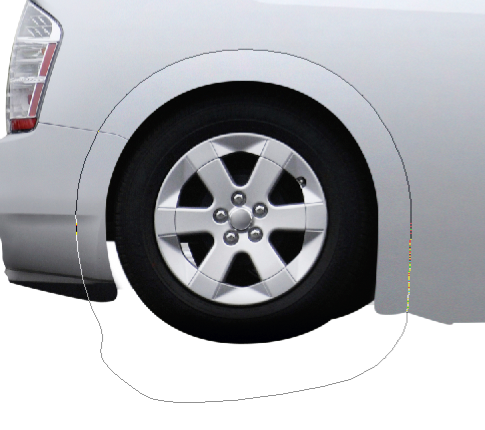
Nest your two wheel groups into a new group called "wheels." Next, draw a path that will represent the edge of the wheel wells. When you are doing this, you don't have to draw a path around anything that you already have. In this case, we have already created a path around the boundaries of the car, so we don't have to do that again. Look at my paths below, for an example.
See how I don't have to make the path along the bottom of the wheels? This is because I already did that before. The "wheels" group is nested inside the "car" group, so the bottom of the wheels are already masked off. After you draw the path for the wheels, load the selection of the path, feather it 0.5px, and apply it as a mask to the "wheels" group. Now apply the path as a vector mask like we did before. Turn off the vector mask by holding Shift and clicking on it.
Step 11
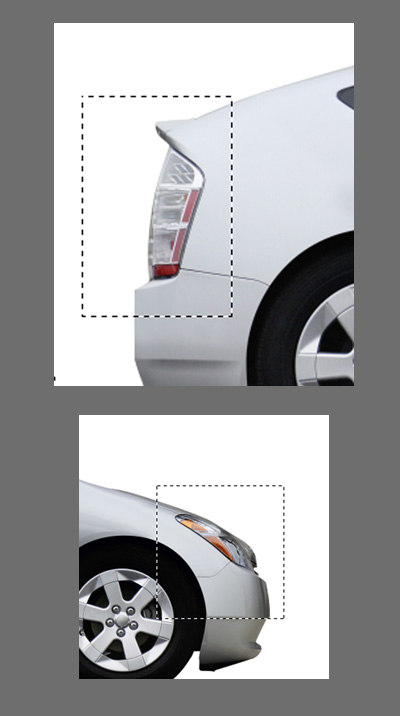
Let's work on the Lights next. Select the "base" layer and the "body" layer and duplicate them. Merge the 2 duplicates into one layer by hitting Cmd/Ctrl+E while they are selected. Name the duplicate "paint." Draw a marquee around the lights and hit Cmd/Ctrl+J to duplicate the selection into its own layer.
Step 12
Put that new layer into a new group called "lights." Go back to the "paint" layer, draw a marquee around the windows, and hit Cmd/Ctrl+J. Put that new layer into a new group, and call it "windows."

Step 13
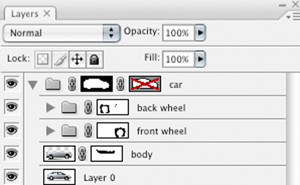
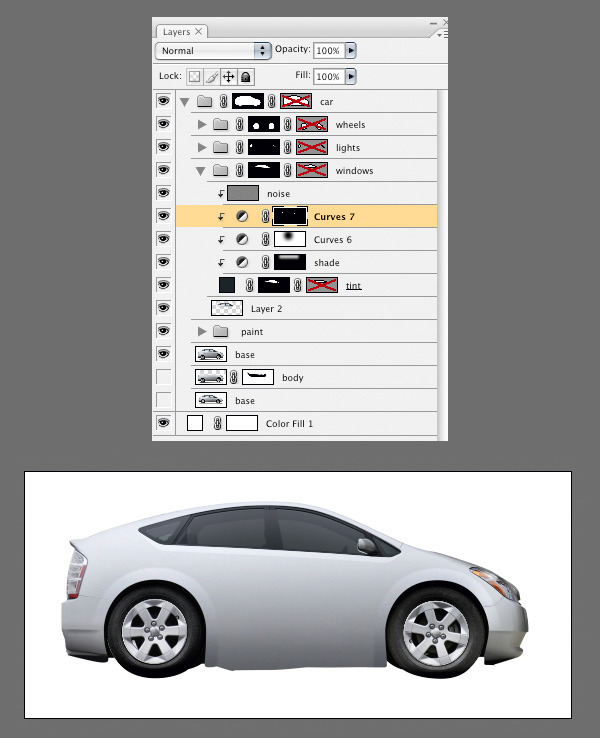
Now draw paths around the lights, load the selection of the path, feather it 0.5px, and apply it as a mask on the "lights" group. Finally, apply the path as a vector mask on the lights group. Then turn it off.
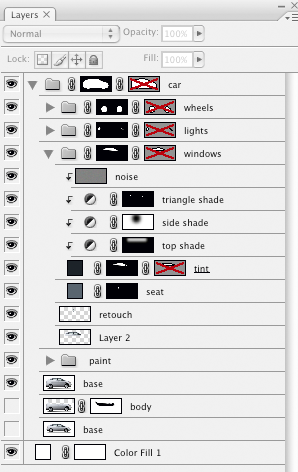
Do the same for the "windows" group. Below is what my layer palette looks like.
Note that we don't need to make any paths for the "paint" layer because we already did for everything else. The paint falls in the negative space that we created for all the other components.
Step 14
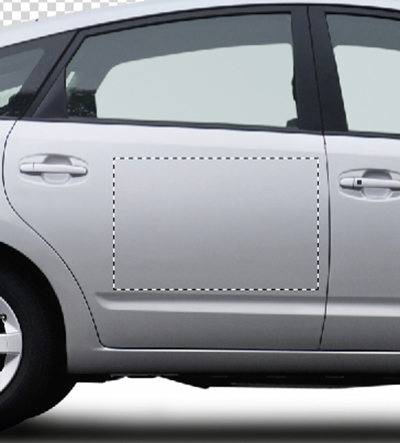
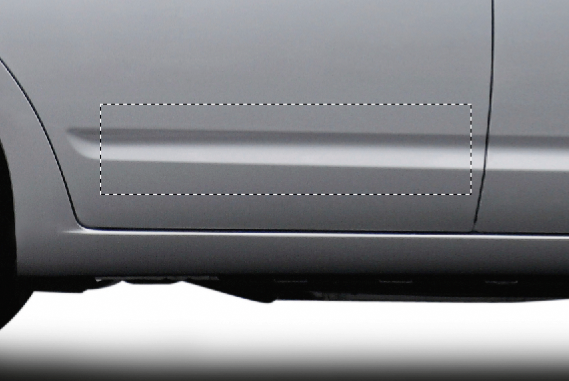
Now that we have isolated everything, we have freedom to concentrate on one component at a time. Lets clean up the "paint" section. We are going to turn this into a 2-door car, so we need to get rid of some lines and one of the handles.
I prefer to work with a clean slate. While holding Option/Alt, click on the eye icon on the "base" layer. This turns off all layers except the one you clicked on. It's handy if you need to work on a specific layer. Make a marquee around the part of the door that is a clean gradient.
Step 15
Option/Alt-click on the eye again to turn off isolation on the layer. With the "base" layer selected, hit Cmd/Ctrl+J to duplicate the pixels. Bring the duplicated layer just above the "paint" layer and call it "grad." Transform the "grad" so that it covers the entire paint section. Gaussian Blur the "grad" layer by 15px. How is that for a clean slate?
Step 16
Now I am going to add a mask to the "grad" layer and make selections with various feathers to mask out the parts where we want it to be see transparent.
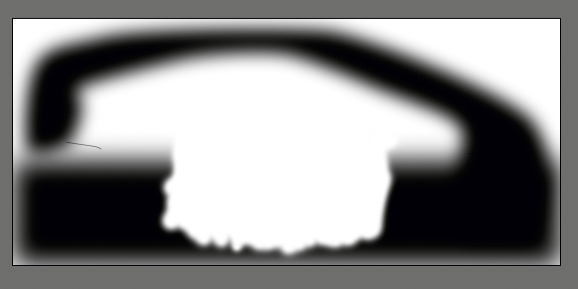
Step 17
Here is what my mask for the "grad" layer ended up looking like.
Step 18
I left the handles out because I am going to go in and do those later.
Step 19
Make a marquee that covers the top third of the "paint" section. Feather it by 200px.
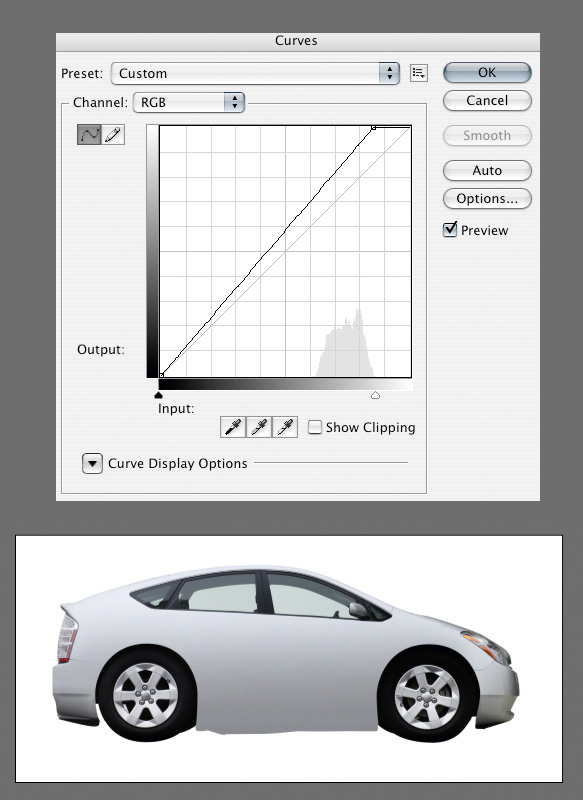
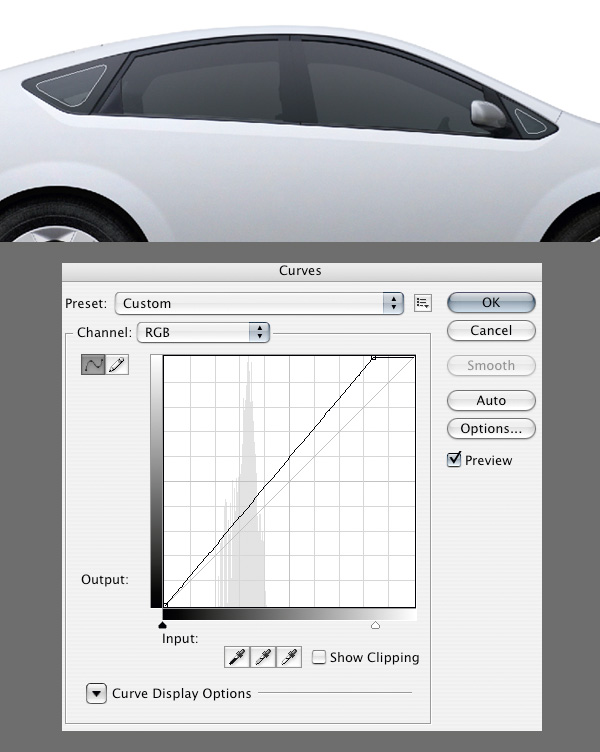
Step 20
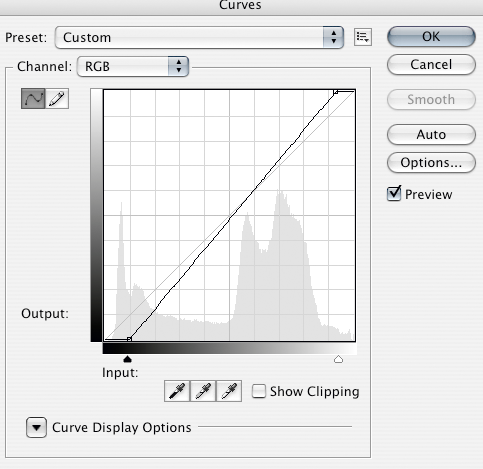
Just above the grad layer, make a Curves adjustment layer and drag the highlight handle to the left to lighten the image. Hit OK. With the curves layer selected, hit Option/Alt+Cmd/Ctrl+G to make it a clipping mask on the "grad" layer.
Step 21
With the "grad" layer selected, make a new blank layer. It automatically becomes a clipping mask because it's in between the other clipping mask and the "grad" layer. Go Edit>Fill and choose 50% gray and hit OK. Go Filter>Noise>Add Noise and use 40 for the amount. Make sure monochromatic is unchecked, and hit OK. Transform the noise layer and scale it to 125%. Set the layer to Overlay and bring the Opacity down to 10%. This makes the "grad" layer blend with the rest of the photo better because the grad layer was too smooth.
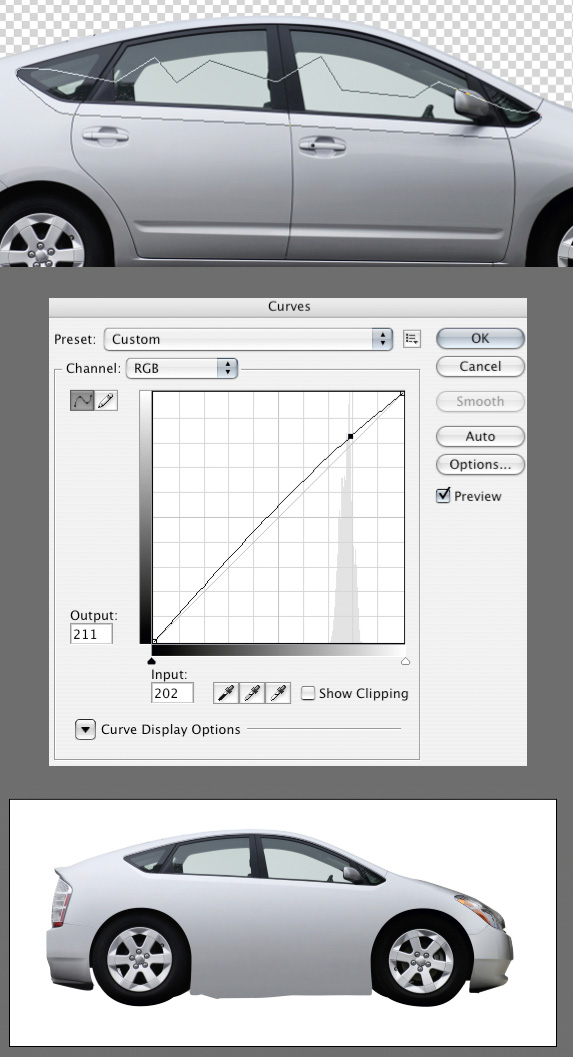
If you go back and look at the "base" layer, you will see a highlight just below the windows. Draw a path that contours the highlight. Make a selection of the path, feather it by 1px, and make another Curves adjustment layer just above the "grad" layer. Then lighten it a little.
Step 22
Click on the vector mask for the "wheels" group. In the Paths Palette, drag the vector mask down to the new path button to make a copy. Select the points that make the back wheel-well. Then scale the back wheel-well up, so that it overlaps the paint.
Step 23
Do the same for the front part of the path. Load the path's selection and feather it 5px. Make a new Curves adjustment layer above the "grad" layer, including all its clipping mask layers. Name the layer "wheel fenders." Below is what the curve should look like.
Step 24
From this point on, I will mostly be using techniques that I have already explained. I'm not going to go into as much detail in Part II. When using new techniques, I will continue to give a detailed explanation, though.
Draw a path around all the glass on the windows. Make a selection of the path and feather it 0.5px. Make a solid color adjustment layer in the "windows" group and fill it with a very dark gray. Call it "tint." Assign the path as a vector mask on the color fill and turn off the vector mask. Make a noise layer like we did before and apply it as a clipping mask on the "tint" layer.
Step 25
Make a heavily feathered selection around the top of the windows. Make a Curves adjustment layer that lightens the top part so you get a nice fade at the top of the windows.
Step 26
Make a heavily feathered circular selection around the center of the windows. Invert the selection and make another Curves adjustment layer that lightens the outer parts of the windows. Both of these curves layers should be a clipping mask to the "tint" layer.
Step 27
Turn the "tint" layer's Opacity down to 90%. Draw a path along the border of the two triangle windows. Then load the selection of the path. Make a new Curves adjustment layer just above the other two and lighten the selection a bit.
Step 28
Here is what my layer palette and image looks like so far.
Step 29
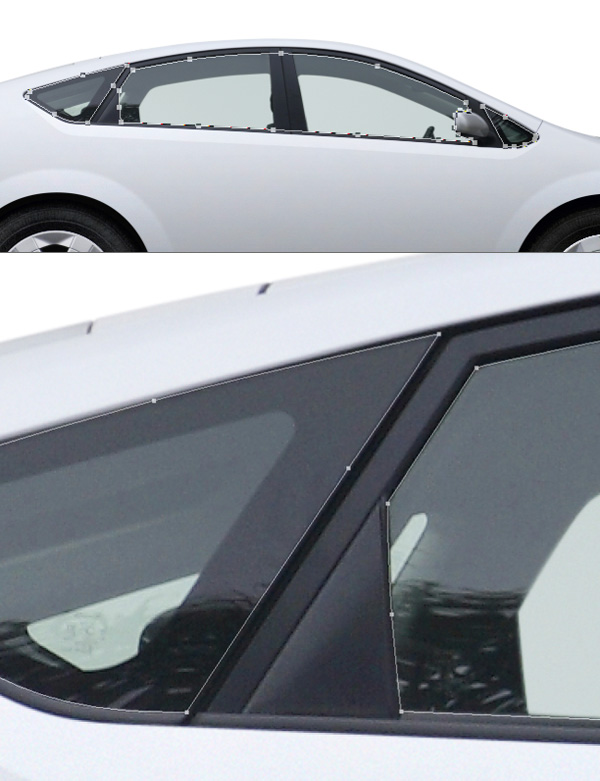
Turn off the "tint" layer for now. Now we have to retouch out the window support that we don't need anymore. I did it by drawing a path around each part I needed to retouch out. Then I painted in the color that I needed on a new layer.
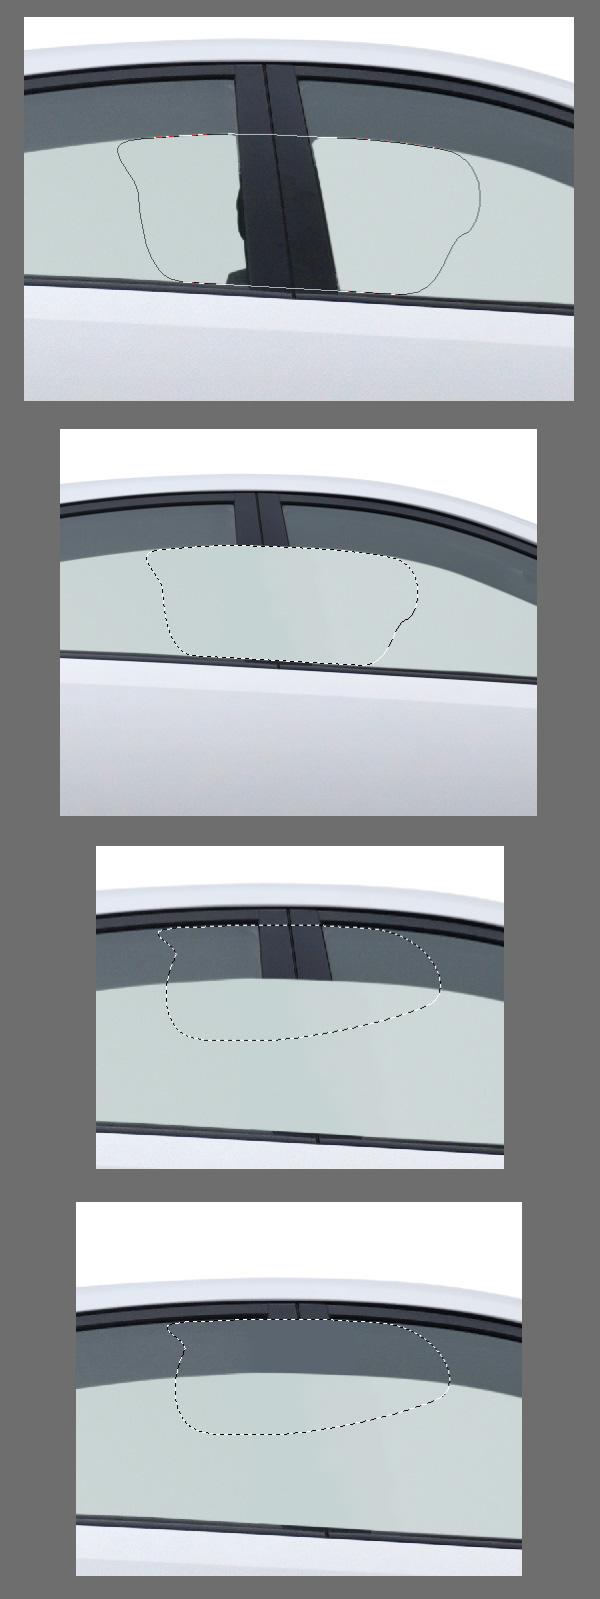
Step 30
After that I fixed the borders by duplicating parts of the surrounding border from the "base" layer and transforming them to fit.
Step 31
Finally, I created a "seat" from scratch and filled it with a dark gray that matched the surrounding colors. Then I put it just below the "tint" layer.
Step 32
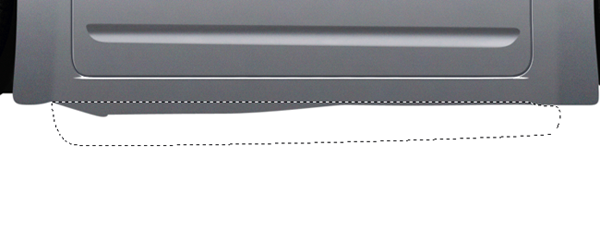
Draw a path that will represent the outline of the door.
Step 33
Create a blank layer at the top of the "paint" section and call it "door." Set a dark gray as your foreground color. Grab the Brush(B) and make the Diameter 3 and the Hardness 50. Now with the "door" layer selected, right-click on the path and choose Stroke Path. Make sure that the source is Brush and that Simulate Pressure is off. Now apply the Bevel/Emboss layer style to the door layer.
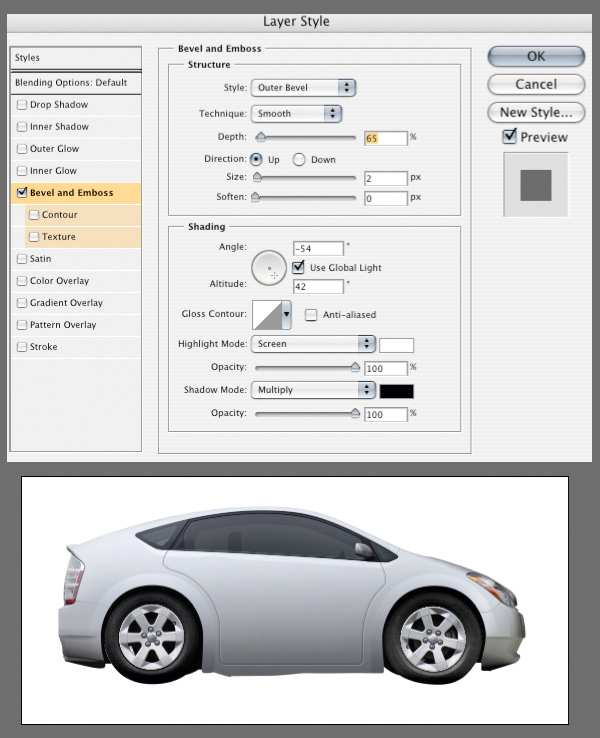
Step 34
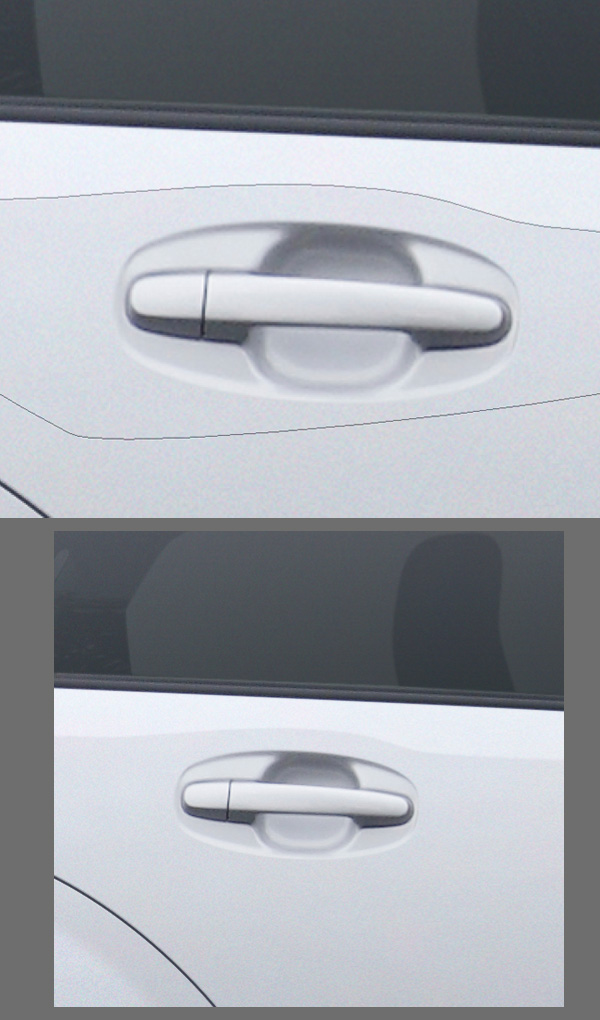
Go back to the "base" layer and draw a path around the handle. Feather it 0.5px and hit Cmd/Ctrl+J to duplicate it. Bring the duplicate to the top of the "paint" section, then place it where you like it. Mine overlaps the highlight a little so I am going to disrupt the highlight by drawing a path and and filling that part of the path with black like below.
Step 35
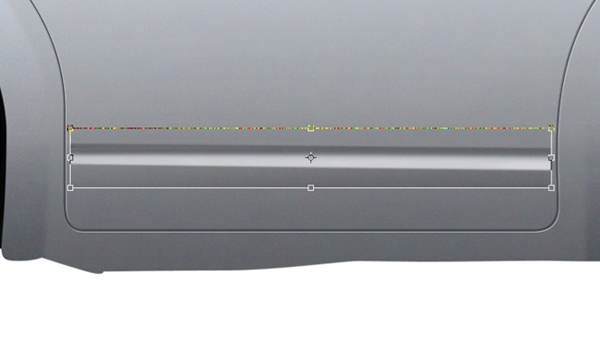
Isolate the "base" layer by holding Option/Alt and clicking on the "eye" icon next to it. Grab a selection of the door indentation and duplicate it to a new layer. Call it "side bar." Option/Alt-click on the eye again to turn off isolation.
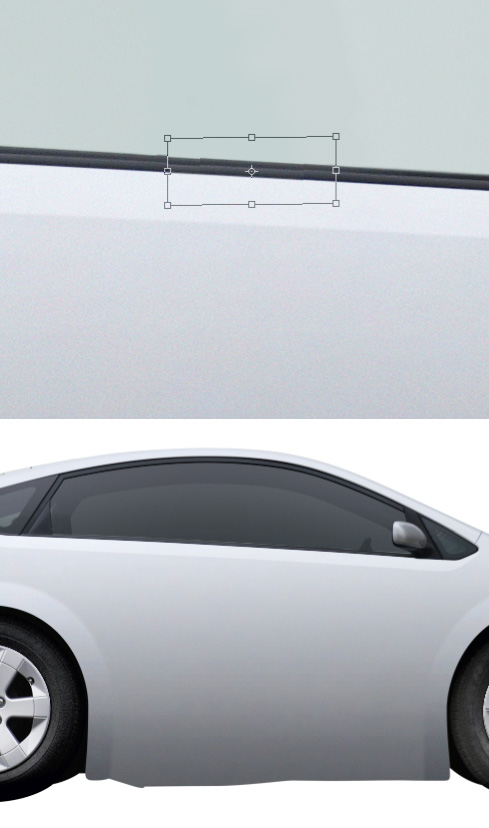
Step 36
Move the layer so it sits just below the "noise" layer that is applied to the "grad" layer in the Layers Palette. Stretch the "side bar" layer so that it extends the length of the door. Blur the layer a little to get rid of the stretched noise.
Step 37
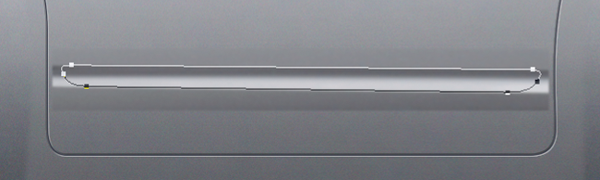
Now draw a path around it that resembles the original shape. Use the path to create a mask for the "side bar" layer.
Step 38
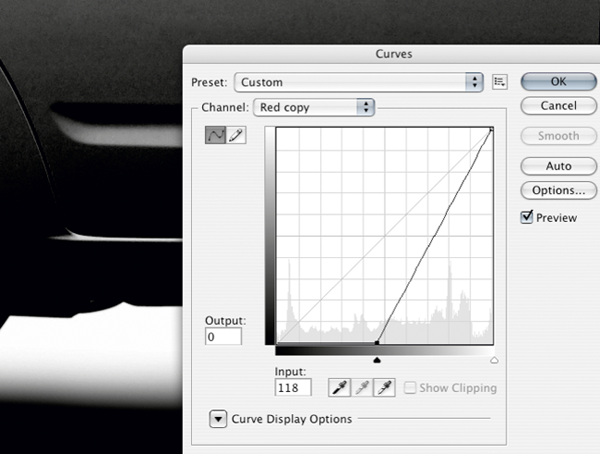
Isolate the "base" layer once again. Now in the channels palette, drag the red channel down to the New Channel button to duplicate it. Now what we are going to do is isolate that highlight that sits just below the door. On the new channel you made put a harsh curve that makes everything surrounding the highlight black.
Step 39
Draw a marquee around the highlight. Invert the selection. Remove any details that aren't the highlight.
Step 40
Load the selection of your channel. At the top of the "paint" section, make a Solid Color adjustment layer and fill it with white. Now transform the layer until it fits the door. Set the layer to Overlay.
Make a path along the bottom of the car where it should be black. Load the selection and feather it 1px. Fill the "grad" layer mask black in that area to remove the paint.
Step 41
Finally, make a selection along the bottom. Feather it about 25px. Then make a Curves adjustment layer just above the "grad" layer. Then darken it until it almost becomes black.

Step 42
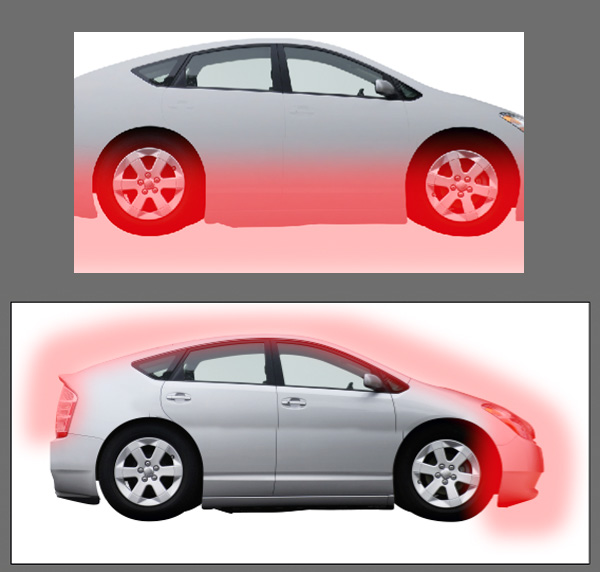
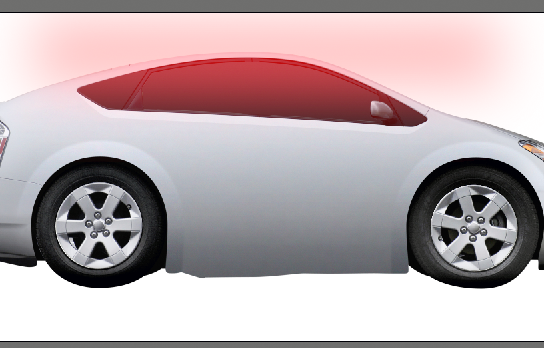
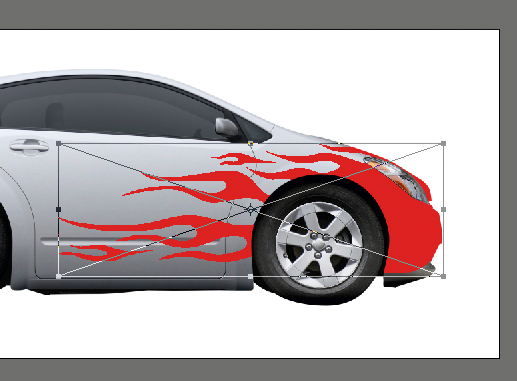
Go to File>Place and select the flames.ai file. Place the flames at the top of the "paint" section and scale them how you see fit.
Step 43
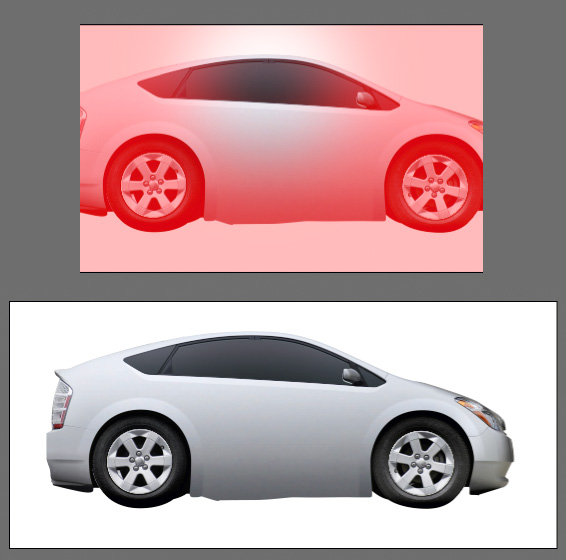
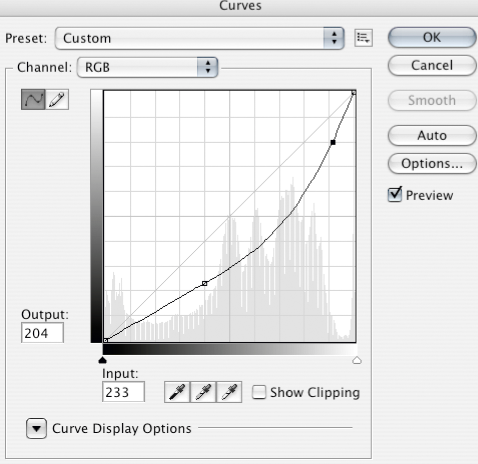
Load the transparency of the "flames" layer by holding Cmd/Ctrl and clicking on its icon in the layer palette. Make a Curves adjustment layer that looks like the image below.
Step 44
Now delete the old placed layer. Then just to even out the color of the paint, make a new solid color adjustment layer at the top of the "paint" section. Make the fill a very light blue. I used (#f0f4ff). Set the layer's blend mode to color.
Final Step
As a final touch, I just increased the contrast and sharpened the lights by making adjustment layers in the "lights" group. The final image is below.
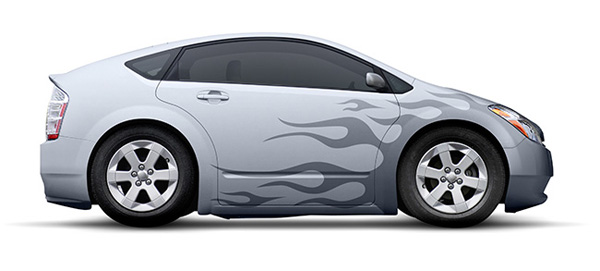
Conclusion
Knowing what you want to do and knowing how to execute it are equally important. I didn't use any groundbreaking techniques to create this design. I just had a good idea of what I wanted to do, and I did it. You can do the same.
No comments:
Post a Comment