Final Image Preview for Part One: Adding Floors to a Building
Step 1
The Vanishing Point filter is all about perspective, when you're editing photography, perspective is one of the most important issues to consider, the Vanishing Point filter helps us to make it easy. This time I've got two short tutorials to help you to understand this amazing filter.
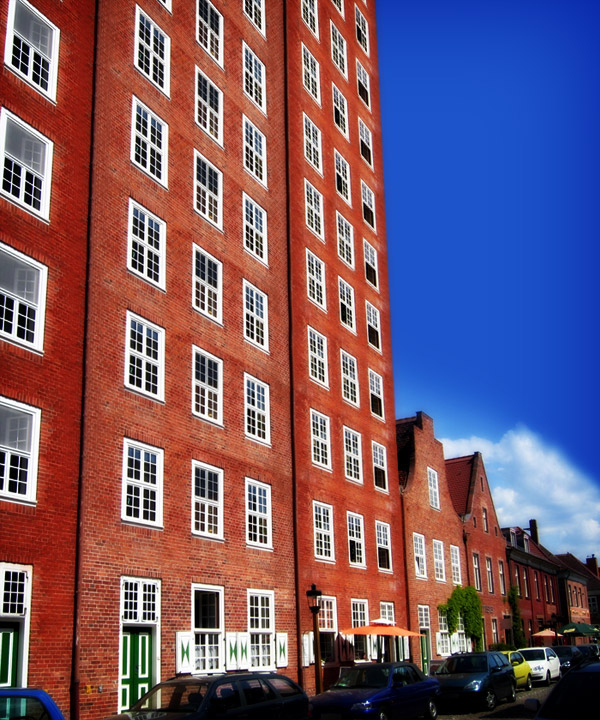
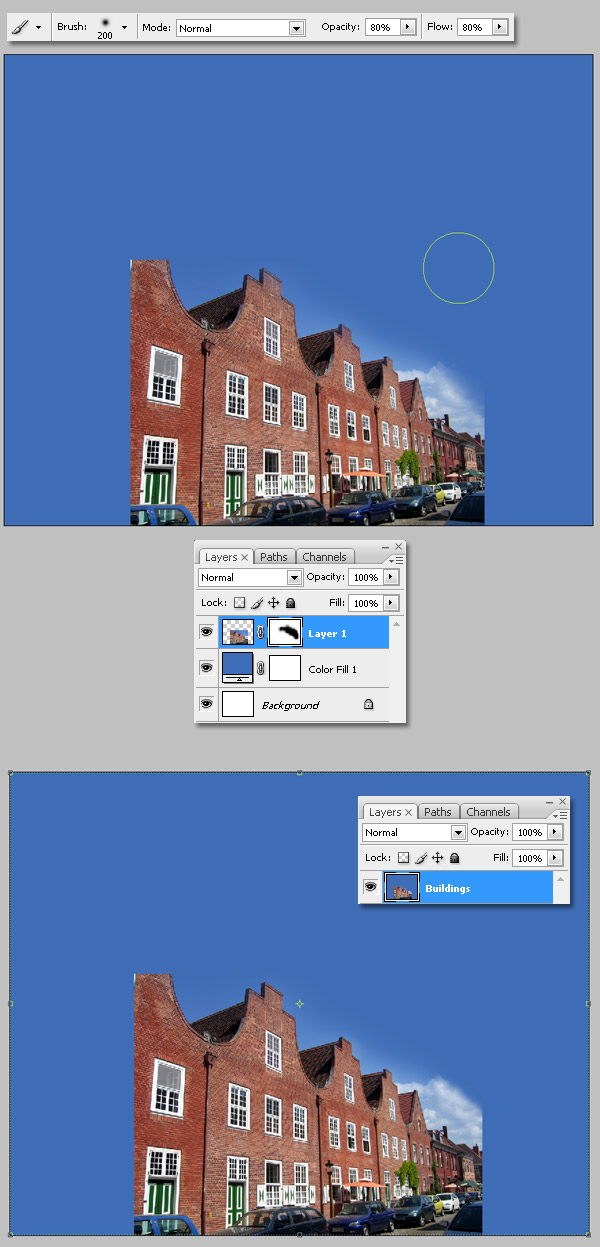
The first one it's about adding realistic floors to a building. Before getting started you'll need an image to edit, I choose this picture because the perspective is very clean and easy to follow. As a first step, paste the image into a new document, a lot bigger than the original picture, then add a new Color fill layer using the sky's color as a sample (you can use the Eyedropper tool to get a similar color).
Add a layer mask to the picture layer and paint with a huge brush on it. Delete the sky over the buildings. Finally, merge the sky blue background with the original picture and name the resulting layer "Buildings."
Step 2
Now, go to Filters > Vanishing point, remember when you're working with the Vanishing point filter, all the editing (paste, select, clone) must be done into the Vanishing Point Filter window and nowhere else. At this point, you'll only need to draw a reference plane, do this by selecting the Create Plane Tool (C) in Vanishing Point Filter window. You can use the windows as a guide.
Step 3
Select the Edit Plane tool (V) and resize your plane, make it wider and taller as you'll need. Hit OK to save the Vanishing Point plane. Then create a new layer above the original picture and name it something like "Edited picture." We're going to add all the painting in this layer to keep the original file handy. Select the new layer and go to the Vanishing Point window again.
Step 4
Now the fun! First, we're going to clone the pipes to get a higher clean area to select in the next step. Select the Clone Tool within the vanishing point window, it works just like the standard clone tool, but this one keeps the perspective when you're cloning. Hold the Alt key and click to select the cloning source, try to click over the area of one of the pipes, then just paint up. Without changing the clone source, clone the other two pipes of our picture. Hit OK if you want to see the result.
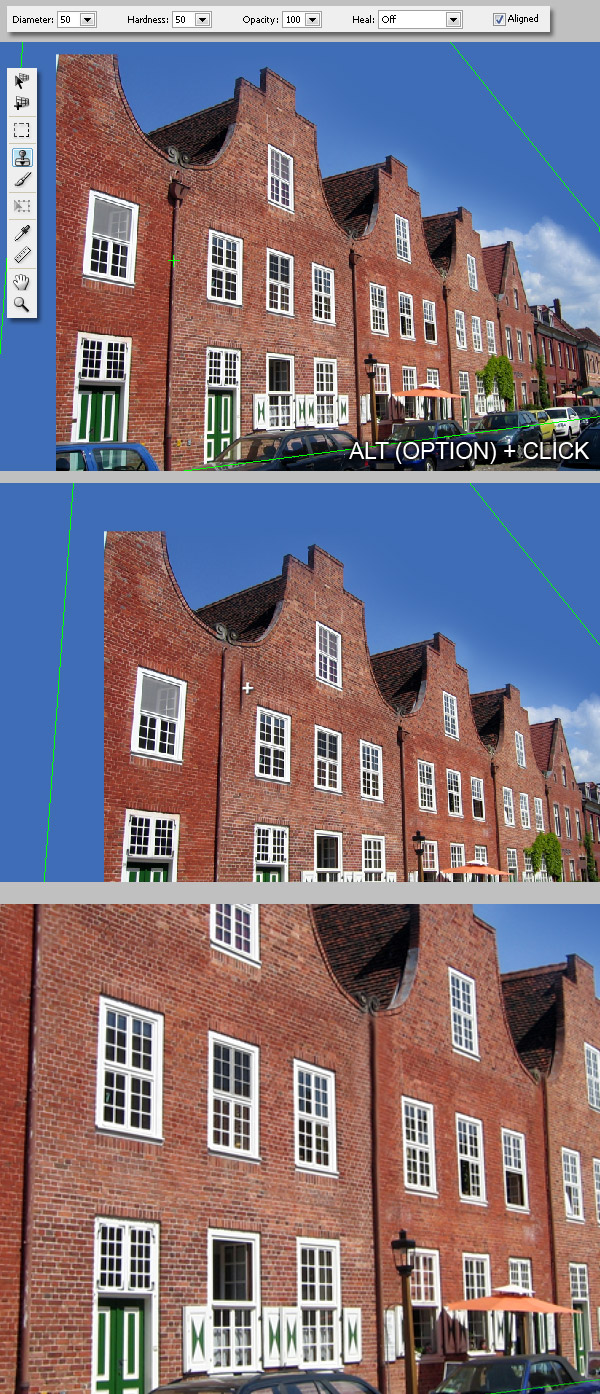
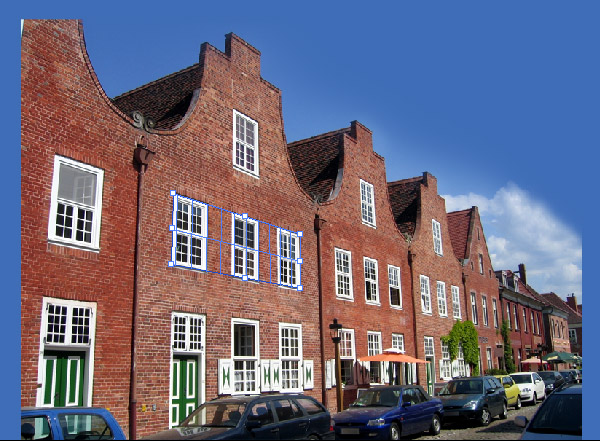
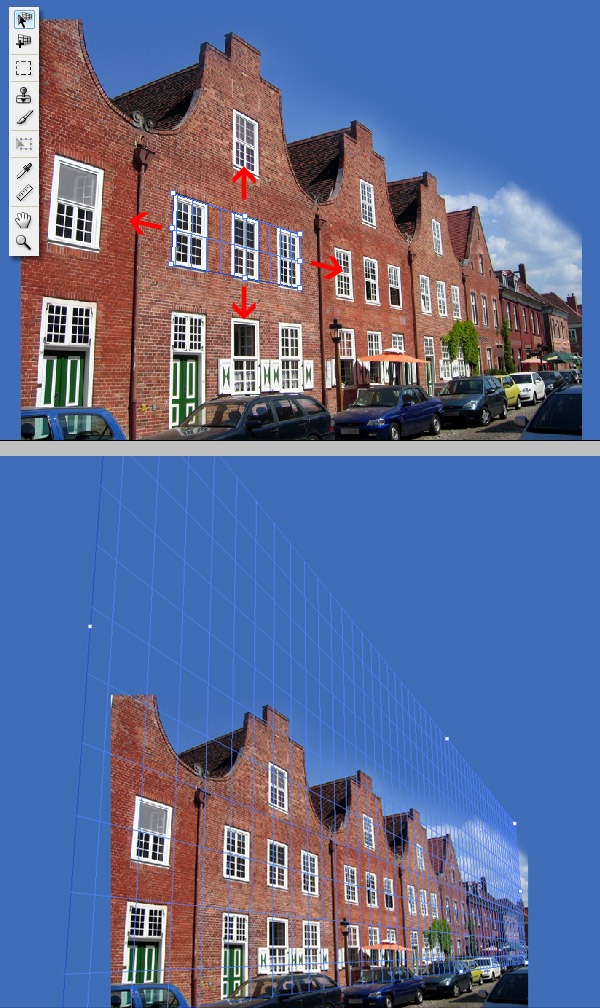
Step 5
Let's add some floors next. In the Vanishing Point window, click on the Marquee Tool, and make a selection using two or three buildings, try to make a selection as clear as possible. Next, hold the Alt key and click + drag the selection some pixels up. Do it as many times as floors you want to add, nevermind if there's some bad areas for now.
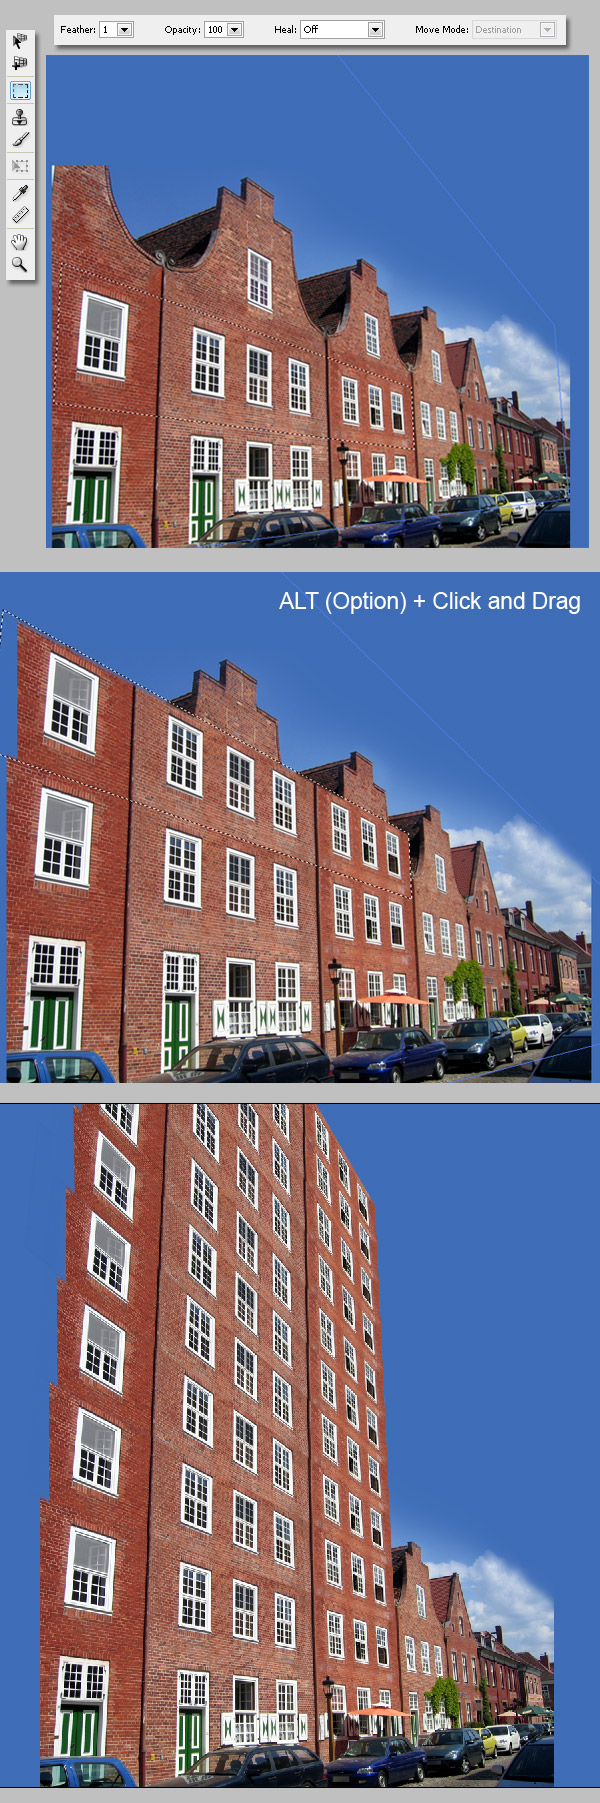
Step 6
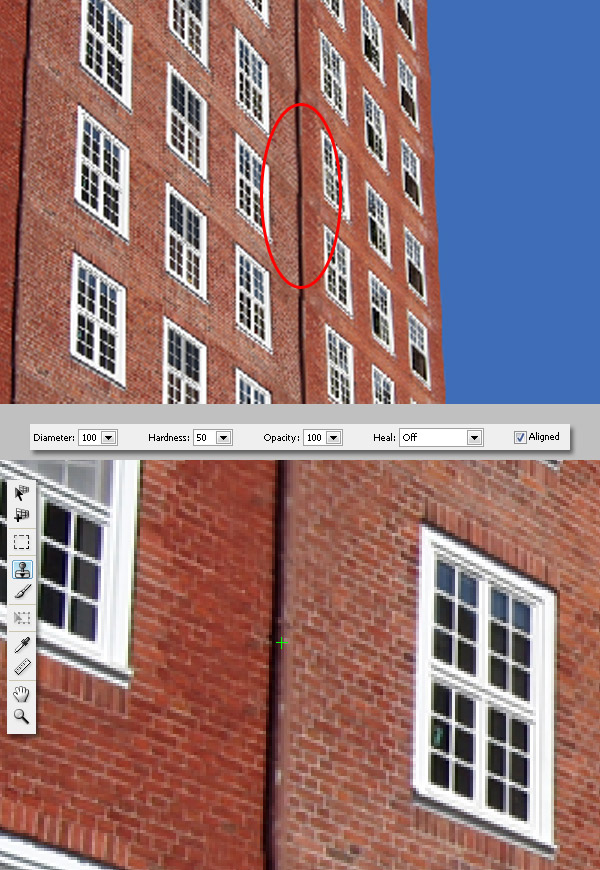
As you'll see duplicating the selection isn't always a perfect process, so as there are a lot of tiny imperfections, use the Clone tool to fix them.
Step 7
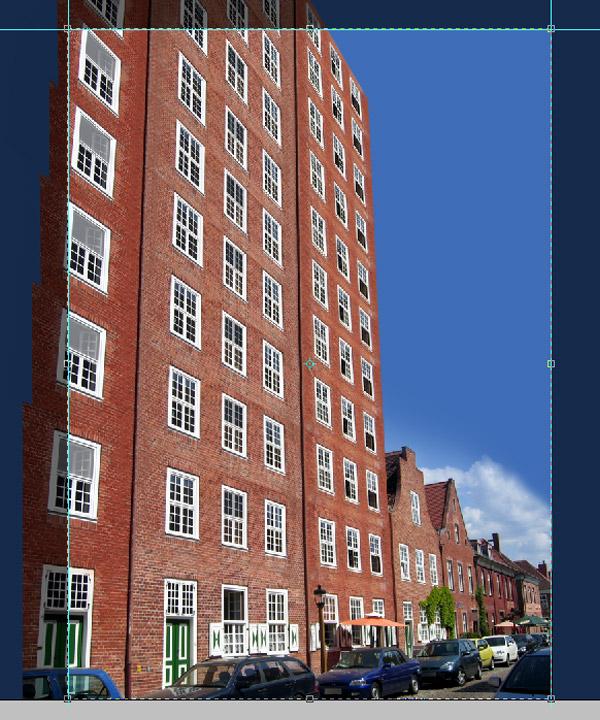
Finally, crop the image. Also if you want, add more details, like cloning the windows to create some variants between them, use the Blur tool to blur the hard line between building and sky, and whatnot.
End of Part One
And that's it! To create a more colorful scene I'd merged the layers, duplicated the result, applied a Gaussian Blur 4px radius to the copy, and change the copy's Blending mode to Overlay with an Opacity set to 75%.

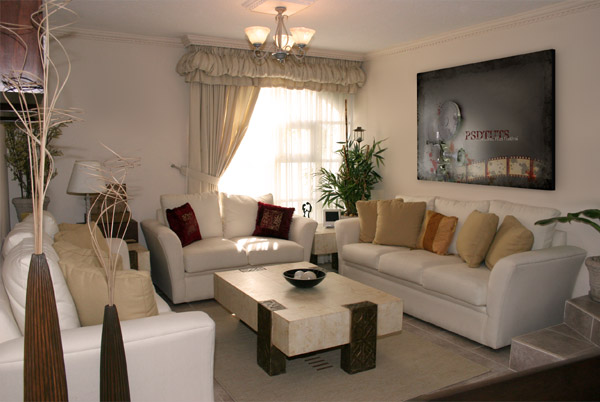
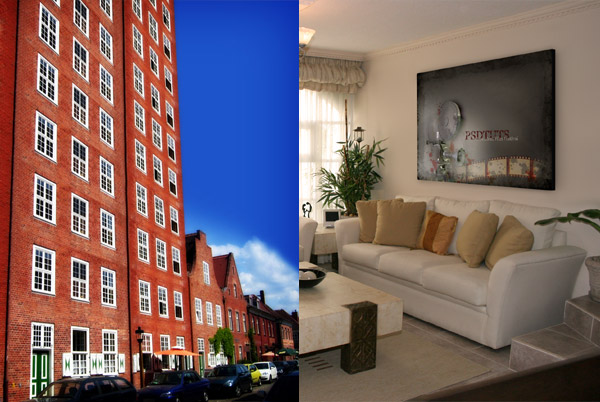
Final Image Preview for Part Two: Adding a Picture onto a Wall
Before we get started, let's take a look at the image we'll be creating. You can view the full-size image here. As always, the layered Photoshop file is available via our PSDTUTS Plus membership.
Step 1
This second quick tutorial is about adding a picture onto a real wall. How many times have you wished to see your very own design as a picture over the fireplace? This tutorial will make it really simple get that kind of result into a photo.
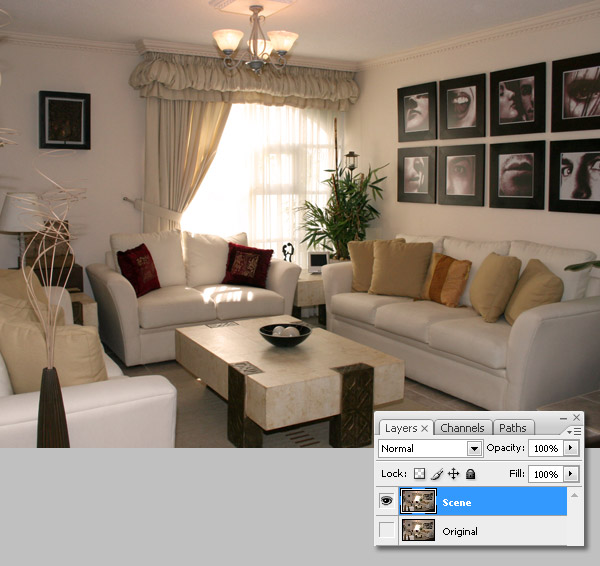
Let's get it started. First you'll need an image to work with, I choose a random one from sxc.hu, this one from Samantha Villagran, open the image as is and save the PSD file somewhere, then duplicate the picture layer and hide the original.
Step 2
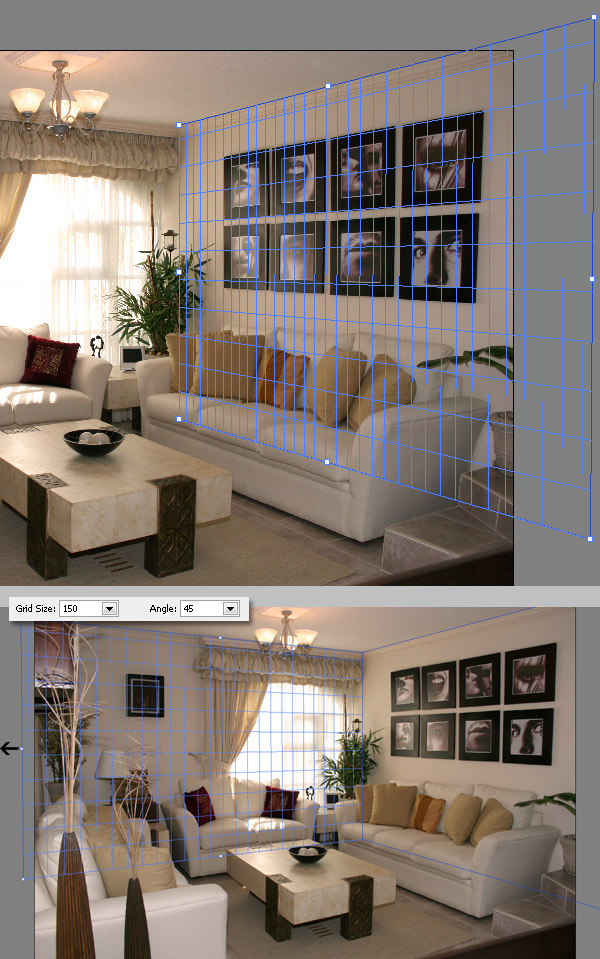
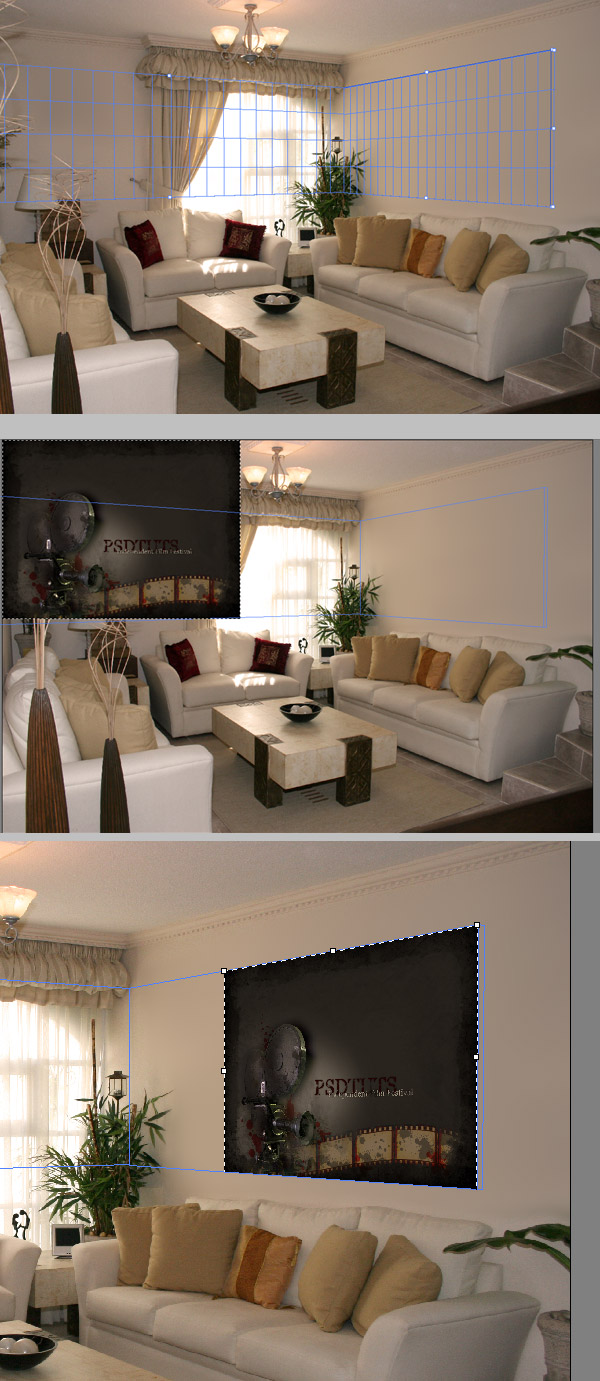
Go to the Vanishing Point Filter (Filters > Vanishing point), and draw a plane over the pictures on the wall, you can use the ceiling and the pictures as a guide. Expand the plane according your needs, if you want to add more than a picture, or use the same perspective on another wall. You can Command + Click one of plane's sides and add a perpendicular plane, if you want to modify the new plane's angle. You can hold the Alt key and drag the mouse, or type the number in the Angle combo box (45º).
Step 3
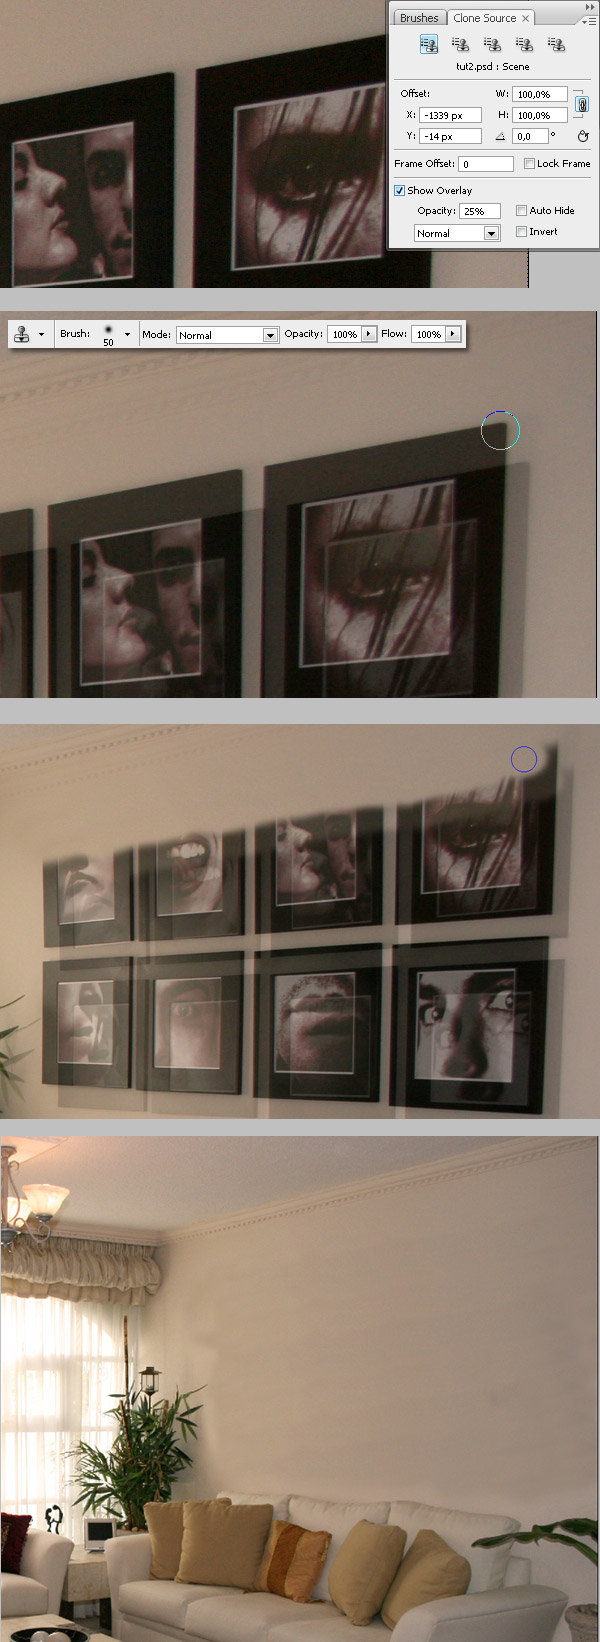
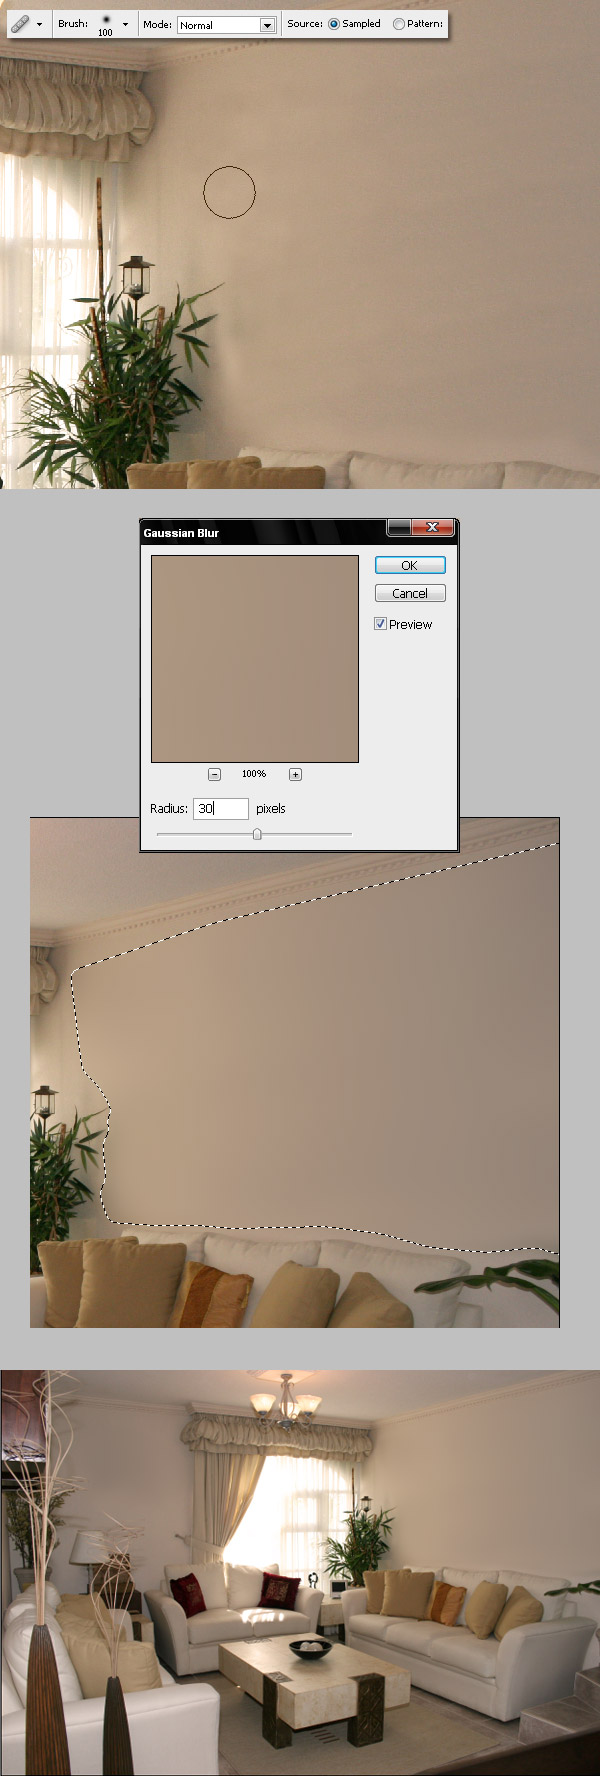
Now, we're going to delete the existing pictures on the wall. Select the Clone tool and Alt + Click somewhere above the pictures to catch the cloning source. Also, you can go to Windows > Clone source and select the Show Overlay option to see a translucent sample of the cloning source. Clone the wall hiding all the pictures.
Step 4
As you can see, the cloning process isn't completely clean. There are two quick and useful tips to make the cloning almost perfect. First, using the Healing Brush tool, clone some areas of the wall. The way to use the Healing Brush is the same than Clone tool.
Once you've finished the healing, use the Lasso tool to make a selection over the wall, then press Command + Alt + D to Feather the selection. Also, set the radius between 5 and 10 pixels depending the size of your image. Next, go to Filter > Blur > Gaussian Blur and set the radius between 30 px to 50 px and hit OK. The wall is looking fairly good at this point. If you prefer, you can hide the pictures of other walls using this technique as well.
Step 5
Now we'll add our own picture to the wall. Copy any image into the clipboard, I'm using the result of one of my previous tutorials on this site for the image. Create a new layer above the base image. Go to the Vanishing Point window, Resize the planes if you want just to use them as a guide, then Paste the image inside (Command + V). After that, drag it over any plane.
Next, using the Transform Tool (T) in Vanishing Point window, transform the image to make it fit exactly into the plane's boundaries. When you have finished placing the image, hit OK and see the result.
Step 6
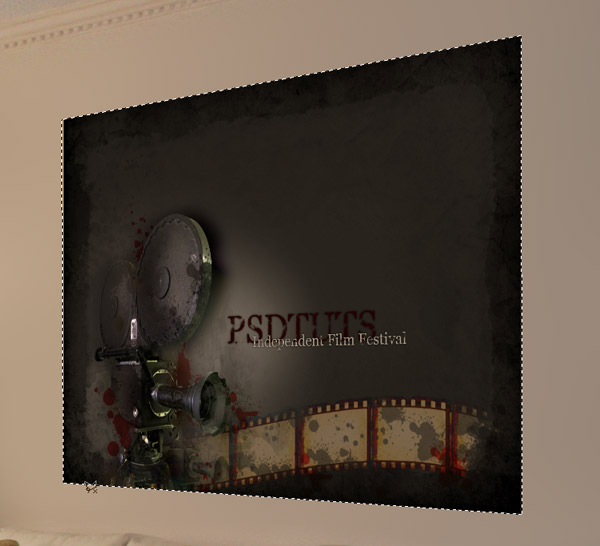
When you place the picture into the Vanishing Point window, the result always turns a little bit pixelated. You can solve this issue just by making a selection around the picture using the Lasso Tool, Command + Shift + I to inverse the selection and delete the extra pixels.
Step 7
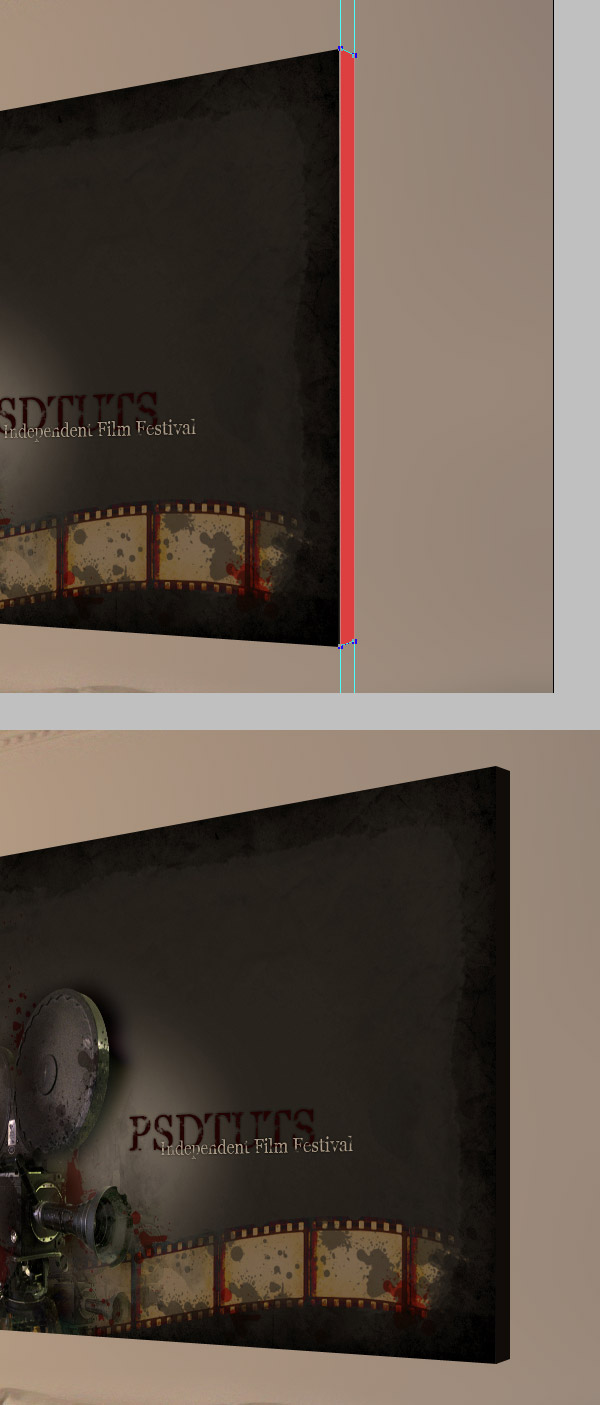
Now add a bevel to your picture. Select the Pen tool and create a shape, as in the image below, then fill the shape with a dark color.
Step 8
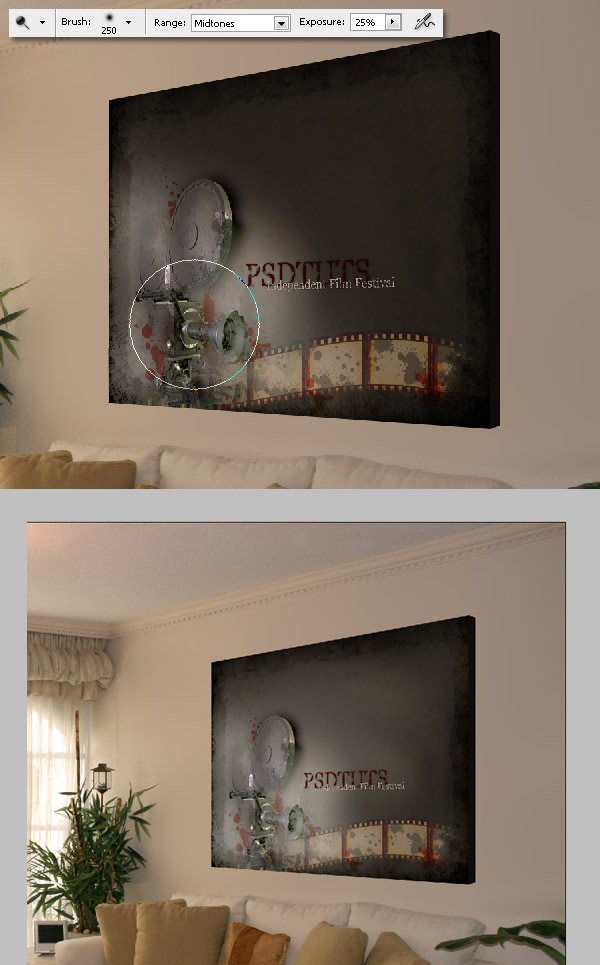
If you take a look at the original file, the light of the window is over the wall's pictures. So we need to duplicate that lightening. Select the Dodge Tool, set a big soft brush and Exposure to 25%, then Dodge some areas of the picture's bottom left and all around the surface.
Step 9
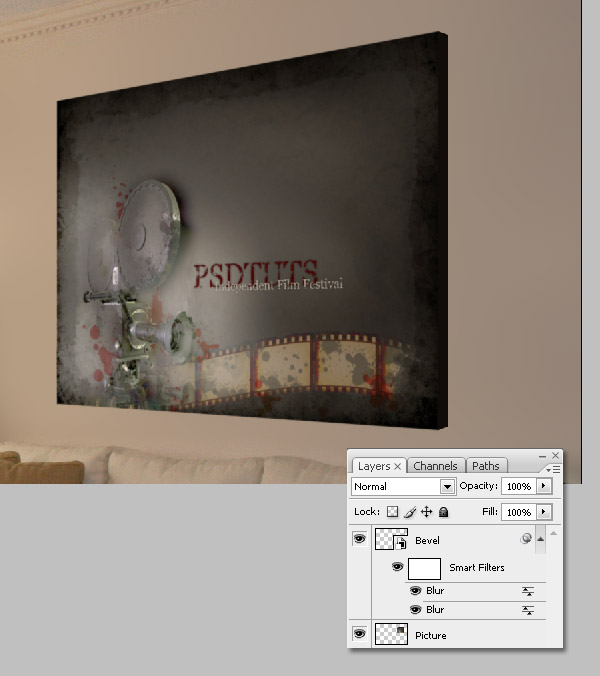
Select the "Picture" layer and go to Filter > Blur > Blur, then press Command + F to do it again. Next, convert the "Bevel" shape into a Smart Object (right-click on the layer's name and press Convert to a Smart Object), then apply the same filter to it twice.
Step 10
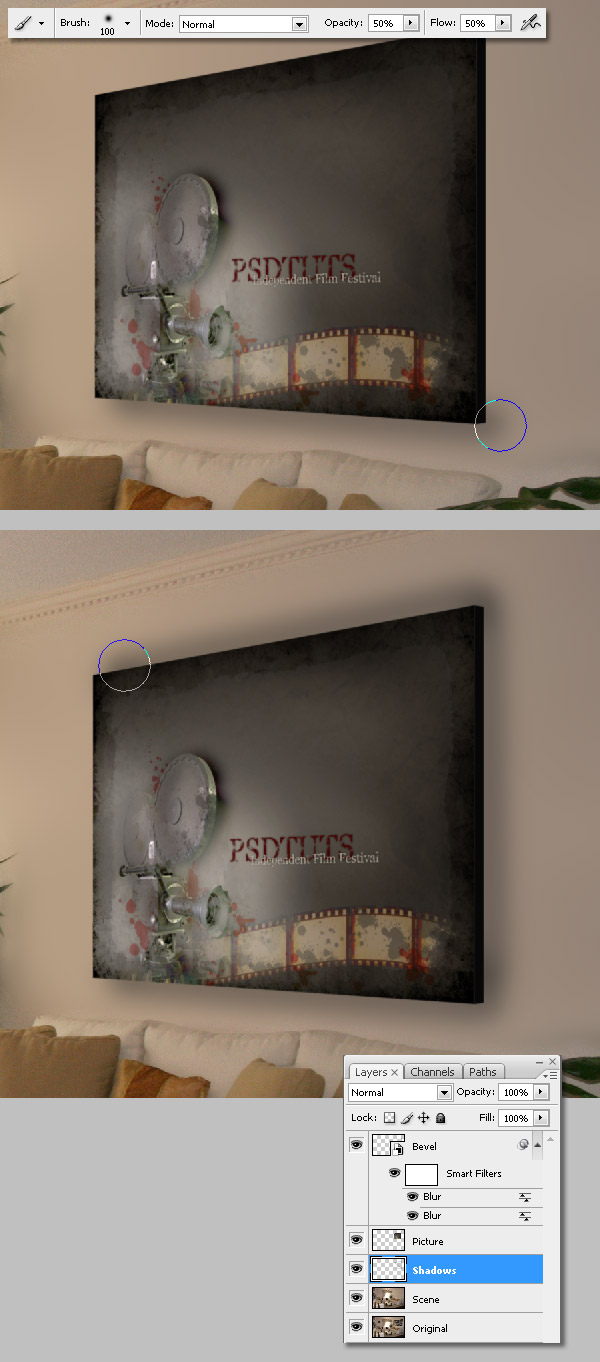
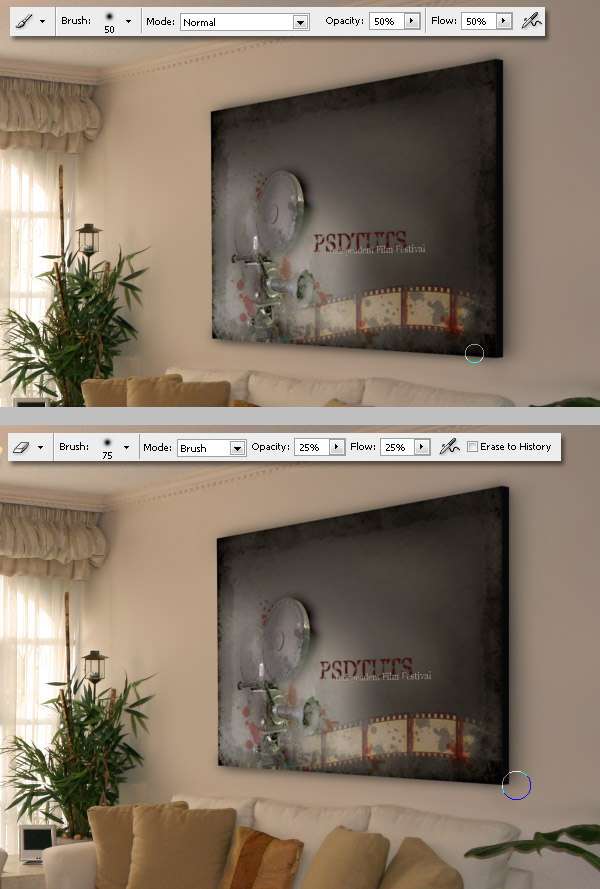
Now let's add a soft shadow to the wall's picture. Create a new layer below the "Picture" layer and name it "Shadows." Now use a soft 100 px black brush (Opacity 50% and Flow 50%) and draw some blurry lines around the picture, except on the picture's left side.
Step 11
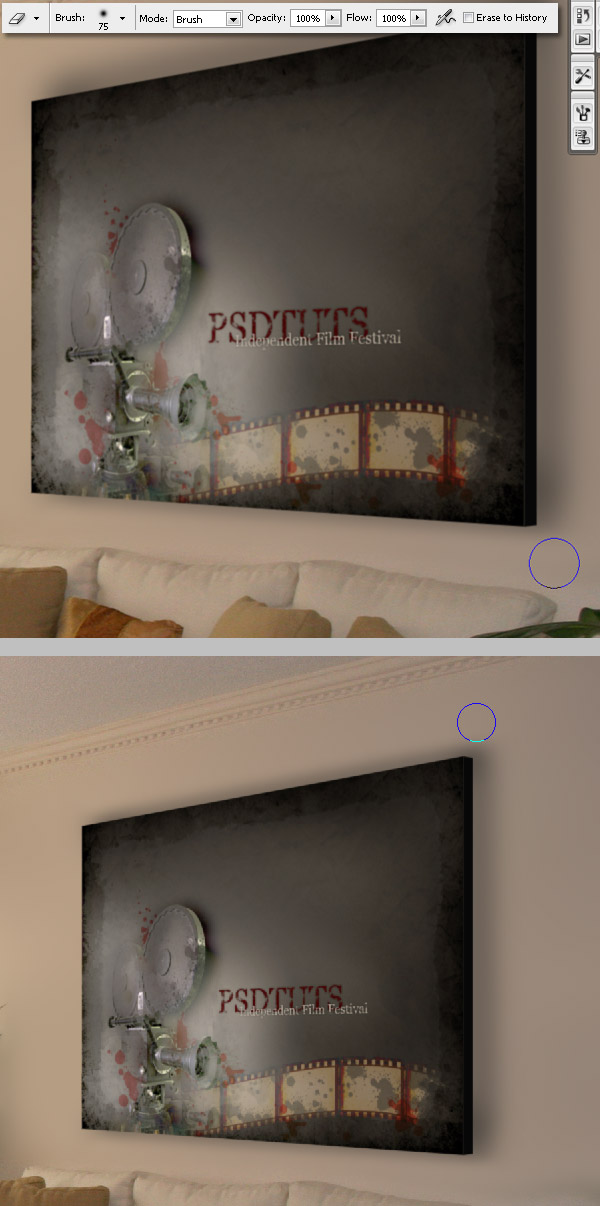
Now delete some areas of the shadow using a soft Eraser set to 75 px.
Step 12
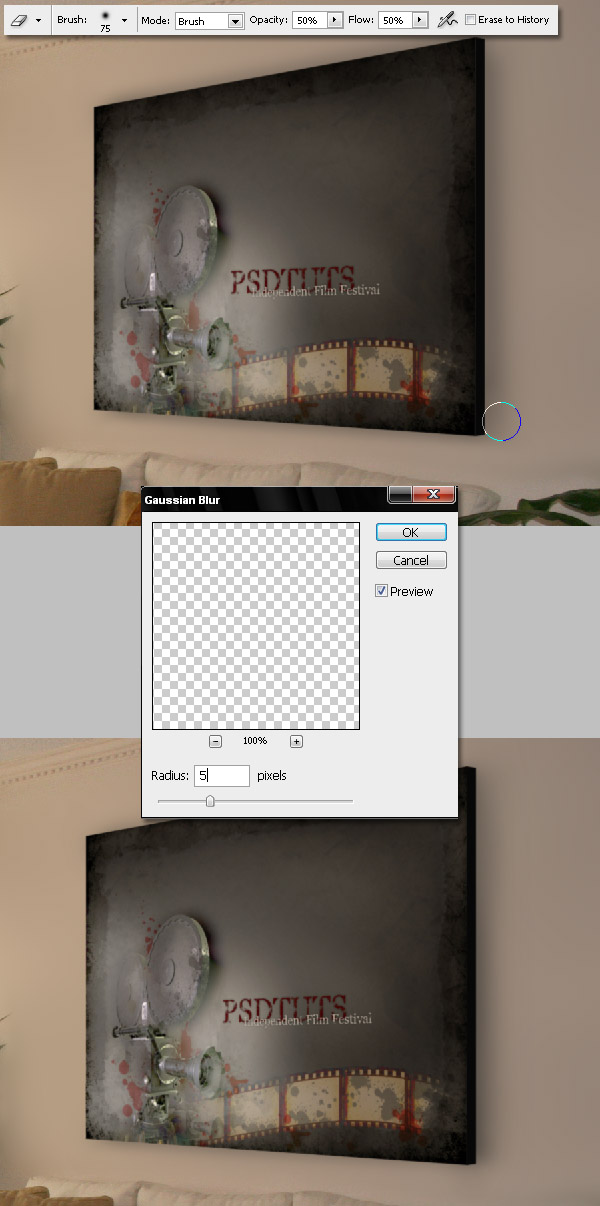
Change the Eraser's Opacity and Flow to 50%, and erase over the black shadows. When you have finished, apply a Gaussian Blur with a radius of 5px to the "Shadow" layer.
Step 13
Now paint a black blurry shadow again, but this time using a Soft 50 px black brush (set Opacity and Flow below 50%). Again delete all the extra shadow using a soft Eraser.
Step 14
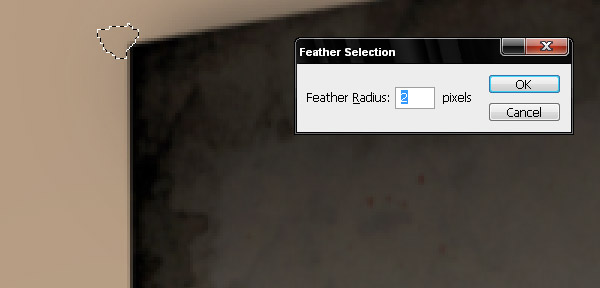
Finally, select a tiny area on the corners using the Lasso Tool to make them just a little bit rounded. Make the selection and press Command + Alt + F to Feather the selection about 2 pixels. Then Delete the selection. Do this on each sharp corner of the picture.
End of Part Two
The Vanishing Point filter makes it easy to add realistic pictures into an existing scene. Try your own!

Conclusion
The Vanishing Point filter is a useful tool for photo editors and photo manipulators, if you've never used this filter, or even if you knew about it, but rarely apply it, start experimenting with it more.
No comments:
Post a Comment