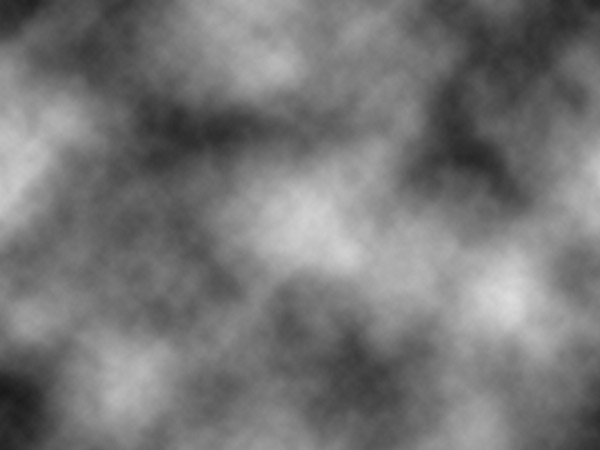
Step 1
First off, let's start by creating a new document and applying the oh-so-obligatory clouds (Filter > Render > Clouds).
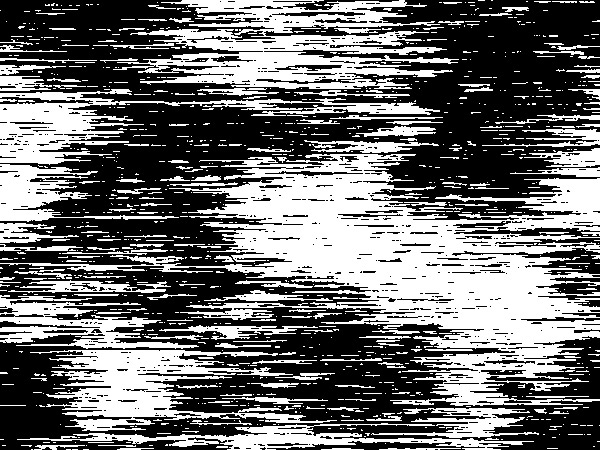
Step 2
Now that we have our base to work with, apply Mezzotint (Filter > Pixelate > Mezzotint) with type "Long Strokes."
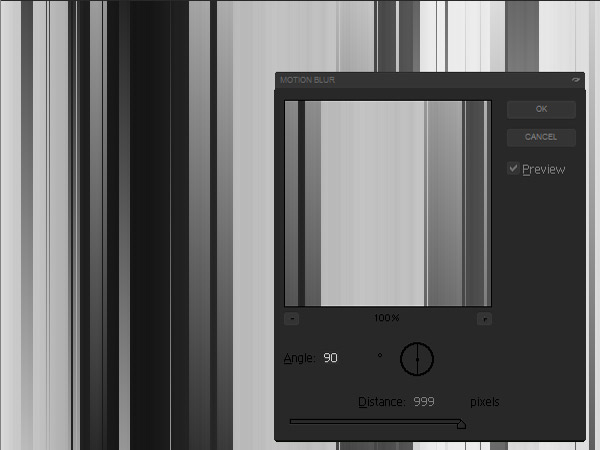
Step 3
Doesn't look like much right now, but with the magic of motion blur
(Filter > Blur > Motion Blur), with an angle of 90 degrees and a
distance of 999 for the settings, everything will be better.
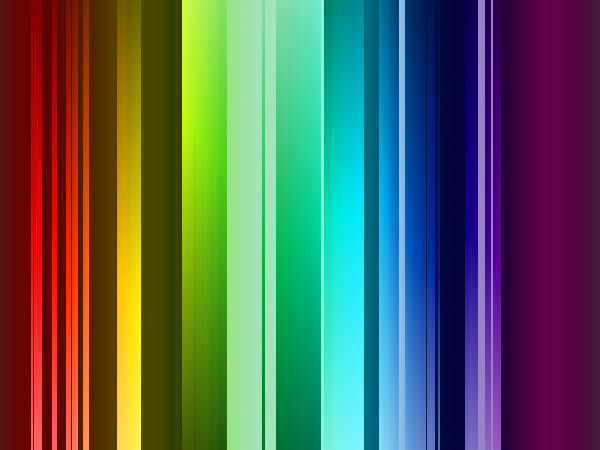
Step 4
Now add a new layer and overlay some color over it. Here I chose
the Rainbow Gradient using the Gradient Tool (G), but you can choose whatever suits you. When you have a layer of color,
set the layer mode to Overlay.
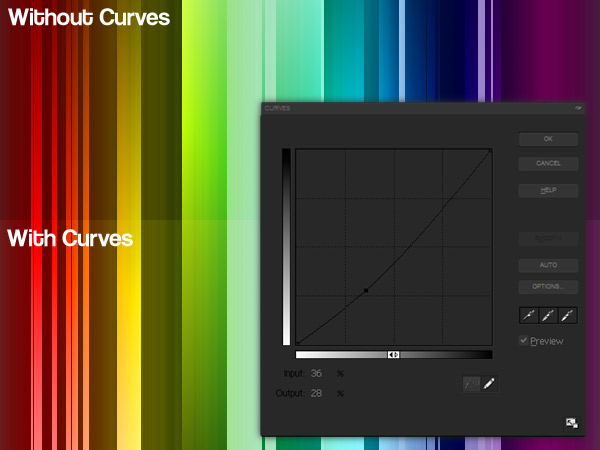
Step 5
If you feel like being creative, you can tweak some more by changing
the curves (Ctrl + M) to make the image either brighter or gloomier depending on
the mood.
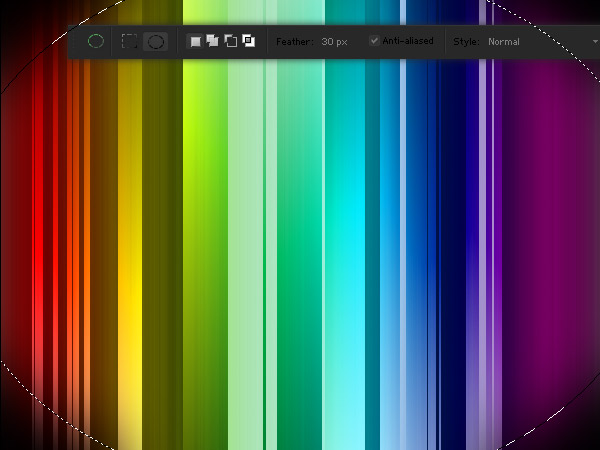
Step 6
Now create a new layer. Then select the Marquee Tool (M), set it to
elliptical, and the Feather to 30, and select around the picture (use
the example below for reference). Then select inverse (Ctrl + Shift +
I), and fill (Edit > Fill) with black. Then change the Opacity to
75% so that it is a bit more subtle.
Step 7
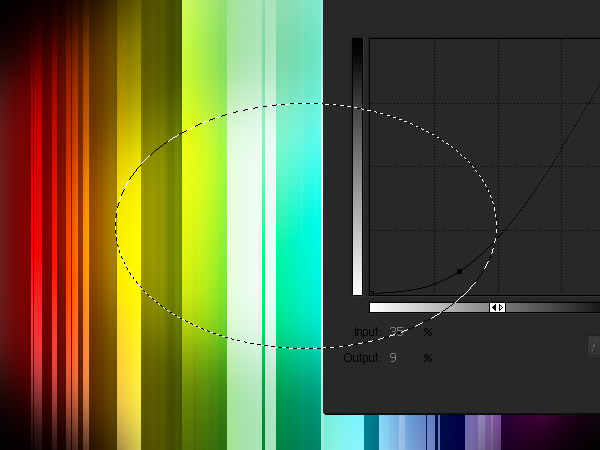
Again create a new layer, and with the same Marquee tool settings as
above, select (use the example below as reference). Then change the
curve (Ctrl + M) to something like in the example. Afterward, change the Opacity
to 60% so that it isn't blinding. Try to be creative and change the
settings to your taste.
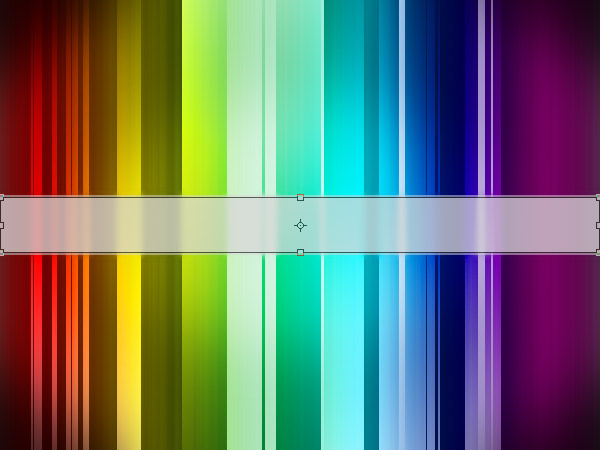
Step 8
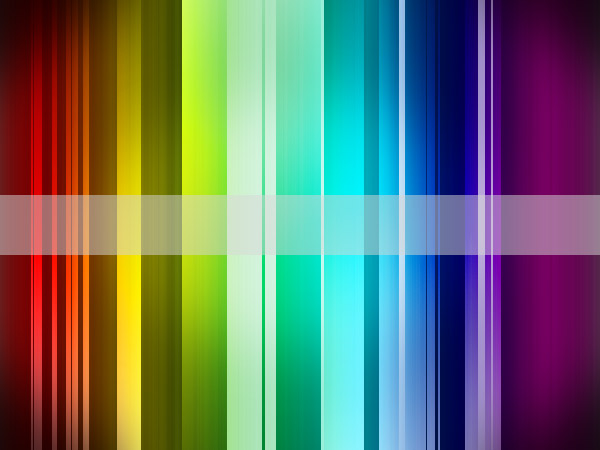
Now we are done with the background. You can choose to do whatever you want with it. But I'll leave you guys with a simple example that you can easily do for generic jobs.
Reset the Marquee Tool to rectangular with 0 feather. Then create a horizontal
bar in the middle of the picture. Then fill it with white (Edit >
Fill) and lower the opacity to say, 50%.
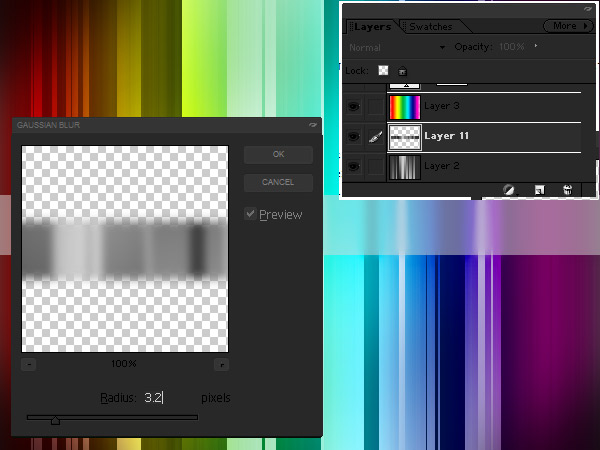
Step 9
Now while still selecting the area, select the first layer (the
clouds + mezzotint + motion blur layer), copy it (Ctrl + C) and paste
it (Ctrl +V) in a layer above it, but below the Color Overlay.
Deselect, and apply Gaussian Blur to it (Filter > Blur > Gaussian
blur) with a setting of about 3.2 pixels.
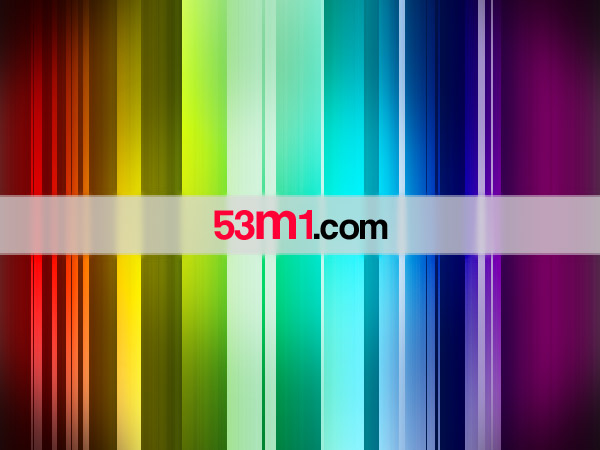
Step 10
Going back to the top layer, duplicate (Layer > Duplicate Layer)
the white horizontal bar layer you created in step 8 and transform it
(Ctrl + T). Then make it slightly smaller height-wise, about 2px
from the top and the bottom.
Step 11
Finally, add a text on top of that layer and type in what your heart desires. Congratulations, you are done!
It's a simple technique that can still produce eye-catching results!
No comments:
Post a Comment