In this Photoshop tutorial we will create a clothesline effect using the pen tool, the warp tool, a few basic layer styles and some of your own photos. Also included in this tutorial is a nice little clothes pin vector graphic I created for the lesson (all available in the files available for download at the bottom of the page).
The original idea for this tutorial came from the header of a blog template I saw some time ago. Normally I’d start with a file size large enough for a proper header, but to make things more visually easy here I’m going to start with my standard tutorial file size of 540×300 pixels at 72ppi.
First lets lay down a nice little gradient in the background so we have something to work against. Set the foreground and background colors to #79b6e8 and #ffffff respectively and lay down a linear gradient from top to bottom.

Select the Brush tool from the Tools bar by pressing the B key, press X to switch the foreground and background colors at the bottom of the Tools palette (making white the foreground color). Choose a 3px hard edge brush from the brushes menu and then switch to the Pen tool by pressing the P key.
What we’ve done here is setup our brush and brush color beforehand so when we draw the clothesline with the pen tool we can easily "stroke the path" and lay down a nice white line.
With the Pen tool now selected, go ahead and draw out your clothesline as shown below.
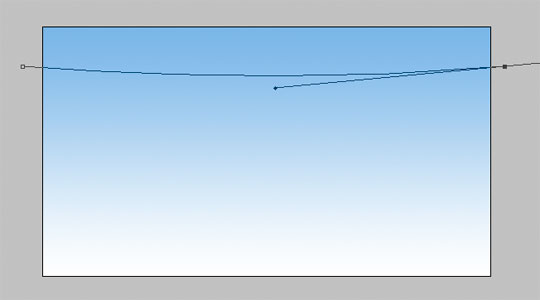
With the pen tool still selected Control-Click (PC: Right Click) on the path and choose Stroke Path. When the options popup appears choose Brush and leave the Simulate Pressure checkbox empty. Click OK.
You’ve just created a nice white line along your path, probably mostly hidden by the path, so press Command-H (PC: Ctrl-H) to hide the path.

I plan to place a few photos on top of each other in each section of my clothesline (see the final example at the bottom of the lesson), so I’m going to start by choosing photographs that I’m not concerned about seeing in my final product.
Open a photo you’d like to use and drag it onto the stage you’re working on, then press Command-T (PC: Ctrl-T) to invoke the free transform tool and drag the corners (*note: Remember to hold down the Shift key while dragging to constrain your proportions) until the photo is the correct size. Feel free to rotate and position the photo while in the Free Transform mode then hit the Return (PC: Enter) key to commit the transformation. (*note: Don’t forget to name your layers)

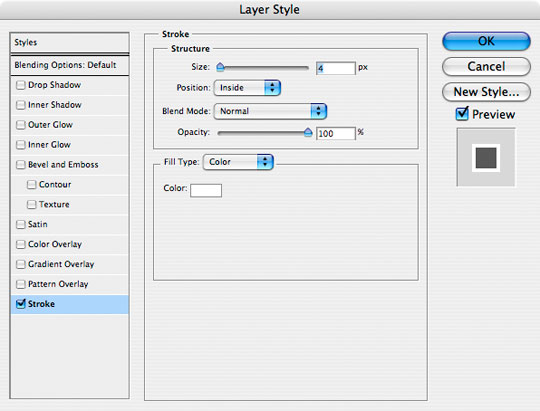
With the photo sized and placed, lets go ahead and add a nice white border around the inside edge by applying the following layer style. Double click on the layers icon in the Layers palette and apply the following Stroke settings to the layer then click OK.
Notice that we are applying the stroke to the INSIDE of the layer. This makes the edges of the photo crisp and sharp rather than rounded as they would be had we applied the stroke to the outside of the photo.
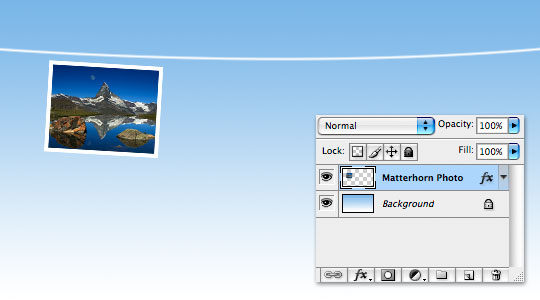
Your photo should now look like the one below (shown with my layers palette inset).
For the sake or realism we are going to assume that this photo is hanging by the corners and would thus be sagging a bit in the middle. From the main menu choose Edit>Transform>Warp and use the points around the image to bend it to your desired look.

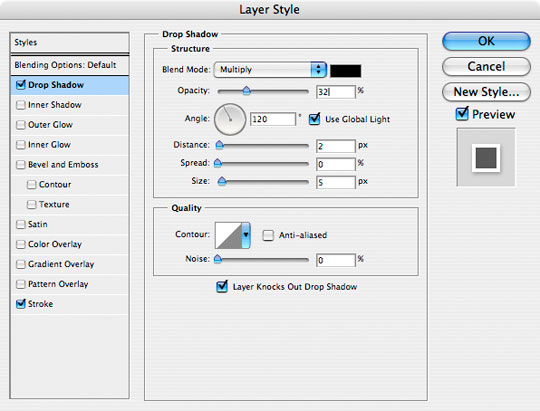
Now lets add a drop shadow by double clicking on the layers icon to pull up the Layer Styles dialog again and apply the following drop shadow.

Now would be a good time to download the lesson files at the bottom of the tutorial if you’re following along at home because you’re going to need the ClothesPin.eps file that is included in the download.
Choose File>Place from the main menu and browse to the ClothesPin.eps file from the lesson download. This will bring the .eps file into Photoshop as a smart object which can be resized to your liking. Obviously the clothes pin will need to be small enough to look right in our design, so size it down, rotate it and position it to your liking on the clothes line.
Press Command-J (PC: Ctrl-J) to duplicate your Clothes Pin layer then move and transform the second pin as desired. (*note: You may have to re-position your image as well to get it in the right spot for the clothes pins to realistically hold it on the line.

Ok, things are looking good so lets go ahead and repeat steps 4-8 to place a few more photos over the top of my original photo layer.

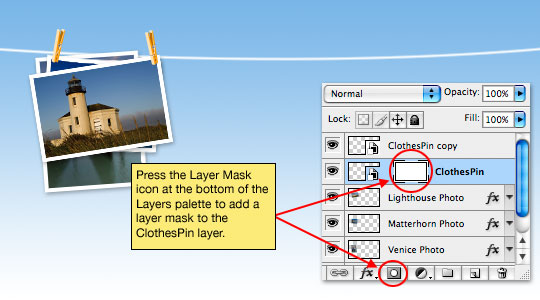
Now lets click on one of our clothes pin layers and add a Layer Mask by pressing the layer mask icon at the bottom of the Layers palette. When you add a Layer Mask it will automatically be selected in the Layers Palette on the layer it was applied to. (*note: notice the brackets around the Layer Mask indicating that it is active and selected)
Press the D key to reset the foreground and background colors then press the B key to switch to the Brush tool. The 3 pixel hard edged brush that we used earlier should still be selected.
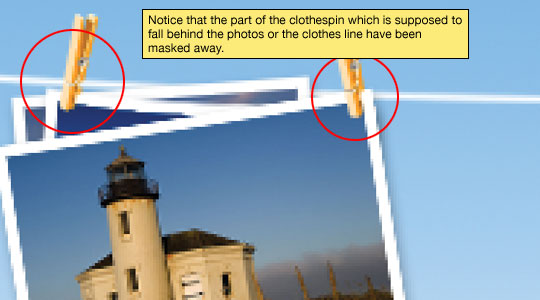
Zoom in on the active clothes pin and using the brush tool paint over the areas of the clothespin that should be hidden behind the photo or the clothesline. Everything painted in black on a layer mask will be masked out and effectively invisible. If you paint anything out by accident simply press the X key to switch to a white brush and paint it back in.
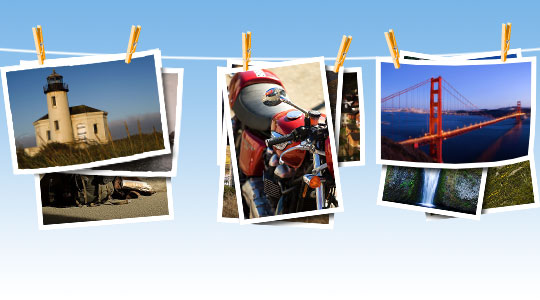
Repeat the process with as many photos and clothespins as you want. In my final example I took the idea of realism a bit further separating the drop shadows from the layers and applying them only to the areas of the underlying photos which would have received the shadow. Play around and have fun. My complete final file is included in the project download at the bottom of the tutorial.
Donwload psd : http://pshero.com/assets/tutorials/0022/pshero_0022.zip
No comments:
Post a Comment